Monthly Archives: November 2011

Fudge, Fudge, Call the Judge!

Am I showing my age, by the title?  How many of you remember, as a child, jumping the rope to that chant?  How many remember even jump roping as a child?   Oh, the good ol’ days.

Today this recipe comes from my special friend, Susan.  She is my exercise partner, my lunch friend, my sounding board, and my personal gardening expert! What more could a girl want?

This recipe is very rich and creamy, and I have made it many times and not once has it ever gone sugary!  It makes a big batch,( 2 pans full) which is perfect for gift giving! Are you ready to make some?

Susan’s Fudge

4 ½ cups sugar

12 oz. canned milk

Boil for 10 minutes, stirring constantly so it does not scorch!

3 bags of chocolate chips (I used milk chocolate, but you could use semi-sweet)

7 oz. jar marshmallow cream

½ lb butter

1 Tablespoon vanilla

Chopped nuts, if desired (I used about 1 ½ cups)

Add hot mixture and mix till dough consistency or 10 minutes in Bosch mixer.  Pour into 2 buttered 9 x13 pans.  Let cool.  This recipe freezes well.

You could add some candy canes and gumball to decorate.  Wrap in cellophane and tie with a big bow, or you could put them in Chinese take out cartons, etc.  I will have some fun ideas you can do with the take out cartons.

Are you ready to go make some yummy fudge?  This is so great, because you can get it all made up and put it in the freezer before your holidays get too much more hectic, and all you have to do is pull it out and let it thaw a bit and you are good to go! (Sometimes, I must I admit, I can’t wait that long!) This is a perfect gift for neighbors, Visiting Teaching, co-workers, friends and your family!

Framed Ornaments

My daughter and I did another craft together!  I think that is a record for us to do two projects in about 1 weeks time!

My daughter found the idea on Pinterest.  If you have never looked at Pinterest, you need to go there.  Just click here and you can follow me!

This is a cute, fun, easy craft that you can complete in couple of hours!

It is framed Christmas ornaments!

First of all, you need to start with a frame.  This is one that I picked up at the DI and I took the picture and glass out and spray painted it lime green. (This frame was a little bit bigger than I would have liked, but it was the only one they had that would work!  The thicker the frame, the better!)

I used this Rust-oleum ultra cover, 2x paint.  I love this stuff!  It really covers well and I only have to do a couple of coats!  This color is Key Lime Green!

After painting the frame gather all your supplies together.  We hung each of the ornaments on a ribbon at varying lengths.  We then just used a staple gun and stapled the ribbons to the back of the frame.This is the bow that my daughter was experimenting with, but then changed the silver flower to a big candy cane striped ribbon.  I told her that I needed a picture of the frame and this is what I got!  Just a goof off!  (do you love the plastic bags hanging on the stair railing?  This is the catch-all area of my house!)

We added a big bow, tulle, curly cues, and beads to the front of the frame.I think that it looks quite festive and I am starting to get the Christmas Spirit!  I have most of my decorating done, and it is a good thing, because this week a lot of the parties will start at our house!What are some of your favorite Christmas decorations?  Have you had them for a long time and are they priceless, or are you getting/making a lot of new, updated things?  I have a couple more projects that I am working on and hopefully I will be able to get them done this week, before the parties!  I will share when they get finished.

The White Envelope

We have a tradition in our home that we started three years ago..My friend Leslie shared this idea with me and I immediately fell in love with it.  My children are all grown and married, and every year we would go through this little ritual– They would say, “Mom, what do you and dad want for Christmas?”  and I would reply “that we really did not need anything,” and I could never come up with any ideas for them.

We usually all get together for Sunday dinner, and three years ago at one of these family nights, I read the following story to my family.  It reminds me so much of my own husband and the kids had to agree, and thus was born the tradition of the White Envelope.  It is truly the highlight of Christmas for my husband and I.  We wake up on Christmas morning and we read the letters from each of our children and their family and I must admit, that it usually brings tears to our eyes!  What a beautiful way to start out Christmas Day!

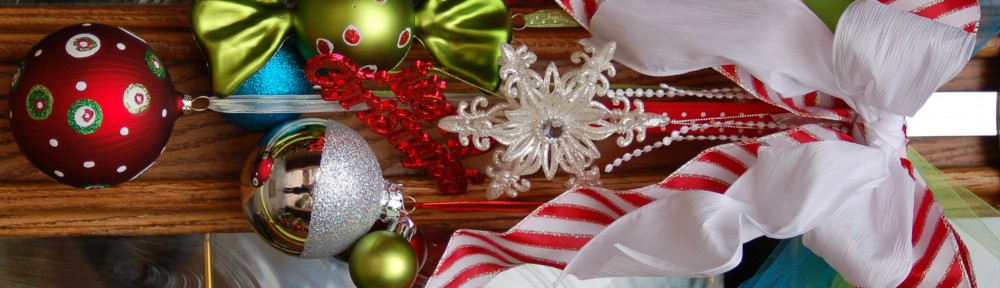
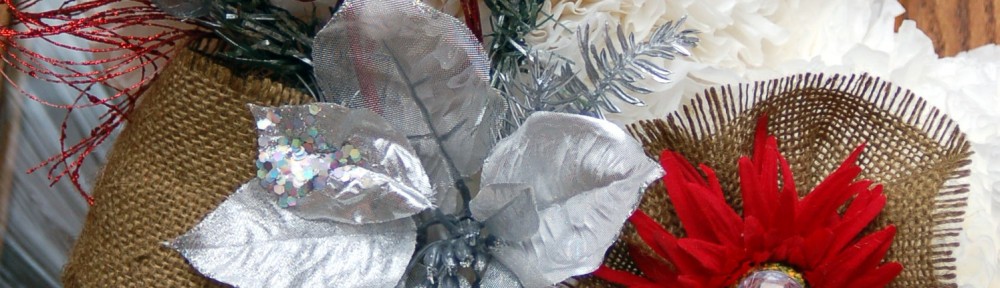
This is our “White Envelope”, I made it out of fabric and it goes on the Christmas tree.  You could use any white envelope, but I decorated it up and we use it year after year.  All of the grand kids know exactly what it is and they get caught up in the spirit also!

Here is the story that I read to my family:

“For the Man Who Hated Christmas”

by Nancy W. Gavin

 It’s just a small, white envelope stuck among the branches of our Christmas tree.  No name, no identification, no inscription.  It has peeked through the branches of our tree for the past ten years or so.

It all began because my husband Mike hated Christmas–oh, not the true meaning of Christmas, but the commercial aspects of it—overspending…the frantic running around at the last minute to get a tie for Uncle Harry and the dusting powder for Grandma—the gifts given in desperation because you couldn’t think of anything else.

Knowing he felt this way, I decided one year to bypass the usual shirts, sweaters, ties and so forth.  I reached for something special just for Mike.  The inspiration came in an unusual way.

Our son Kevin, who was 12 that year, was wrestling at the junior level at the school he attended; and shortly before Christmas, there was a non-league match against a team sponsored by an inner-city church.  These youngsters, dressed in sneakers so ragged that shoestrings seemed to be the only thing holding them together, presented a sharp contrast to our boys in their spiffy blue and gold uniforms and sparkling new wrestling shoes.  As the match began, I was alarmed to see that the other team was wrestling without headgear, a kind of light helmet designed to protect a wrestler’s ears.

It was a luxury the ragtag team obviously could not afford.  Well, we ended up walloping them.  We took every weight class.  And as each of their boys got up from the mat, he swaggered around in his tatters with false bravado, a kind of street pride that couldn’t acknowledge defeat.

Mike, seated beside me, shook his head sadly, “I wish just one of them could have won,” he said.  “They have a lot of potential, but losing like this could take the heart right out of them.”  Mike loved kids- all kids – and he knew them, having coached little league football, baseball and lacrosse.  That’s when the idea for his present came.  That afternoon, I went to a local sporting goods store and bought an assortment of wrestling headgear and shoes and sent them anonymously to the inner-city church.  On Christmas Eve, I placed the envelope on the tree, the note inside telling Mike what I had done and that this was his gift from me.  His smile was the brightest thing about Christmas that year and in the succeeding years.  For each Christmas, I followed the tradition—one year sending a group of mentally handicapped youngsters to a hockey game, another year a check to a pair of elderly brothers whose home had burned to the ground the week before Christmas, and on and on.

The envelope became the highlight of our Christmas.  It was always the last thing opened on Christmas morning and our children, ignoring their new toys, would stand with wide-eyed anticipation as their dad lifted the envelope from the tree to reveal its contents.

As the children grew, the toys gave way to more practical presents but the envelope never lost its allure.  The story doesn’t end there.

You see we lost Mike last year due to dreaded cancer.  When Christmas rolled around, I was still so wrapped in grief that I barely got the tree up.  But Christmas Eve found me placing an envelope on the tree, and in the morning, it was joined by three more.

Each of our children, unbeknownst to the others, had placed an envelope on the tree for their dad.  The tradition has grown and someday will expand even further with our grandchildren standing to take down the envelope.

 Mike’s spirit, like the Christmas spirit will always be with us.

.

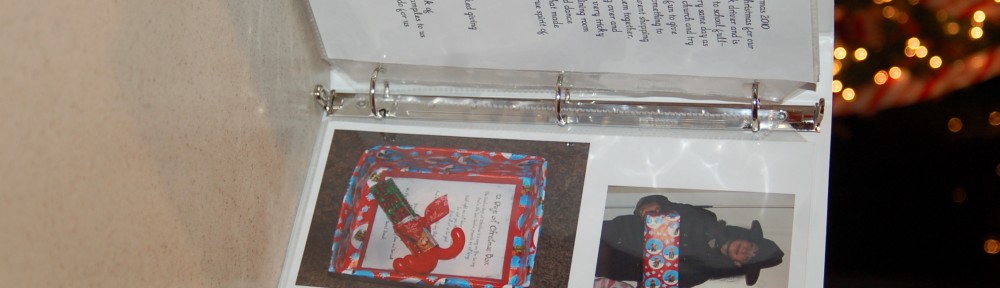
I decided to make a binder to put all the letters in.  It is so fun to re-read the letters every year and remember all of the kind acts of service performed by those we love!

Sometimes the letters include pictures of what the family did.  This particular page looks like a Halloween post, but it is the kids dressing up in disguises so they will not get caught in delivering some gifts. How fun is that and I love that the kids are learning to serve others!

Do any of you have fun traditions that you do at Christmas time?  It is such a wonderful time of the year and I love the Spirit of Christmas and wish that I could just “can” it and keep it with me all year long!

Salted Caramel Butter Bars

How many of you did the Black Friday thing?  I do not do that anymore, but my daughter did and I have to tell you what happened to her!  She decided to meet up with one of her friends and they decided to meet at Wally World at 10:00 pm.  My daughter left her home at a little after 9:00 pm to drive about 15 mins away.  (She wanted to get there a little bit early.)  She pulled onto the freeway and looked up ahead and the traffic was stopped!  There was a 4 car pile-up wreck, and the freeway was totally blocked!  It took her almost an hour and a half to go 15-20 miles!  Needless to say she did not get very much of what she had set out to get, because she was 1/2 hour late.  (Oh how I do not miss those days!)  They then went to Kohl’s for the midnight opening and the line was clear down around the store, but at least she got the things that she wanted in there!  She got home at about 1 am and went to bed for a couple of hours and then got up and ordered some more things online!  Oh my! What we as mothers don’t do for our little beloved children!  Boy am I glad that all of my little beloveds are grown and I can just go to bed at night!
So here is a recipe for all of you that did the Black Friday thing and need to reward yourself just a little bit.  One word of warning, these are very, very rich but very, very yummy!
My daughter made these and brought them for Thanksgiving.

Salted Caramel Butter Bars

For the Crust:
1 lb. salted butter room temp
1 cup sugar
1½ cups powdered sugar
2 Tbs vanilla
4 cups all purpose flour
For the Filling:
1 bag 14 oz. caramel candies (about 50 individual caramels), unwrapped or 14 oz Peters   caramel
1/3 cup milk or cream
½ teaspoon vanilla
1 T. coarse sea salt (optional)
To make the crust:
In a large bowl, combine the butter and sugars. Using mixer on medium speed, beat together until creamy. Add the vanilla and beat until combined. Sift the flour into the butter mixture and beat on low speed until a smooth soft dough forms.
Spray a 9×13 inch baking pan lightly with non-stick cooking spray. Press one-third of the dough evenly into the pan to form a bottom crust.
Preheat to 325F.
Bake until firm and the edges are a pale golden brown approx 20 minutes. Transfer pan to a wire rack and let cool about 15 minutes.
While the bottom crust is baking and the remaining dough is chilling, make the caramel filling. Place the unwrapped caramels in a microwave-safe bowl. Add the cream. Microwave on high for 1 minute. Remove from the microwave and stir until smooth. If caramels are not completely melted, microwave on high for 30-second intervals, stirring after each interval, until smooth.
Pour the caramel filling over the crust.  If you are going to salt the caramel sprinkle it on caramel layer now.
Remove the remaining chilled dough from the refrigerator and crumble it evenly over the caramel.
Return the pan to the oven and bake until the filling is bubbly and the crumbled shortbread topping is firm and lightly golden, about 25 – 30 minutes.
Let cool before cutting into squares
When I make these I  just use 14 oz of the  Peters caramel, then you do not have to unwrap all the individual caramels. I am lazy that way!)
Have a great weekend!

Coffee Filter Wreath

I have a fun project, if you need one for this weekend!  It is fairly inexpensive, depending on what flowers and ribbon you use and you don’t have to think very hard to make it, so put on a good movie or in our household a good ballgame!  We watched the Utah football game…go Utes!  My daughter and I got together this weekend to make these.  It was so  much fun and we have not really done very many craft nights since she started working, so we were way overdue for another one!

You start with an 18″ straw wreath, and LOTS of coffee filters.  I used about 400 coffee filters.  Mine is probably a little too full, you could space your filters out a little bit more and only use about 350 coffee filters.  My daughter got really carried away and used over 600 filters on hers, but once she started putting them so close together, she had to finish it that way. It still looked great, but you really don’t need that many.  The cost of the straw wreath was $5 at Hobby Lobby and all florals were half off  that day, so we scored with the wreath only costing $2.50!  The coffee filters were $1.25 per package of 200 ( I used two packages),so another $2.50 and my wreath only cost $5.00 plus whatever flowers and embellishments that you use!

Start around the outside first, and go all the way around.  We just started putting them on and soon learned that it was better to go all the way around the outside first.Take a coffee filter and center it around a marker like this.  This keeps you from burning your fingers with the hot glue.  (I however, was struggling even with the marker and managed to burn myself 3 times!  It takes talent…I know!)Then add a dab of hot glue to the end.  (You gotta love the glue gun..it is well loved!)Then hold it onto the wreath for a few seconds to make sure it is secure.  We left the plastic wrap on the straw wreath and it worked just fine and we did not have the mess of the straw all over!Go all the way around the outside.  Make sure that you do not go too far down on the side, so that the wreath will lay flat against  your door or wall.  After you do the outside, then go around the inside center and then just start filling in all of the middle.  Like a already said, we probably put our filters a little closer together than we should of.  If you space them out a little more I think that it would be a little more rufflely!  (Is that a word?)This is what it looks like from the back!  I hot glued and stapled a ribbon to the top to hang it with.  I have seen this wreath with just the coffee filters and no embellishments and it is beautiful that way too!I added some silver sprigs, a silver poinsettia, a red flower backed with a burlap ruffle, some red sparkly curls, a sprig with red and white balls, and a burlap bow and white beads.

Here is a close up of the embellishments.

 I am thinking that these would be cute for Valentines day and spray paint the wreath red after you get the filters on!  Or how about green for St. Paddy’s Day?  They really are fun to put together because you can just sit and make them without to much thought and some days no thinking is a good thing!

I linked this to  I heart nap time, and My Crazy Beautiful Life

It’s Beginning to Look A Lot Like Christmas!

Every year we have a little tradition that my boys hate, but that I love!  It is the hauling of all the Christmas decorations from the basement to the main floor! I have so many totes of decorations that it is crazy, but I love to decorate and at Christmas time, I do several rooms in my house!

All of these boxes go in my kitchen!  Plus I have two little trees that are already decorated, that I put in the adjacent dining room.

Just keeping it real here folks!

This is my main entry, where I have a Santa Claus collection and my Nativity collections.This is the living room.  My youngest son put up the tree for me, since I cannot even lift it!  His cute little new wife said to me “How does all of this even fit into your house, and how long does it take to put it all up?”  I just smiled.  My son replied that I would have it all done by Thanksgiving when they are all coming for dinner, and he is right it takes me 3-4 days to get it all put out.  I also have a tree in my bedroom and decorations out on the front porch.  So yes, I am a little bit obsessed!  OK, maybe I am a lot obsessed!(The kids wanted to put some ornaments on the tree, but we just put the one big Santa ornament on, because I have to straighten all the branches out and get all the lights plugged in right first!)

It was kind of fun this year because most of the grandkids wanted to help haul the boxes up and it made it a lot faster.  Even my boys were excited, because they know that it is not too many more years and their children can just take over with this fun little tradition!  And I would absolutely love it.

These pictures are the before and I will do a little house tour after Thanksgiving with the after.  How’s that?

Thanksgiving Rolls

I am so “Thankful” that I found this new recipe.  If any of you out there have been assigned to bring rolls to your Thanksgiving dinner, or any other dinner for that matter, and you know that it is going to be a hectic day, you just might want to take a look at this recipe!  It is a make ahead dough that you freeze and then just take them out the day you want to use them and let them thaw and rise for a few hours and then bake them!  They are so light and fluffy and you can have the great homemade taste on the day you want them without having the preparation that day!

Please pass the honey!

The recipe is found here, at Jamie Cooks It Up! It is called Butterflake Frozen Roll Dough.  She has a great tutorial and you can print the recipe there.

I may have just found a new favorite roll recipe!  I love the fact that they taste so good and you can make them ahead of time!

Grandma’s Icebox Pie

I have a recipe for you today that was a secret in my husband’s family for many years! My husband’s grandma would make this pie every year for Thanksgiving.  I mentioned that I would like the recipe, and everyone just laughed and told me that I would never get it from Grandma.  They said that Grandma  always made the pie and so I didn’t need the recipe.  A few years later I was talking to Grandma and just decided to asked her for the recipe, and well, guess what?  All you have to do is ask!  I have very fond memories of Grandma every time I make this pie.  Grandma had the loving nickname of Grandma AlkaSeltzer!  Not because her cooking was bad, quite the opposite!  She was such a fantastic cook and she cooked everything, and I mean everything!  You had to try it all and by the time you did you were so stuffed that you were almost sick.  But what a way to go!:)  I am so glad for the fond memories that I have of Grandma and Grandpa.

This pie is so rich that you can only eat just a sliver of it.  At least at a time!

Okay, shall we make an Icebox Pie?

First you will need to crush 1/2 box of vanilla wafers.  Just put them in a zip lock bag and let all the air out and seal it.  Use a rolling pin, a glass or a jar to crush the cookies into crumbs.  Melt 1/4 c. butter and add it into the zip lock bag and mix it well to make a cookie crust.

Put the crumbs into the bottom of a pie dish and using your fingers pat it down in the bottom and up the sides a bit.Next mix 1/2 cup butter and 2 eggs and 1 lb powdered sugar until smooth and creamy.  I know that some of you will not want to try this recipe because it has raw eggs in it!  But all I can say, is to use good quality, fresh eggs.  I have been making this pie for years and no one has ever gotten sick.  I have tried to substitute other things for the eggs and have not liked the quality of them, so I have gone back to using the eggs.  If there is anyone out there that has a good substitute, please let me know!Put the filling into the pie crust, (for some reason I did not take a pic of that, so just pretend ok?)  Next take a can of crushed pineapple and drain it really well.  Take the back of a spoon and press all the juice out.  You want the pineapple to be as dry as possible.Layer the pineapple on top of the filling.  Cover with plastic wrap and refrigerate over night. (This is great, because you can make it the day before!)
Just before serving, slice fresh bananas on the top. (sorry about this picture the lighting was horrible)Then add a dollop of “REAL” whipped cream.  The fake stuff does not cut it here, you have to have the real thing!  When I make whipped cream, I use powdered sugar instead of granulated sugar.  A tip that Grandma AlkaSeltzer taught me!

A word of warning:  This pie is very addicting!  You start out with just a sliver, but before you know it, you need another sliver only just a little bit bigger, then you have to have another….well you get the idea!

 Here is the recipe:

Grandma’s Icebox Pie

1/2 box vanilla wafers-crushed

1/4 cup melted butter

Mix together and pat into the bottom of a pie dish and up the sides.

1 lb. powdered sugar

1/2 cup butter-softened

2 fresh eggs

Mix in mixer until smooth and creamy.  Carefully spoon onto the cookie crust.

1 can crushed pineapple-well drained

Spoon pineapple on top of filling.  Cover with plastic wrap and refrigerate overnight.  Before serving add sliced bananas to top and add a dollop of real whipped cream.

Refrigerate any leftovers.

Ruffled Purse

I think that I am like some of you in the fact that I love purses and I love ruffles.  So when I saw this pattern last spring to make this purse I just knew that I had to have it!  This has been one of those projects that I was excited to do, but finding the time was a bit difficult because life just got in the way.  I didn’t really need it for anything other than the fact that I just wanted it!  So it kind of got put on the back burner, but now that it is done I am thrilled that I finally finished this project and I love the way that it turned out!

It does not have really long straps, which I like, because I can just tuck it up under my arm.

It is a big, spacious bag, 15 1/5″ wide x 12″ tall.  It has two pockets in it, which I made into 3 pockets. and it is so roomy inside.  I love the black polka dot lining.  I guess I should have used pink polka dots :) :)This is the pattern: It came from Izzy &Ivy and it is called Petunia! The instructions and the  pattern were great and pretty easy to follow.  However, this is probably not a project for a beginning seamstress.

 Now that I have made one, I may just have to make another bag in the spring!

Or maybe not.