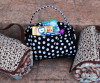
I received this for a Christmas present from a dear friend and I loved it so much that I decided that I had better make a couple of them to have on hand for gifts. (I might even save them for next Christmas!)
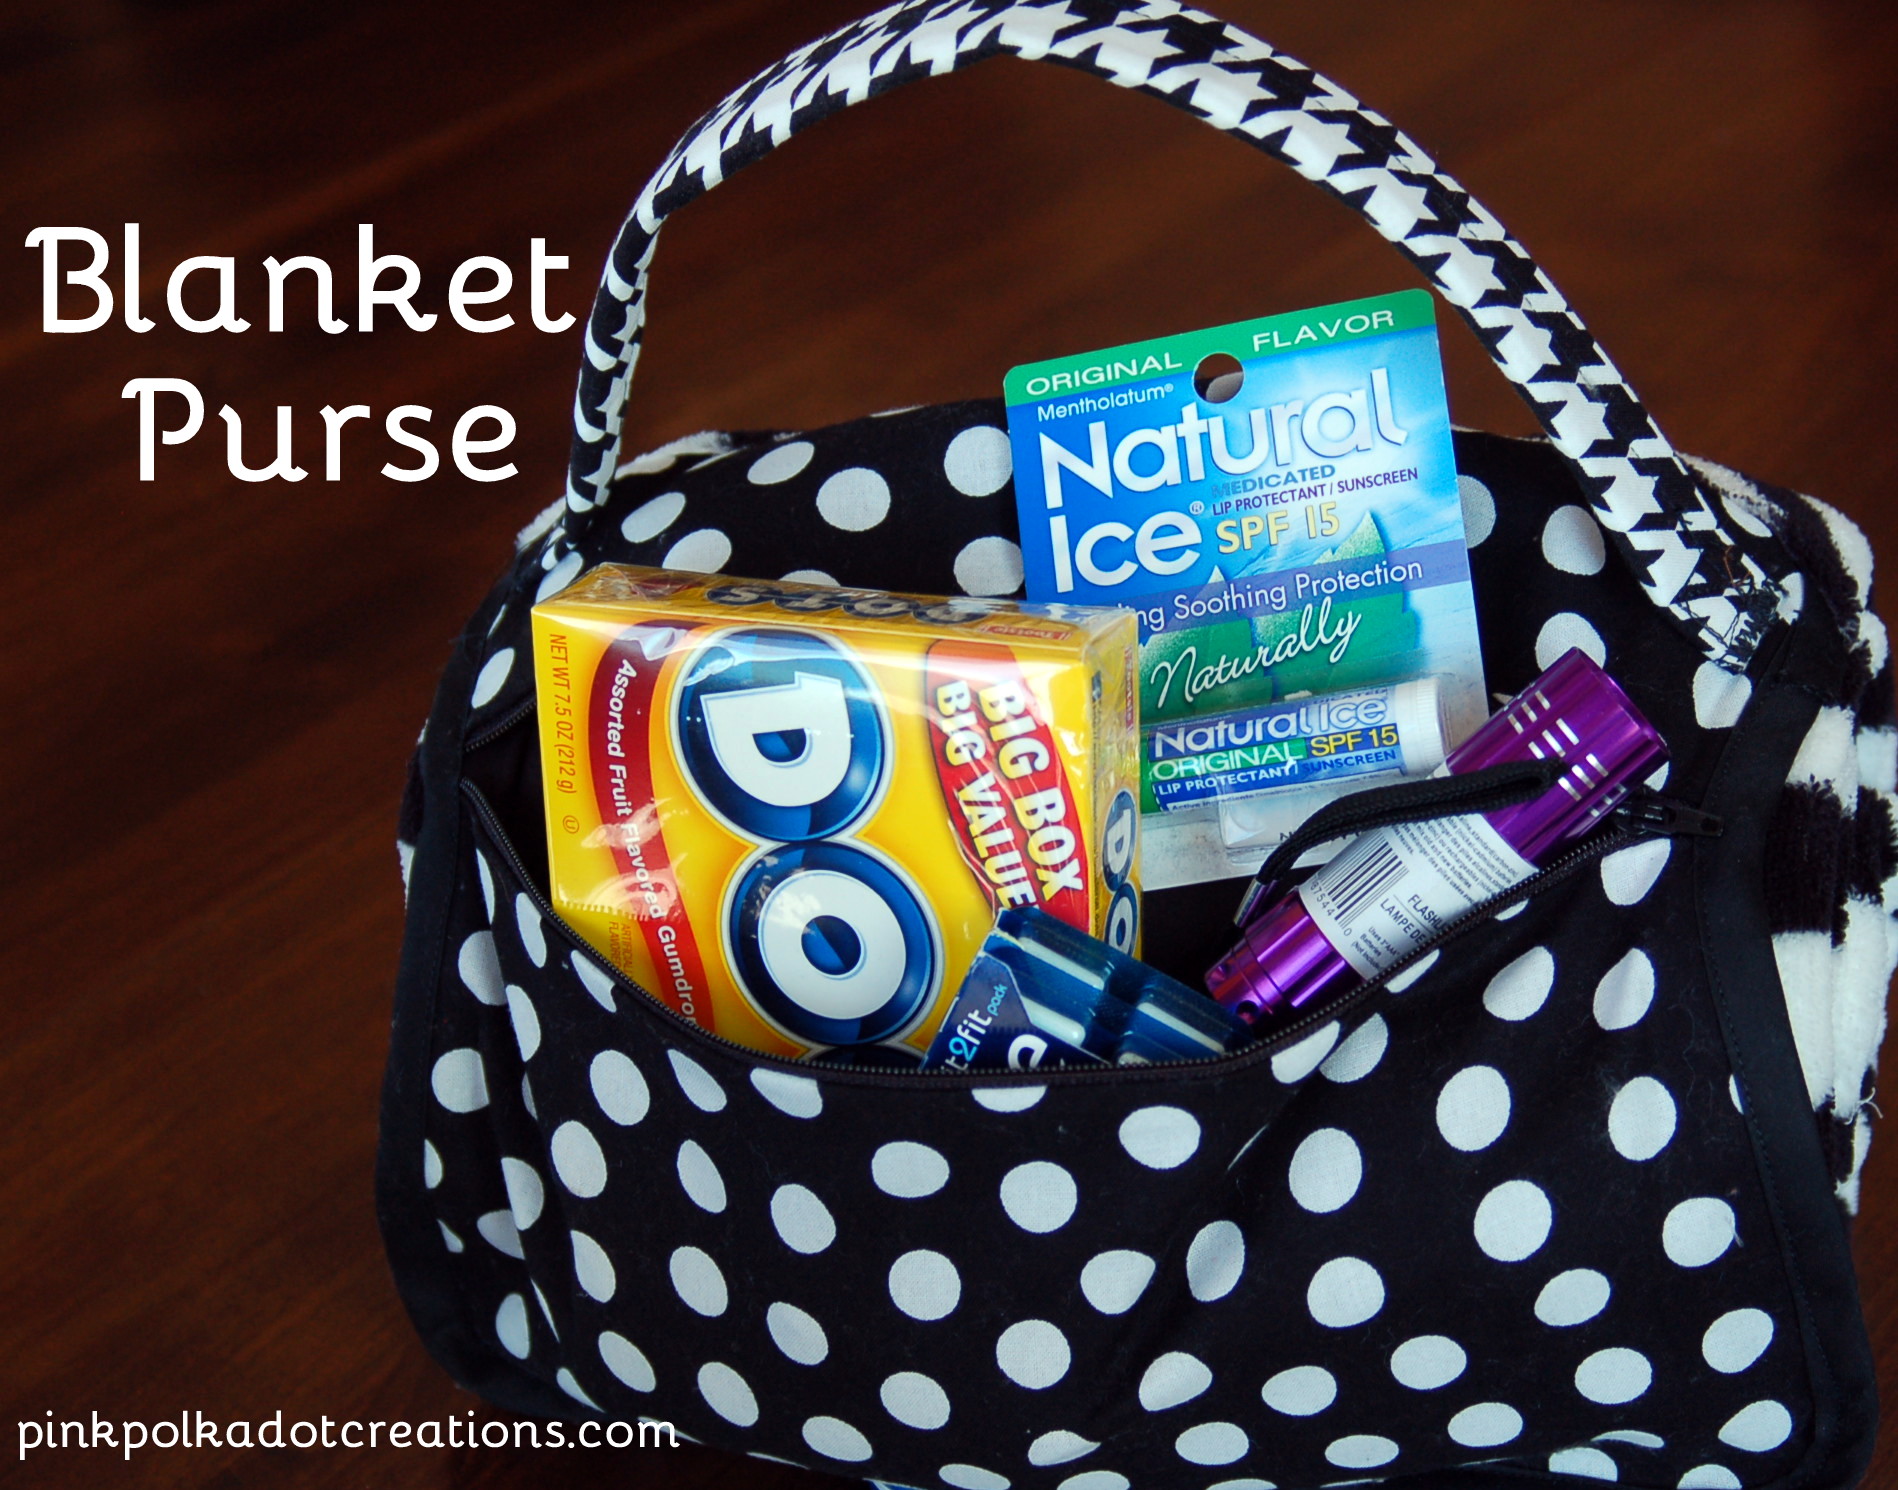
It is a blanket that is rolled up and has a pouch with a handle attached to it with velcro! How cute is this? My friend filled the pocket full of goodies and said just to keep it in the car! I can think of a dozen different places that I could use this!
So does anyone else want to try to make one of these? Here is the tutorial for it:
You will need three pieces of fabric, the outside piece the back and the lining.
For the outside print and the lining, cut one of each: 6.75 x 12 and 2.25 x 12 inches
For the back piece cut 9 x 12 inches
1 package of bias tape binding
1-12 inch zipper
10 inches velcro
14 inches belting for the handle, or you can make your own handle with leftover strips of fabric.
1- 50 x 60 inch microplush throw. (you can find these at places like, Wal-mart and Target, I happened to get mine at Gordman’s)
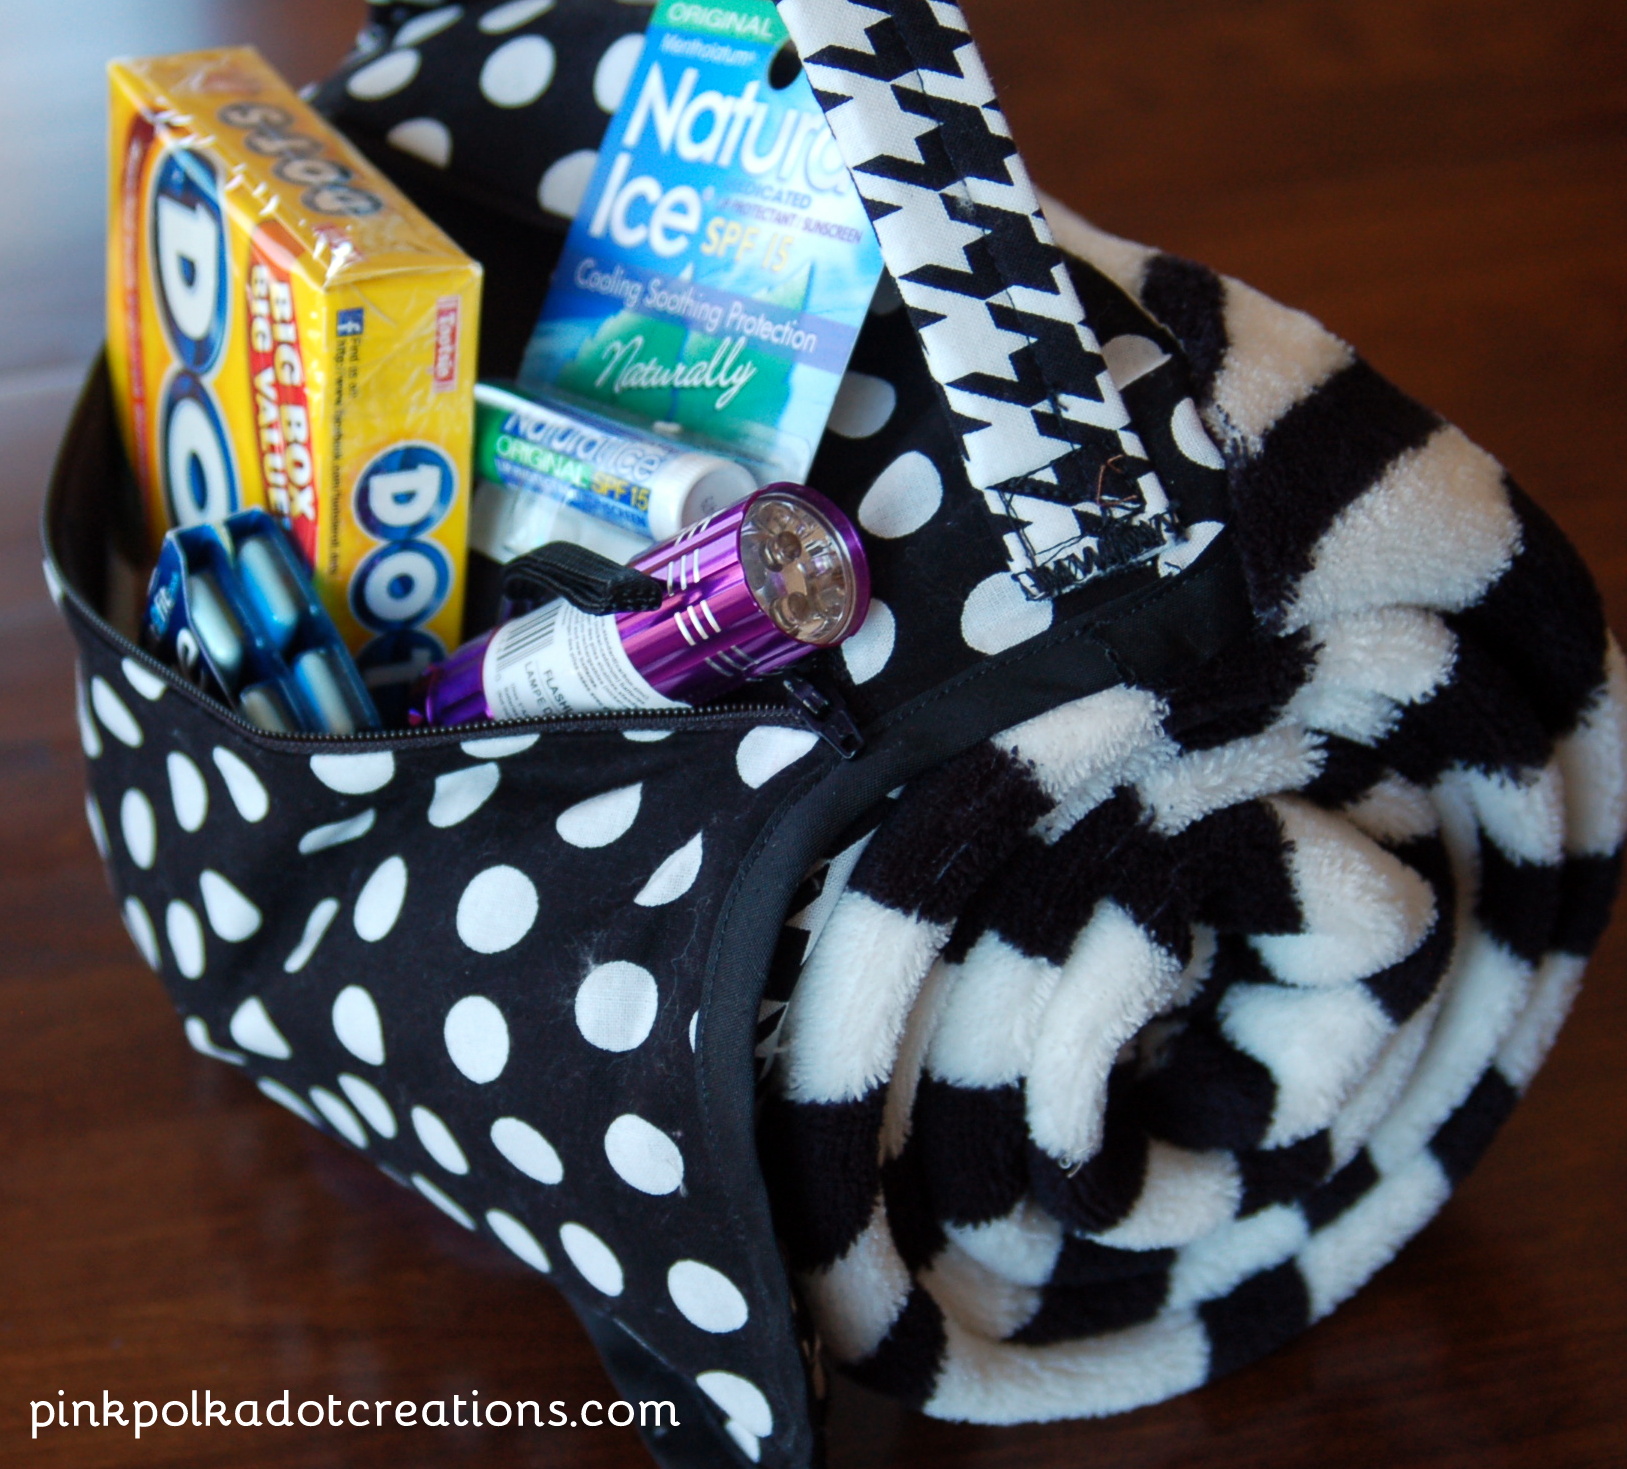
1. Place the 6.75 x 12 front and lining, right sides together and sandwich the zipper in between, with the front of the zipper facing the the right side of the front fabric. The zipper will extend beyond the fabrics.
2. Sew right along the zipper with your zipper foot.
3. Press both the front and the lining back, away from the zipper teeth.
4. Pin the 2.25 x 12 pieces, (front and lining) to the other side of the zipper with the zipper front facing the outside fabric. Sew along the zipper with your zipper foot and press both fabrics away from the teeth.
5. Unzip the zipper to the middle and trim off any excess zipper.
Next:
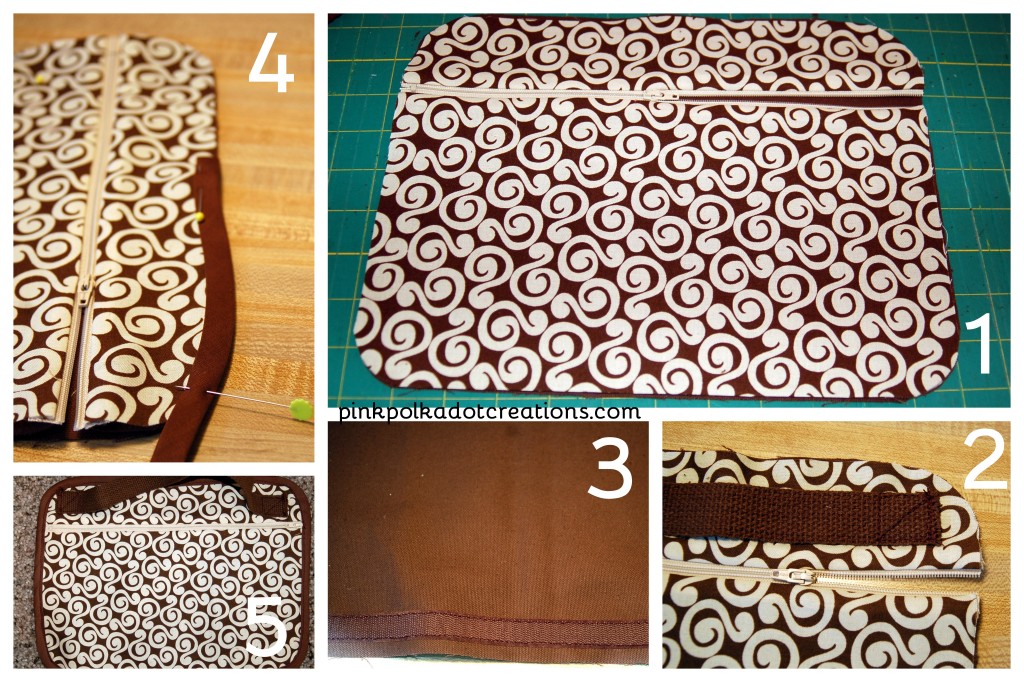
1. Place the lined front zipper piece and the back piece together, wrong sides together. Then round the corners, I just used a jar lid to do this.
2. Separate the two pieces and sew the handle to just the lined front piece. I just centered it between the edge and the zipper and sewed a square and a diagonal line for reinforcement. Do both ends.
3. Center the rough side of the velcro to the right side of the back piece along the bottom, leaving room for the seam. Sew all the way around the edges of the velcro.
4. Put the front and the back pieces together again, wrong sides together. Pin the bias tape over the edges and sew all the way around.
5. You now have a completely enclosed pocket with a handle on the top and a strip of velcro on the back bottom edge!
 To assemble the bag:
1. Pin your completed pocket to the top right hand corner of your blanket. Right sides together.
2. Fold the blanket into fourth the long way with the pocket at the top.
3. Roll up the blanket all the way to the top and pin the soft side of the velcro to the blanket.
4. You will need to line up the velcro on the back of the pocket with the velcro on the blanket. Unroll the blanket and stitch all the way around the velcro piece.
You are now done sewing! All you need to do is fold the blanket again and roll it up. Fasten with the velcro and put whatever fun things you think you might need in the pocket!
These are so fun and there are so many different ways that you could use them!
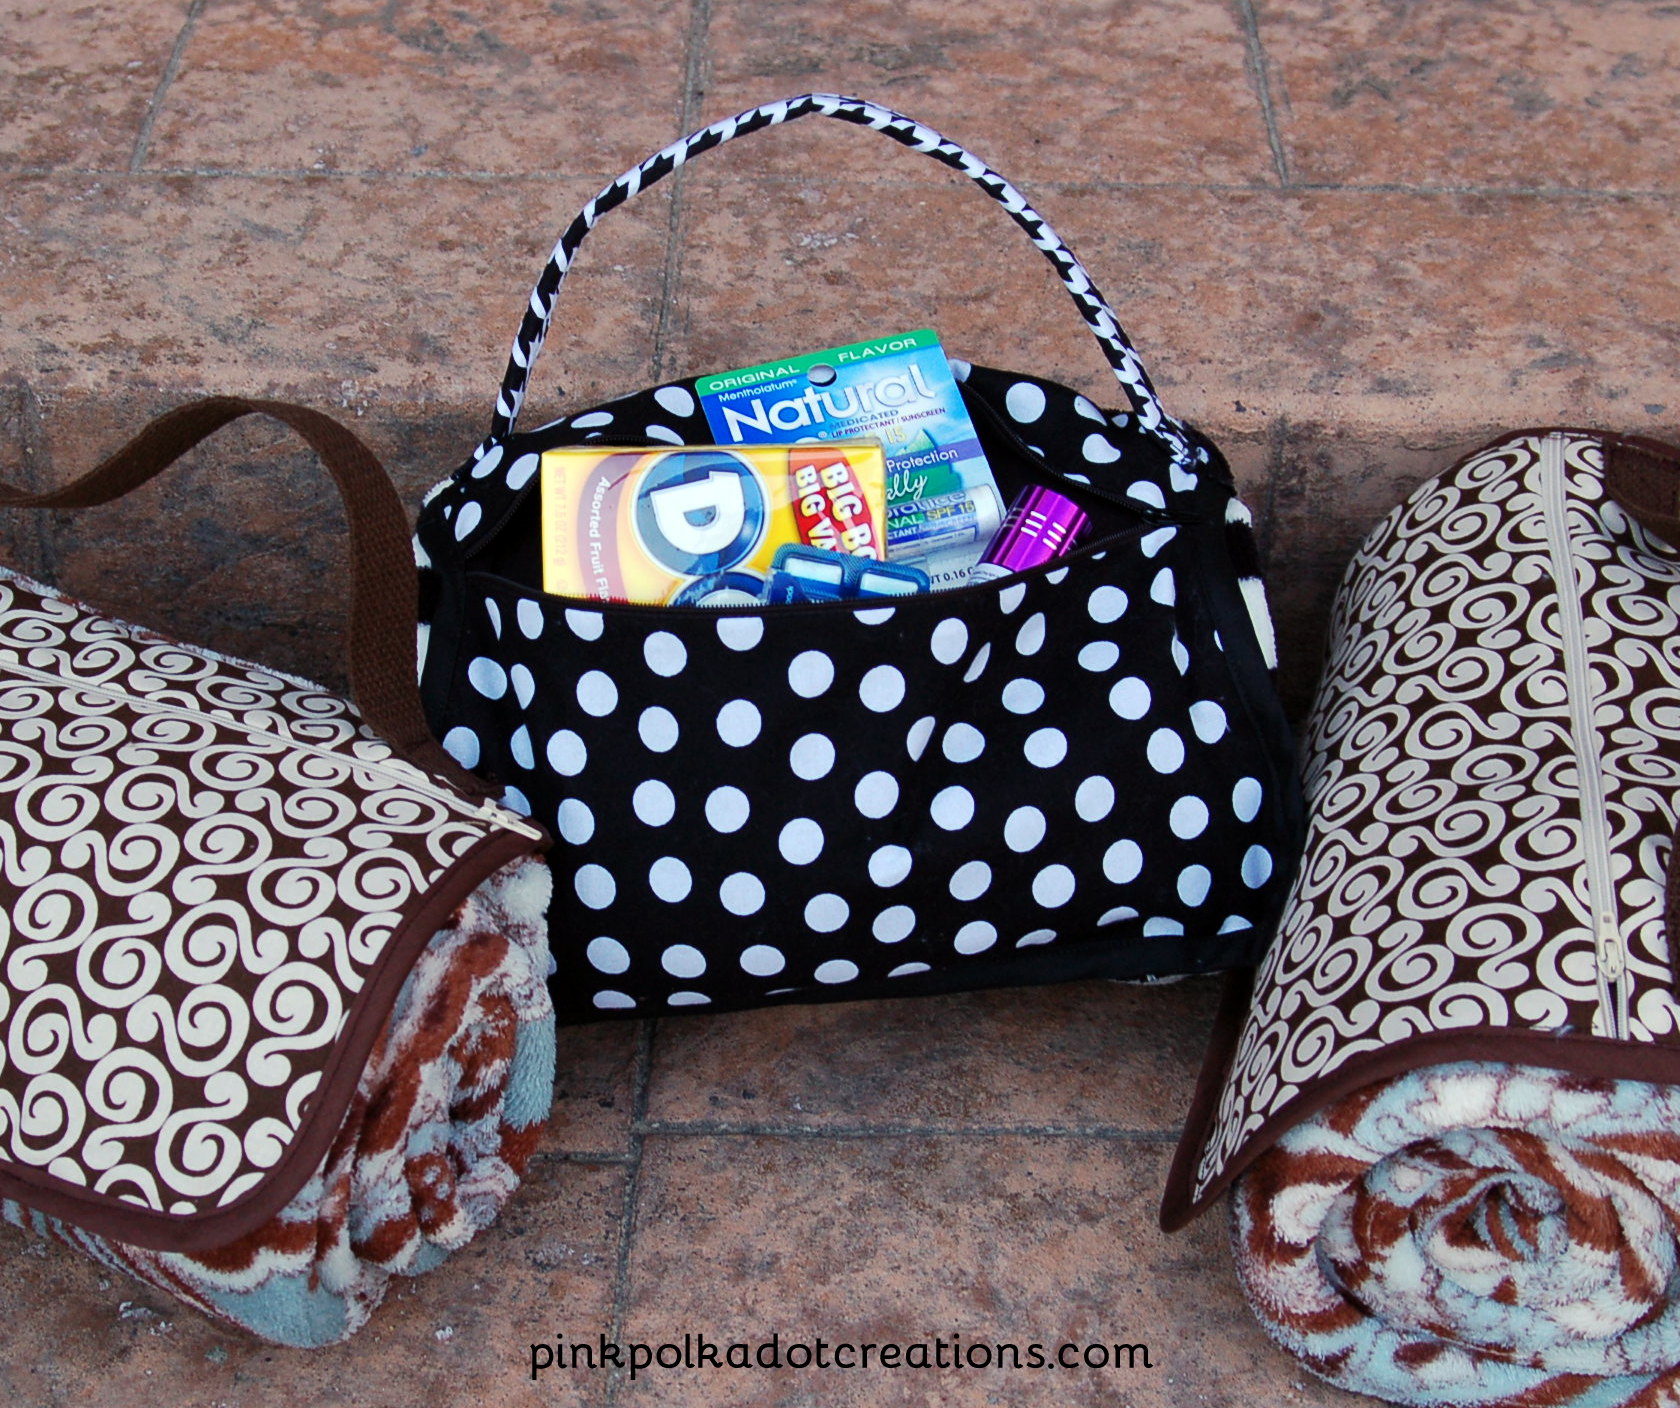
How would you use one of these fun blanket purses? Do you need a gift for anyone? If you have a favorite sports team and could find a blanket with your team logo on it, that would make a great game day blanket! :)
Hope you have a great day!
Thanks for visiting today, Love Ya!
Keep in touch…Like on Facebook and Pinterest


Thanks so much for sharing them with Wednesday’s Adorned From Above Link Party.
Have a great week.
Debi and Charly @ Adorned From Above
Genius, Rita!! LOVE it.