
I was contacted by Crafty Wood Cutouts asking if I would be willing to do a project from their store and then blog about it, Um…yeah!
I went down to the retail store and it has some darling displays and ideas! If you live in the Orem/Provo area, you really should check out this fun little store! If you don’t live nearby, check out their cute website!
I decided on a couple of different projects. The first one is this classic monogram wreath:

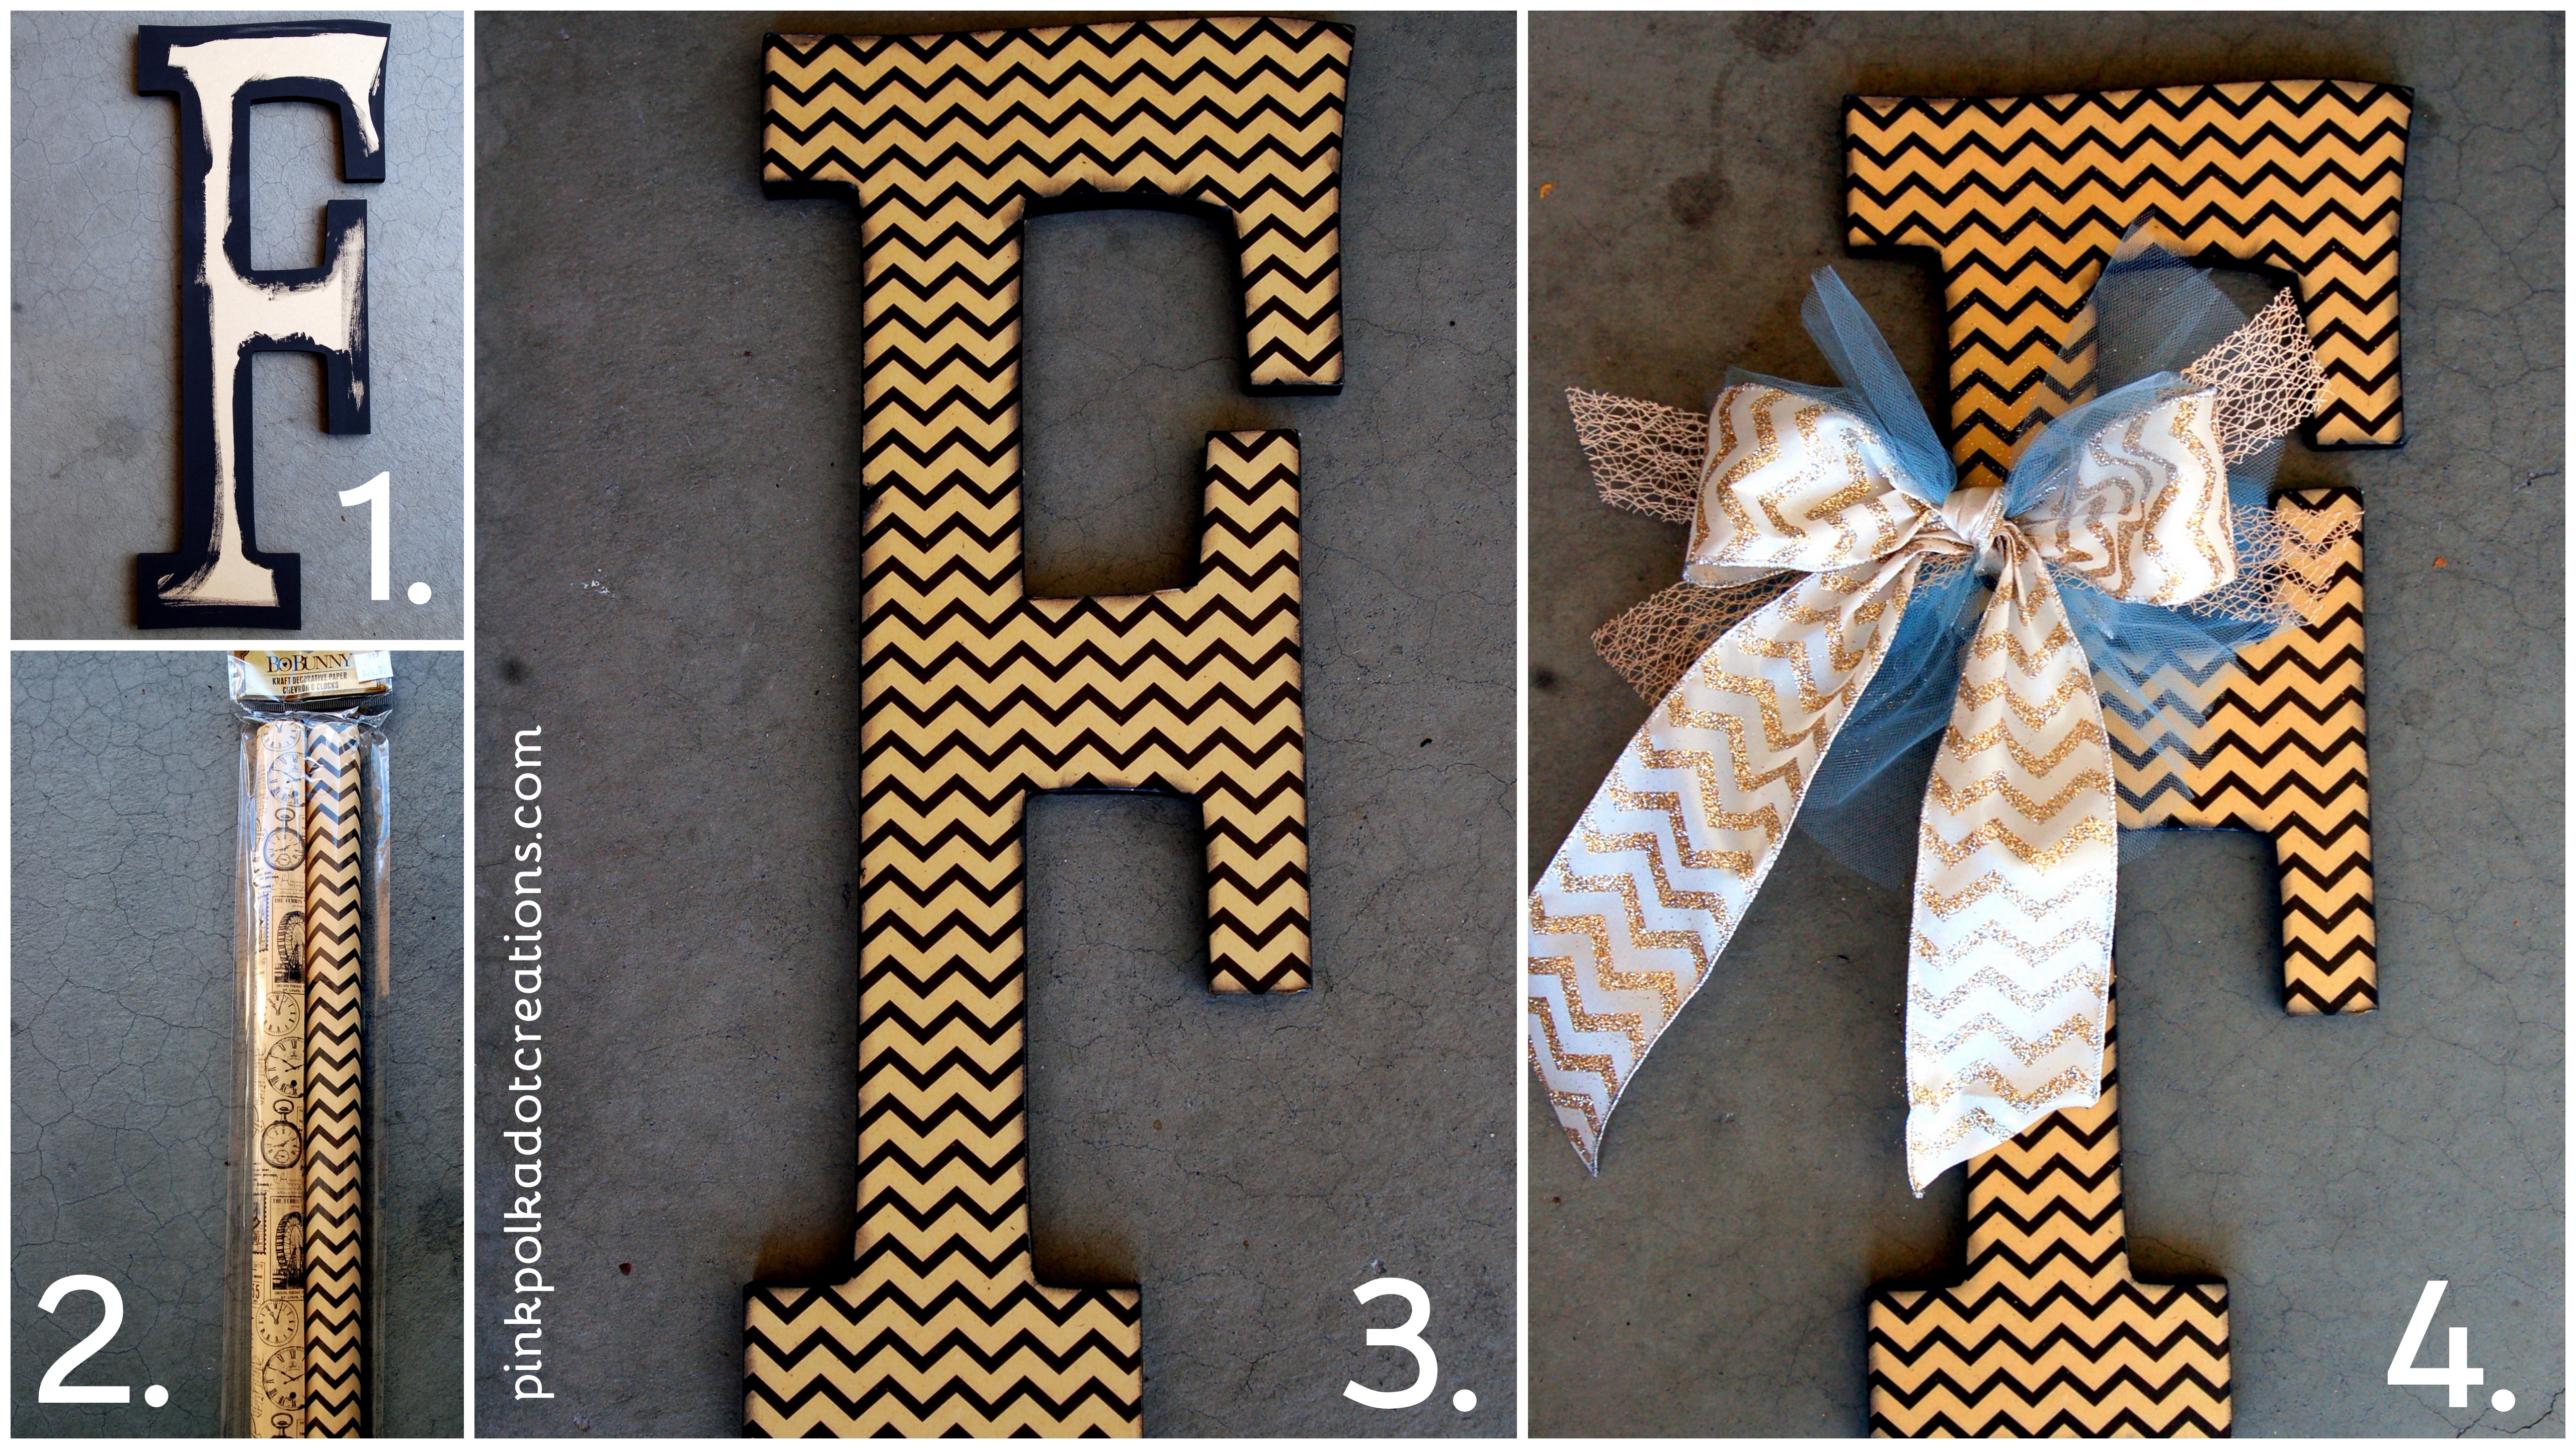
This wreath was so fun to make and the Crafty Wood Cutouts had the letter and this fun chevron paper!
To make this fun wreath:
1. Paint the edges of the wood the color that you want. ( I love these letters because they are big in size, but thin wood, so they are not heavy, perfect for hanging.)
2. Pick a cute paper to add to the front. These rolls of paper by Bo Bunny are perfect because they are big enough to cover the whole letter without having to piece it together!
3. Trace around the letter onto your paper and cut it out. Add Mod Podge to the front of the wood and then apply the paper. If you put the Mod Podge on the paper it will make it wrinkle. Smooth out the paper and let it dry. Add another coat or two of Mod Podge on the front of the whole letter to protect it, especially if you are going to hang this outside! Then ink around the edges with an ink pad.
4. Add some ribbons because as you know, ribbons just make everything cuter! :)
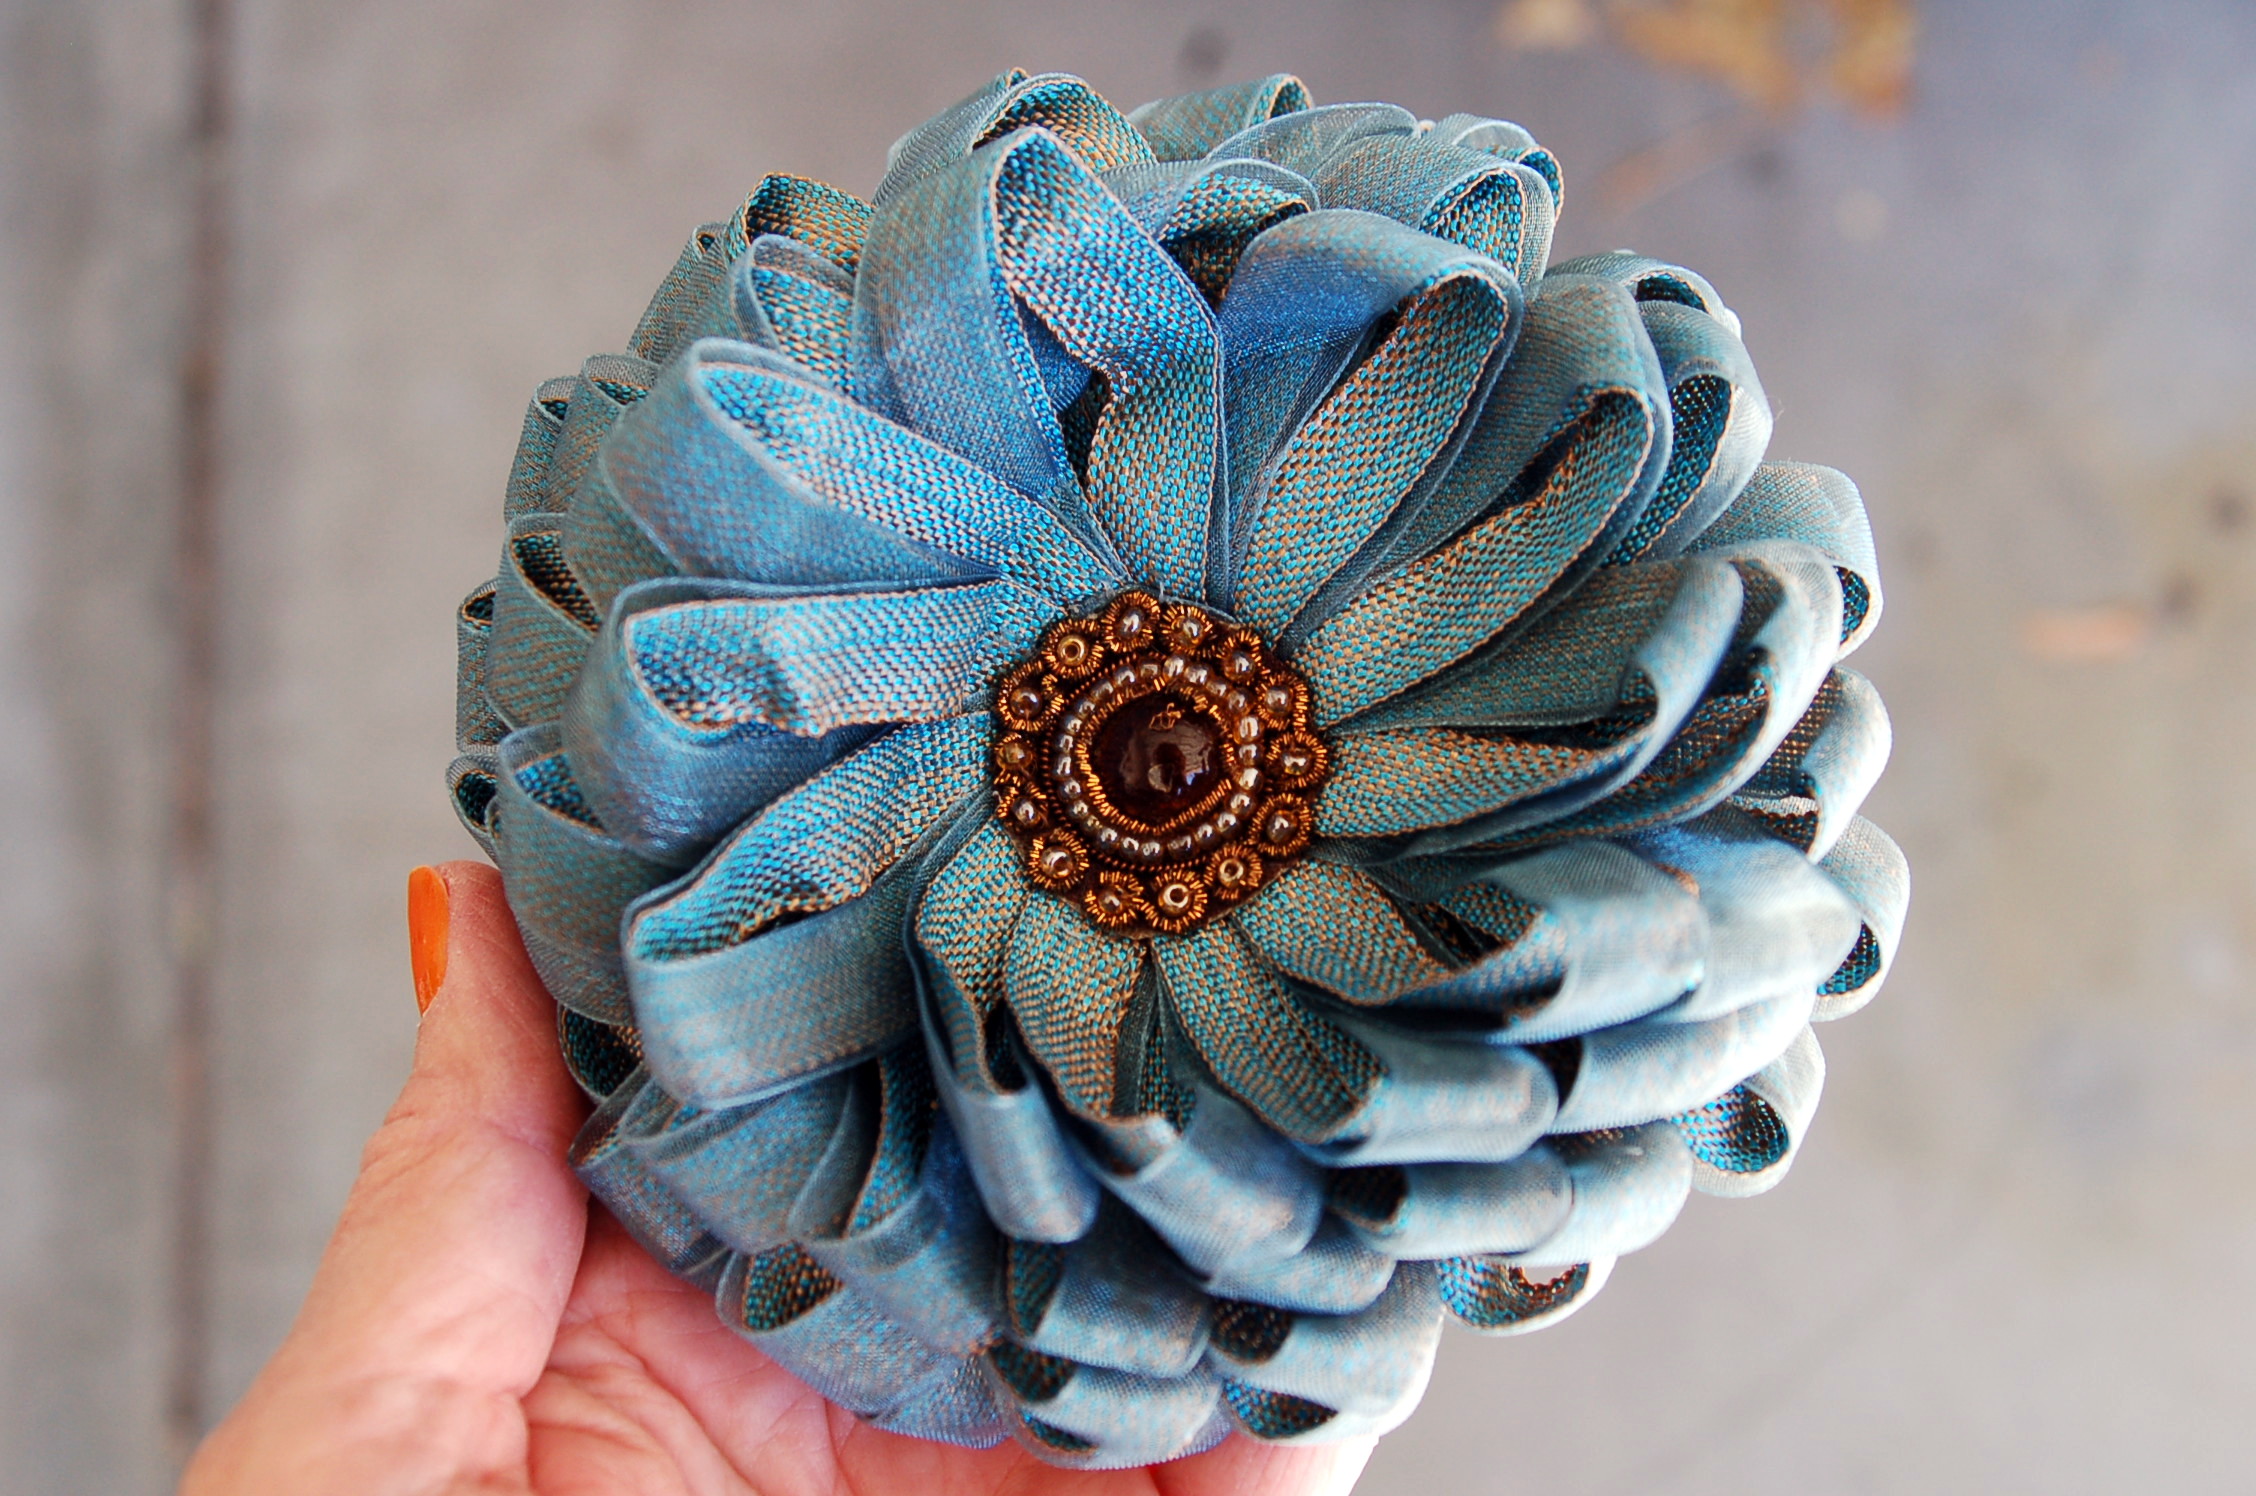
My daughter found this darling bow with the rhinestone center. It is actually a lamp shade accessory! It was just the color that we wanted so I added this on top of all of those ribbons!
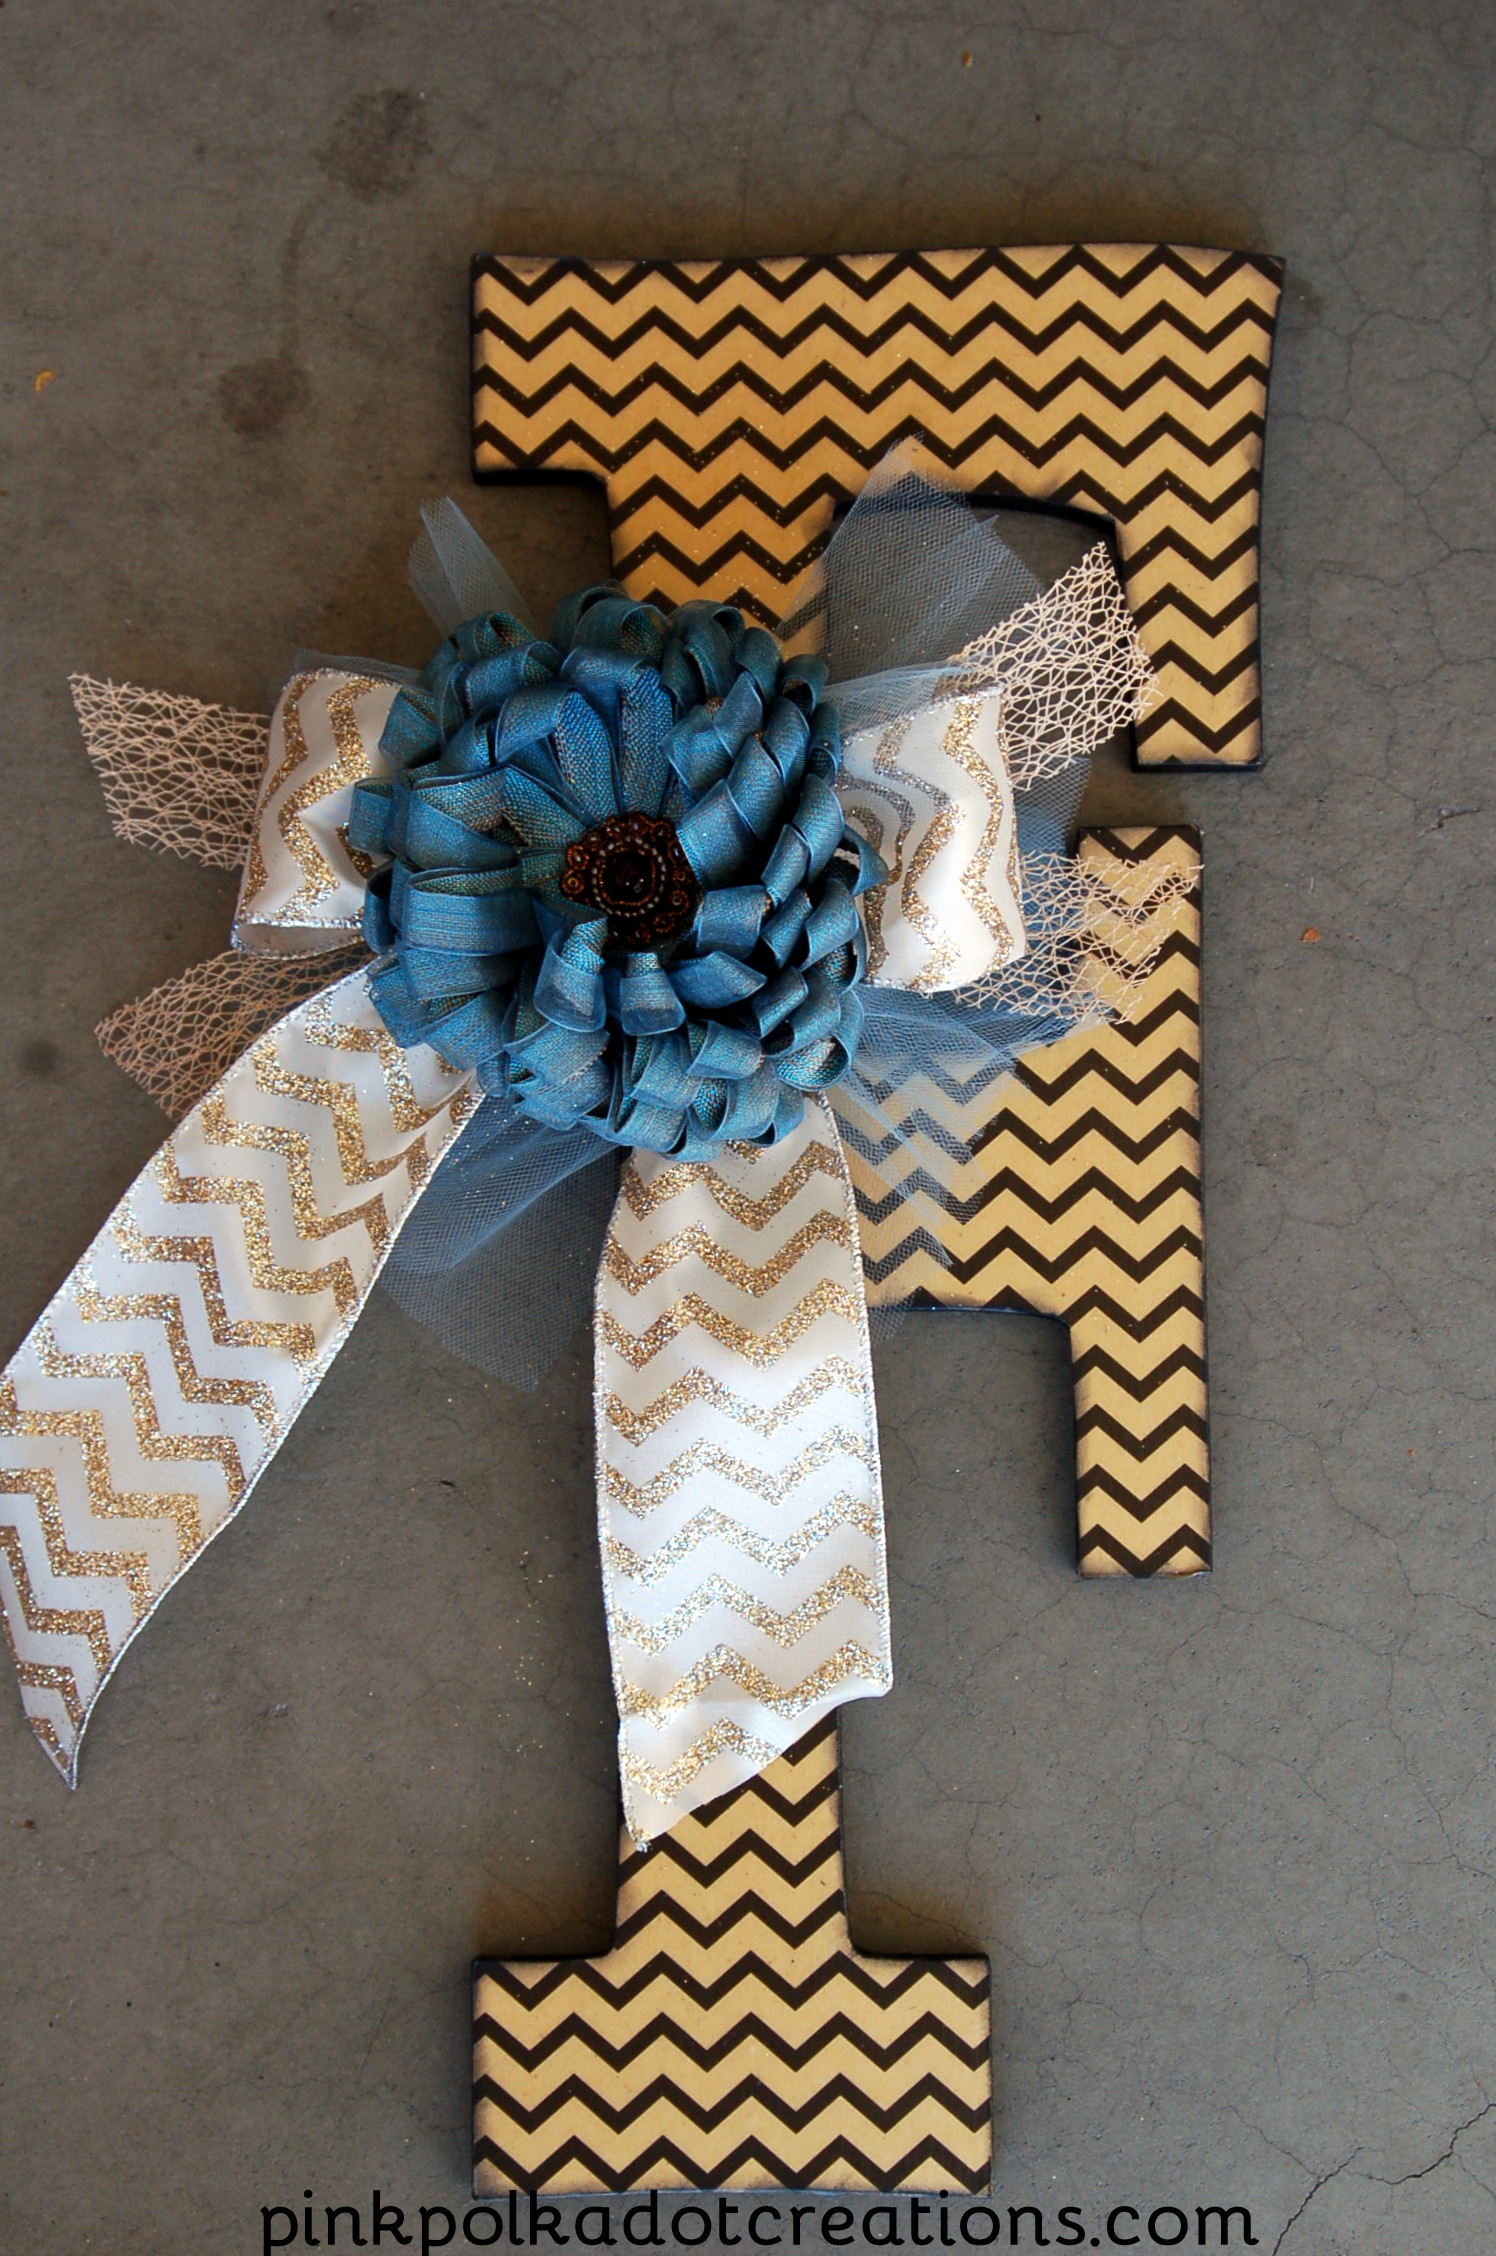
I think that this cute letter is now ready to be put into a wreath, Although it is pretty cute all on it’s own!
If you would like to make one of these monogram letters, here is a link to Crafty Wood Cutouts where you can buy them:
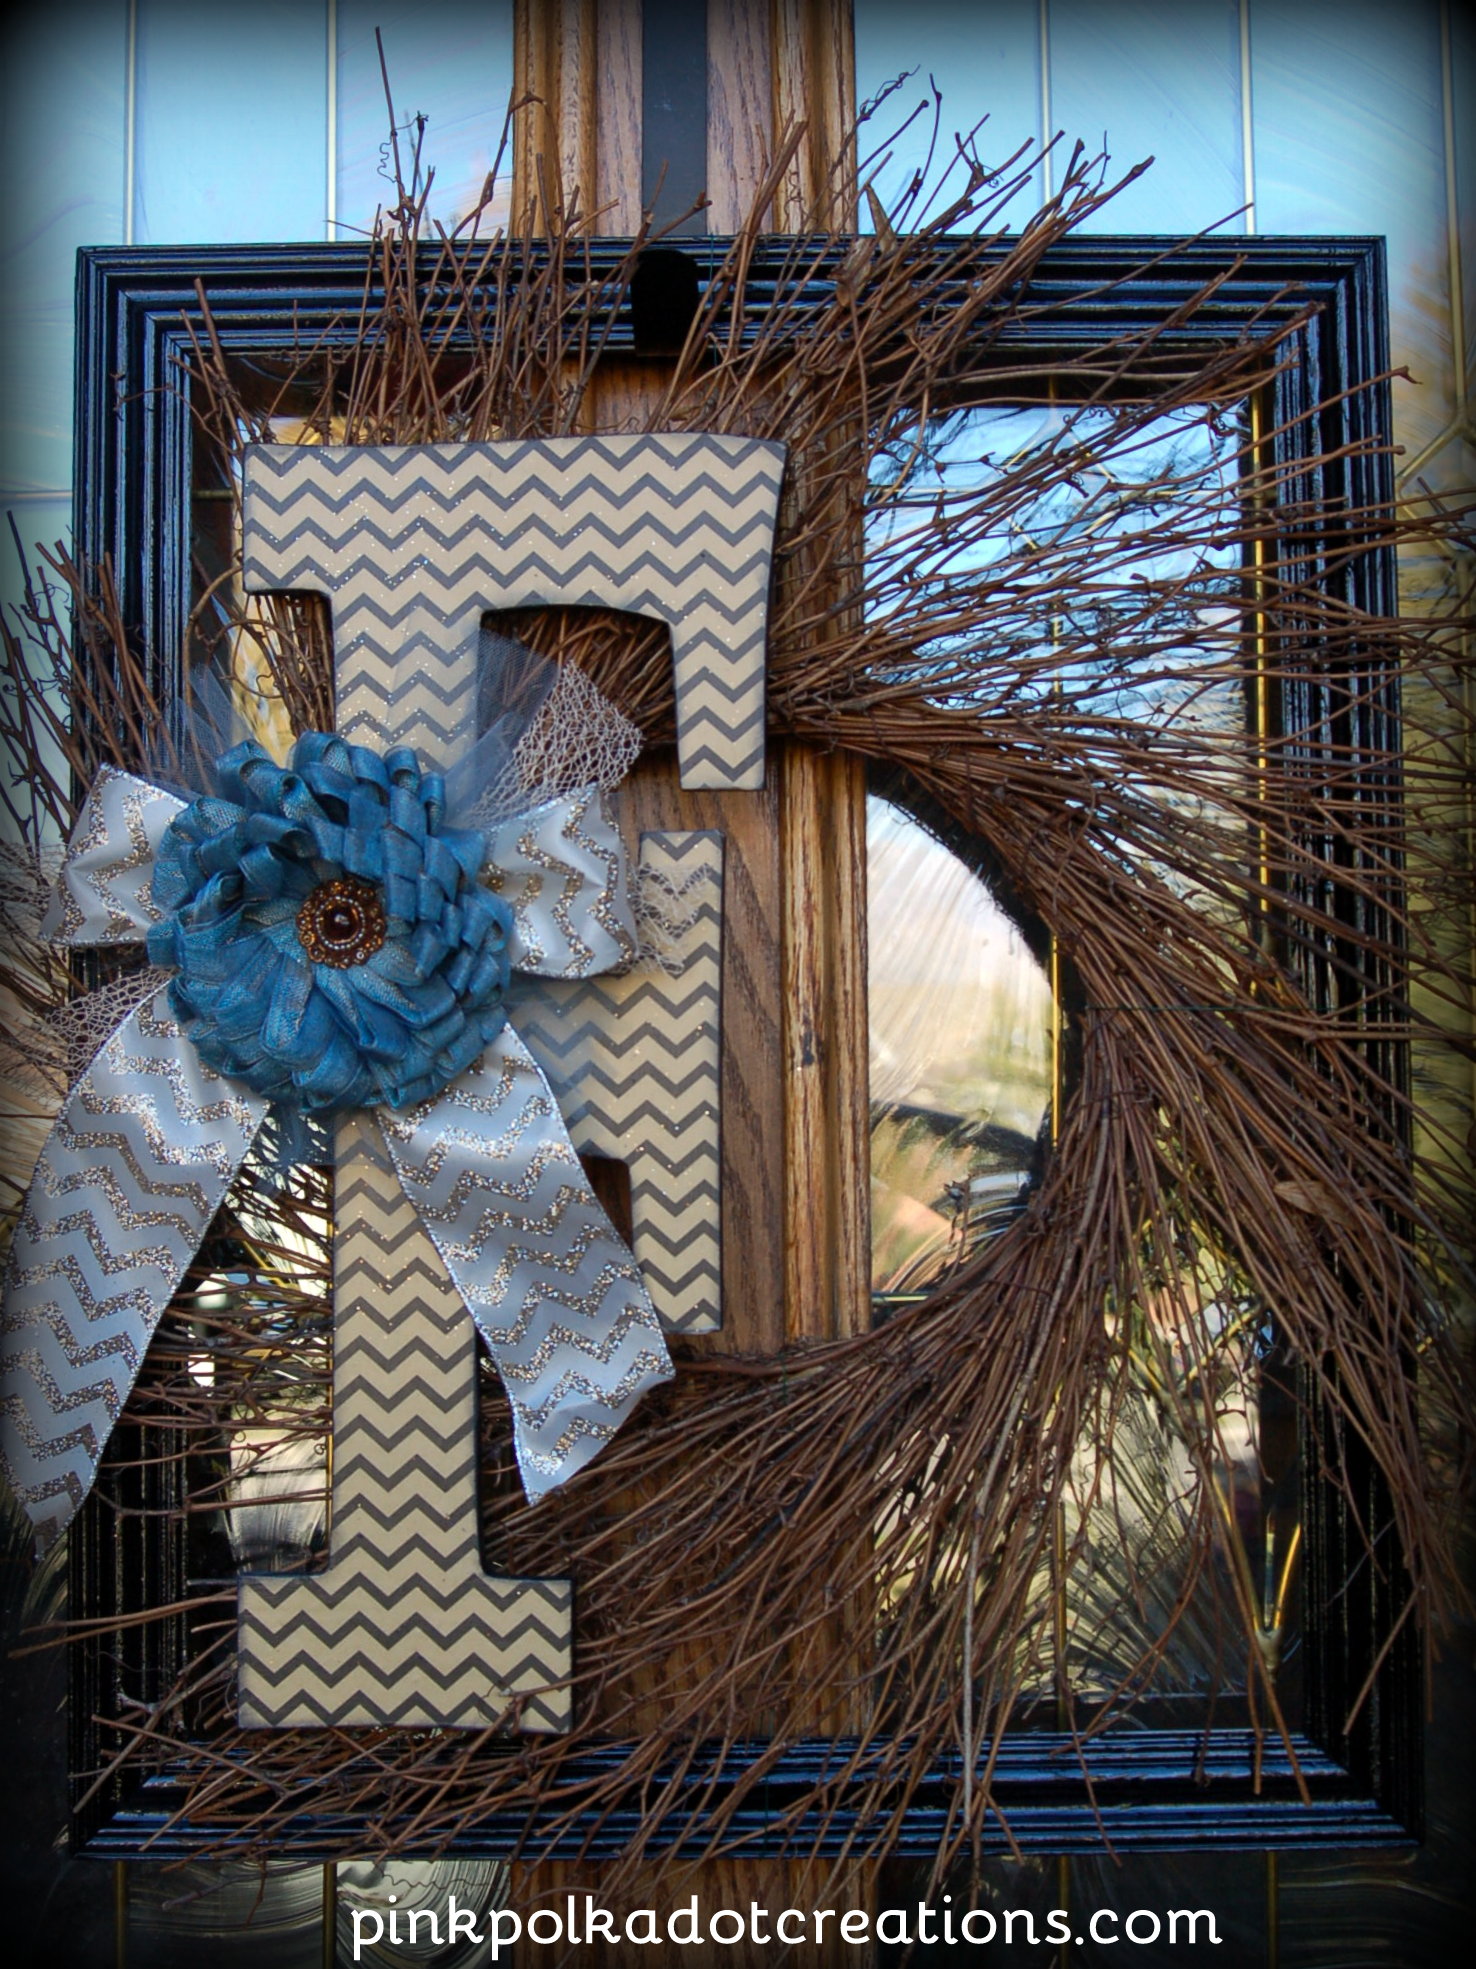
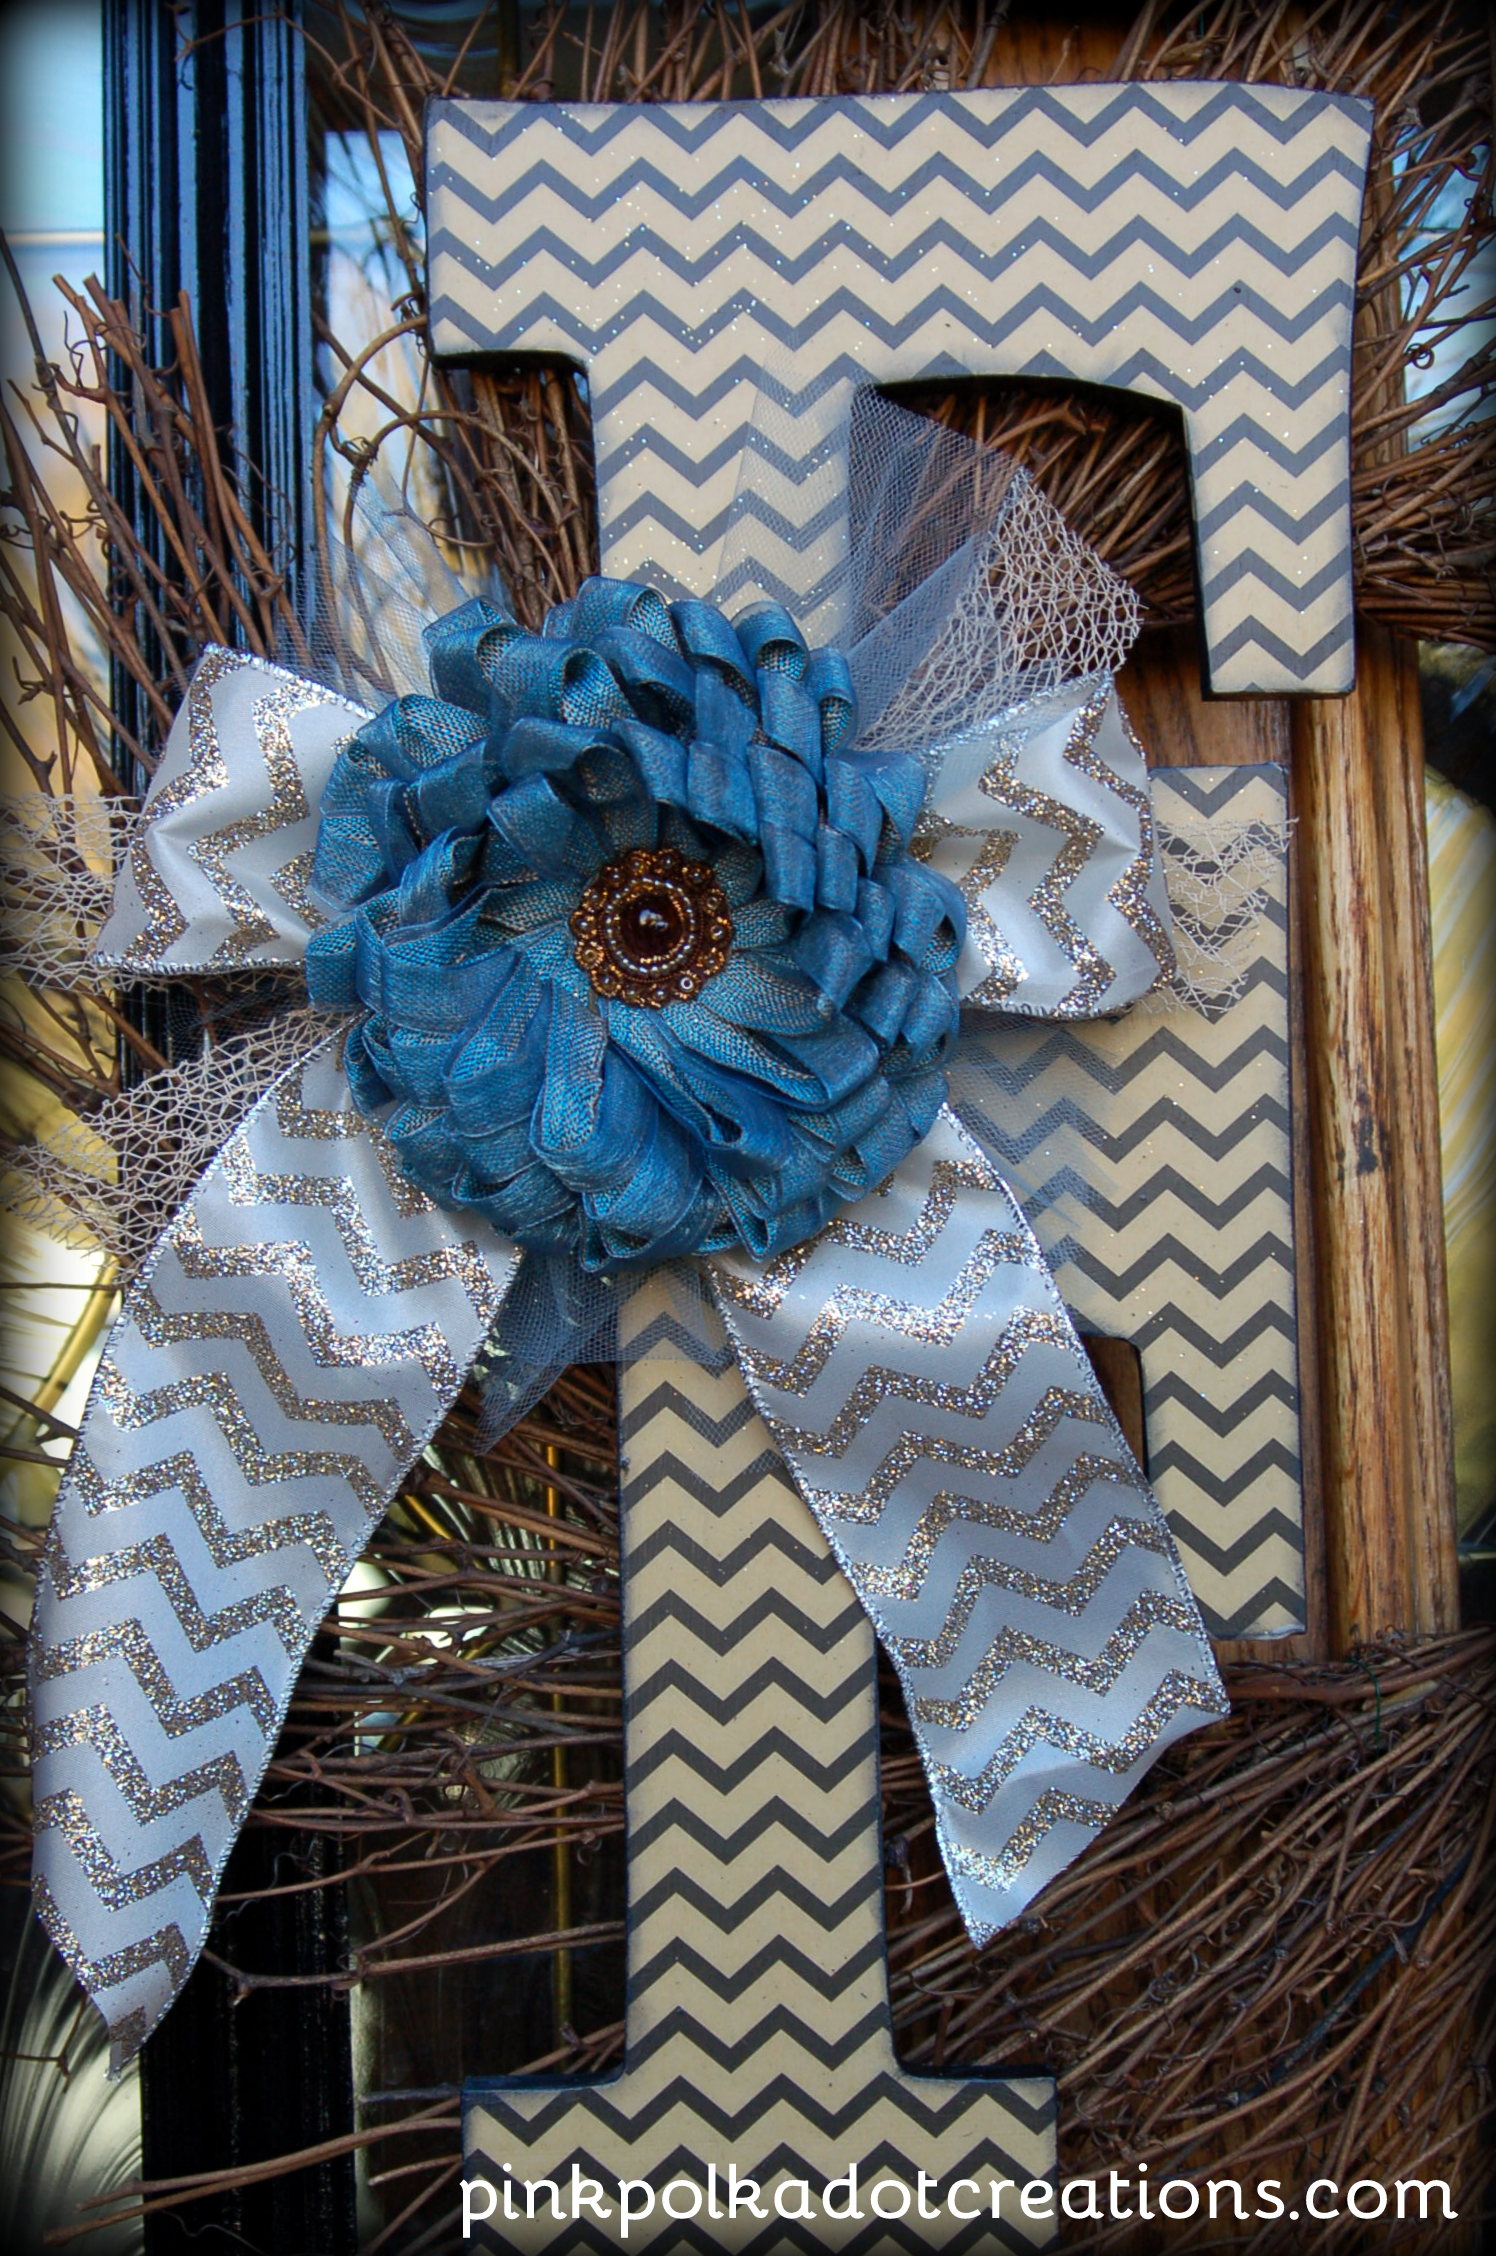
I put this monogram on a stick wreath. I just wired it onto the wreath right above and right below the ribbons. Then I wired the wreath onto a frame from the thrift store that was simply spray painted black! That is all there is to making this stunning wreath for the front door. I think that it makes a beautiful welcoming statement!
The other project that I picked from Crafty Wood Cutouts,
Is this fun little project just in time to put out for the Thanksgiving Holidays!
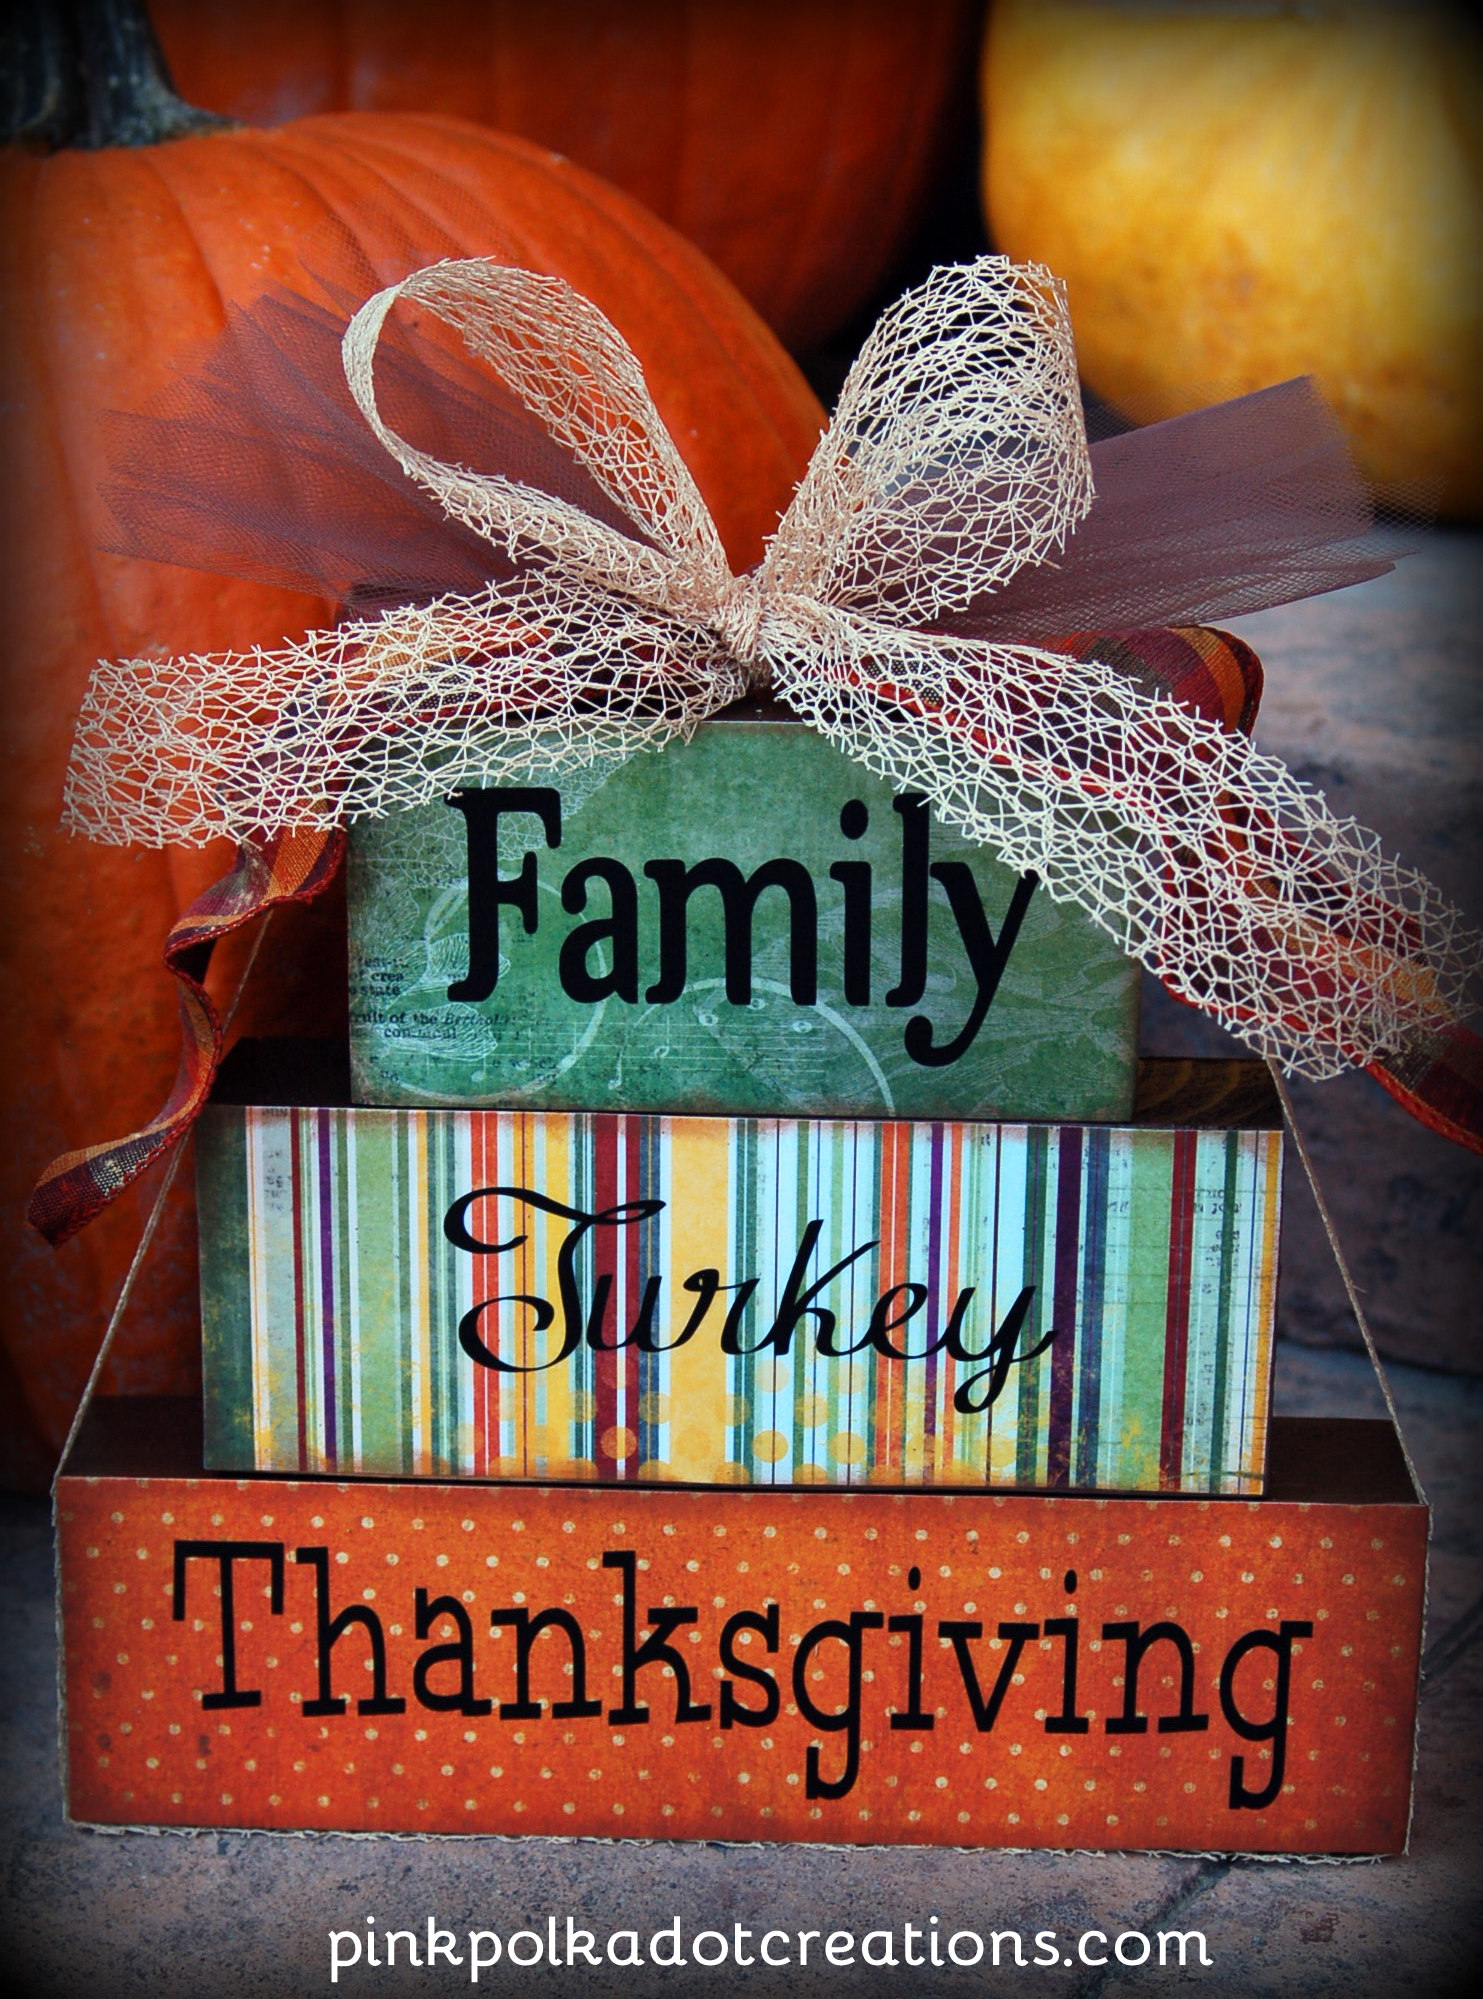
This was sooo easy. It only took about an hour to make from start to finish!
It is called Thanksgiving Stacking Blocks and it includes the wood and the fun vinyl. This is only one of the monthly stacking blocks they have because they have different ones for each month! They also carry a great line of scrapbook papers! All you have to do is paint the edges and mod podge the paper to the front of the blocks. Let it dry and add the vinyl lettering! Then, of course you have to tie it all up in a nice little bow to top it all off!
Do any of you want to make a fun wood project?
Christmas is coming up and we need to start thinking of gift ideas, right? These are perfect, because they are easy to do but they add a very classic look to your home decor or your holiday decor!
Thank You Crafty Wood Cutouts for this fun opportunity!
Keep in touch…Like on Facebook and Pinterest!
Thanks for visiting today. I am going to be at the Pinners Conference today, hope to see some of you! :)


Beautiful Rita. I love the ‘lamp accessory’ too. Great color, and a fabulous repurposing idea!
Hope all is well?! I thought of you a couple of weeks ago when I came across some tomatoes and realized although I LOVED that recipe from last year and totally wanted to do it again, time crept up on me. Funny…the older I get the more that happens! lol
This is adorable!!
Thanks again for joining the Link Up this week!