Yesterday I told you that I would show you the project that I came home with from The Wood Connection Store. So drum roll please: Ta…Dah!
I got these cute wood letters and I knew exactly what I wanted to do with them. I have a shelf in my living room and I wanted to put something cute on it. We had new family pictures taken a couple of days ago, so I want to put some new pictures in this room and they will go perfect now! Let’s make some fun wood letters with pattern paper.
First of all I had to decide what colors I wanted and then I laid the letters on the papers in the order to see how they looked. I just kept trading them around until I liked what I saw. Then trace around the letter with a pencil. You can turn the letter and the paper over if you are worried about the pencil line showing, but I knew that I would be inking the edges so the pencil lines would not show. Also be sure to look at the pattern on the paper and make sure it is facing the way that you want it to look! This is said from trial and error :)
 Then cut out the paper cutting just inside the line.
 I then laid it all out again one more time to make sure that it was how I wanted it.
 Next I am going to show you a super duper way to “paint” your letters. I used about 3/4 of a bottle of acrylic Burnt Umber paint. Pour it into a shallow pan. I just used a glass cake pan. Just make sure that all of your letter will fit in the pan.
 Next fill the pan about half way full of water and mix the paint in well.
 Then simply put your wood piece in the paint and I kind of swished it around a little bit or use your brush to get it on the sides a bit.
 Then turn the wood piece over and do the other side. Pay attention to the sides of the letters to make sure they are all covered with paint.
 Then lay the wood pieces out on some paper towels to dry. I put the right side down, because I am going to cover the front with the paper, so it does not matter what it looks like. This method is so much easier than trying to paint all the insides and curly cues. This process only took me about 15 minutes to do all of the letters! This method turns out more like a stain than a solid color, but it is so easy to do. If you want it darker, you can dip them all again or you can make your paint more concentrated to begin with. Of course you can use any color when doing this, but I knew I wanted the brown to go with my papers. You also do not want to let the wood soak in the paint or you will start raising the grain!
 After the paint has dried you simply apply an even coat of Mod Podge to the front of the wood piece, (if you put it on the paper it will wrinkle)
 Then put your cut out paper on the wood and rub out any bubbles and make sure you rub all the edges so that they are are stuck down good.
 I then inked the edges of all my letters with my cat eye ink pad. I used the Chestnut Roan color. This just gives the edges a little bit of the distressed look.
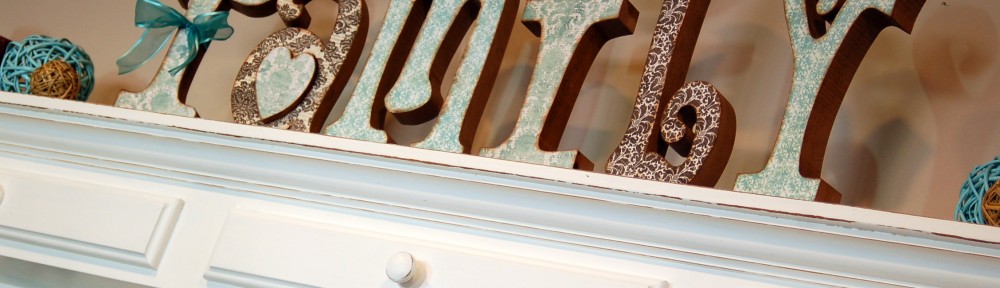
 I tied a bow on the “F” because ribbon just makes everything a little cuter! :) And here is what it looks like on my shelf! I added a few things that I already had and I think that it looks great! Now I need to swap out the pictures with some of our new family pictures to complete my “family” decor!
 This is fun to do with any word and you can add your own personality by the colors and the papers that you use! You can also just glitter the front of some of the letters instead of putting the paper on for a little extra sparkle.


I think there might be a wood connection by my work? I would love to try and make one of these – I love your painting trick.
Glad you like it. Thanks for your comment and your support of my blog!
That is super cute! I will definitely be filing that in the to-make-one-day file. :) Thanks for sharing.
This is going on my project list! Great tutorial and I love your painting trick! I am pinning it!
Thank you for your comment and your support. I hope that you can try the painting trick because it works great!
What a great trick with the paint! These are so warm and welcoming :) Thanks again for sharing at Mix it up Monday!
You’re making me so jealous of your Wood Connection projects! :) I LOVE the papers you used here. The turquoise and brown are so lovely! Thanks for sharing at oopsey daisy!
What a great way to paint letters-thanks for sharing! I may have to stop at the crafts store to see what I can find.
It really is great, I hope that you can try it out sometime!
These are beautiful! I also love your painting trick! Will it work with regular paint that is used for furniture and walls or do you recommend the acrylic paint?
I have not tried it with regular paint. You have to water down the paint, so I am not sure how it would work. I guess that I should try it on a small item and see what happens. If you try it, let me know how it turns out. Thank you for your comment and your support!
Hi! I found your post on pinterest. Have a question, do you have to “ink” the edges? I’m not wanting a distressed look, but will skipping this step make the edges come loose after awhile? Thanks for such great directions and pics. I can’t wait to do this for my son’s room!
The inking step is for looks only. It will not have any effect on the finished product. Good luck with your project for your son’s room!
Could you please tell me where you got your letters from?
I got them at the Wood Connection Store. They have two stores in Utah but unfortunately they do not have a website.
Not only is your project gorgeous, but your shelf is to die for! Mind sharing where you got it?
I wish that I could tell you where I got that shelf, but it is at least 15 years old and I do not remember! I would look at some unfinished wood stores like the Wood Connection.com furniture store or 4 Chairs in Lindon, UT. Sorry that I cannot remember, but chances of them having the same thing 15 years later are pretty slim anyway. Thanks for your comment.
Do you think inking the edges would work on white painted letters? I love the distressed look on your letters, but am worried it will be too bold on the white letters (with colored papers and modge podge as you have done) I have for my baby girl’s room.
The ink works well on the painted surface. If you are worried about the color being too bold, you might want to try a softer color like a tan or lighter brown, or perhaps a gray color.
Incredibly great idea for painting the letters. I have tried a multitude of various brush sizes and gadgets to try to get the curly ques painted. Thanks, Cheryl
Such a GREAT tutorial!
Thanks for sharing your secrets! :)
Where are you finding the wood letters from?
The Wood Connection store in American Fork, Utah
this is a really great tutorial. I love the details and little tricks! Even tho I am a crafter, not everything is super obvious. I would have put the modge podge in the wrong place :(
Jackie, so glad that I could be of help. :) Painting wood this way is one of my best tricks!
Great project! Love it! Thanks for sharing.