Hi everyone! It has been a bit since I have posted a project that I have done, so today I want to show you my Redwork Garden Accent Pillow!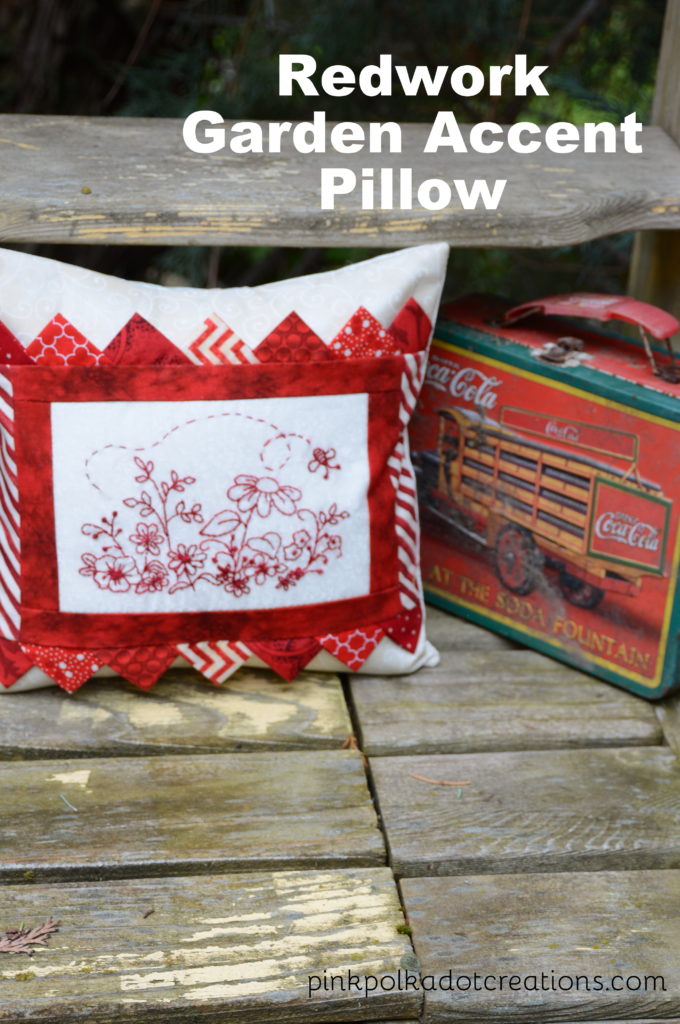 Continue reading


Hi everyone! It has been a bit since I have posted a project that I have done, so today I want to show you my Redwork Garden Accent Pillow! Continue reading
Hi everyone! Hope you are all having a beautiful spring day today! I feel like we are finally starting to get back into a bit of a rhythm.
We have our little grandson back home and my husband is steadily improving…so I feel like there is a light at the end of the tunnel! I want to say thank you to all of you that have send your love and prayers. They were very much appreciated.
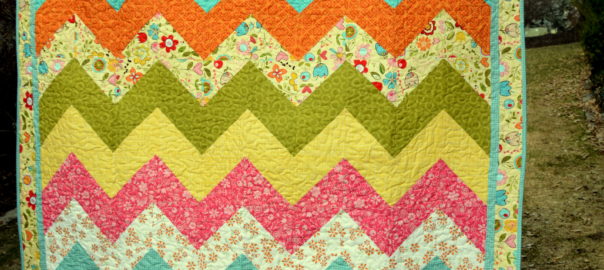
Today I want to show you a quilt that I just finished! It was a kit that I have had for years and I finally pulled it out and put it together!
The name of this quilt is: Chevron Rainbow Ribbons Quilt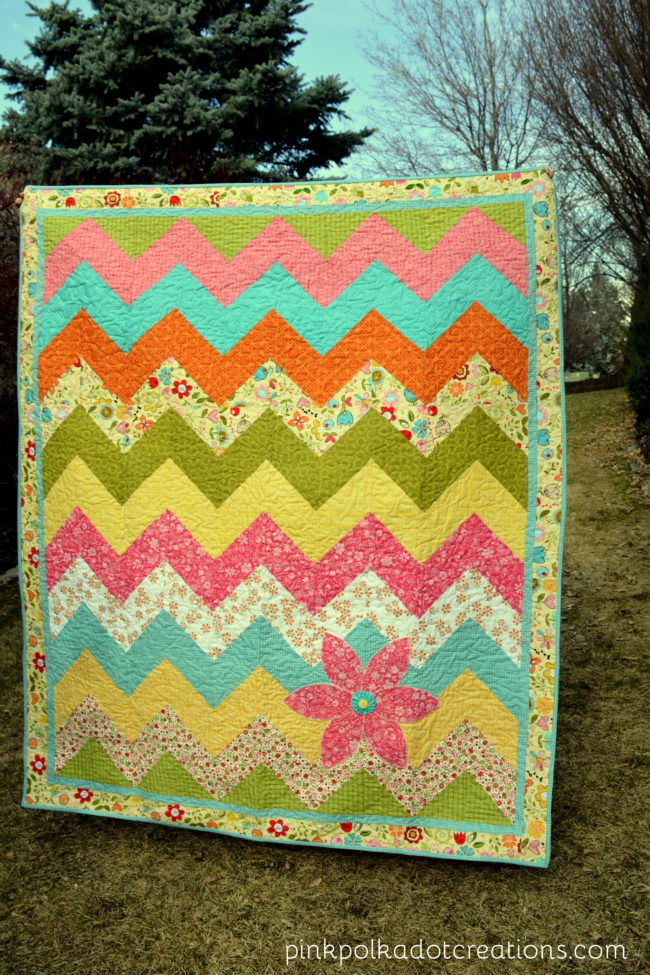
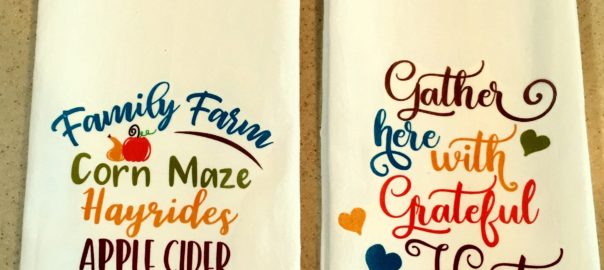
Today I have some fun Harvest Dishtowels to show you! They were so fun to make that I also decided to do a darling t-shirt!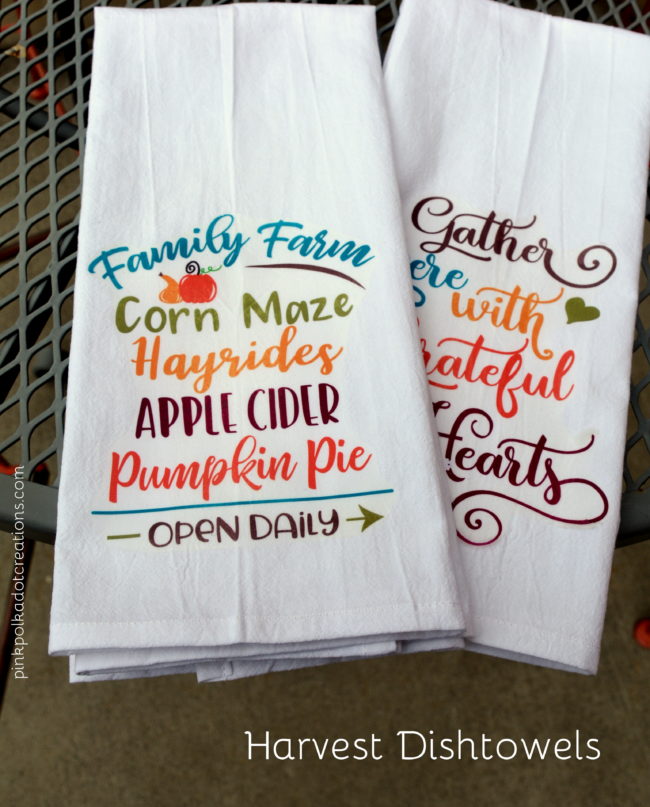 Continue reading

Today I have a mini renovation to our master bedroom…I finally finished my Headboard Makeover! Continue reading
Today I have another fun project…a Cutting Table Makeover!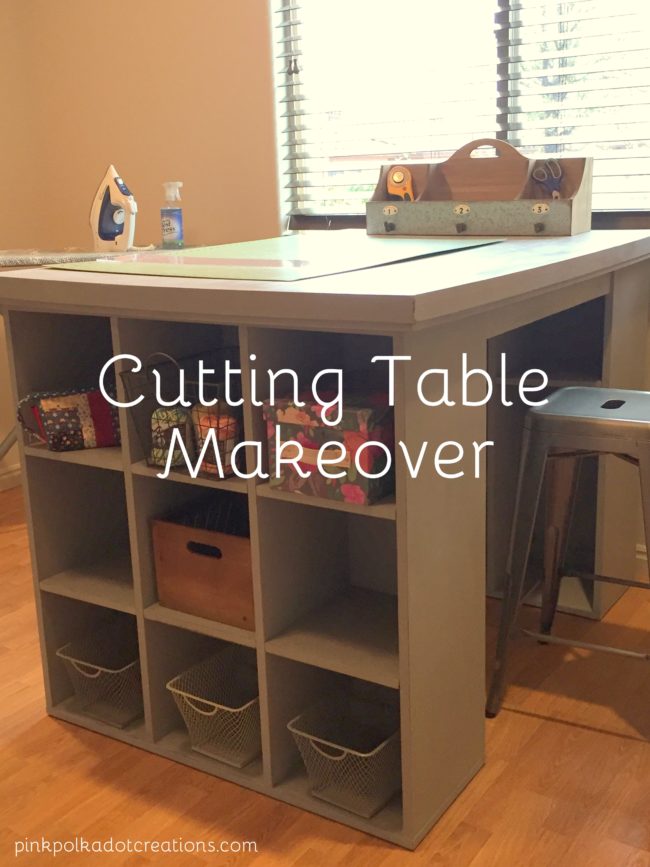 Continue reading
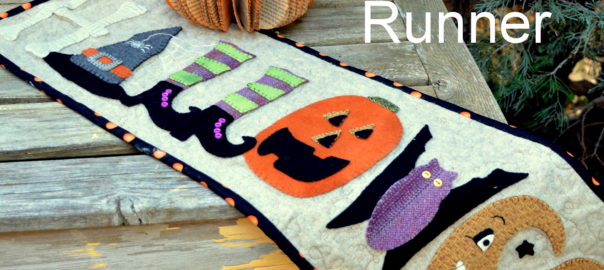
Fall is finally in the air, so now I can start thinking about putting out my Wool Halloween Table Runner!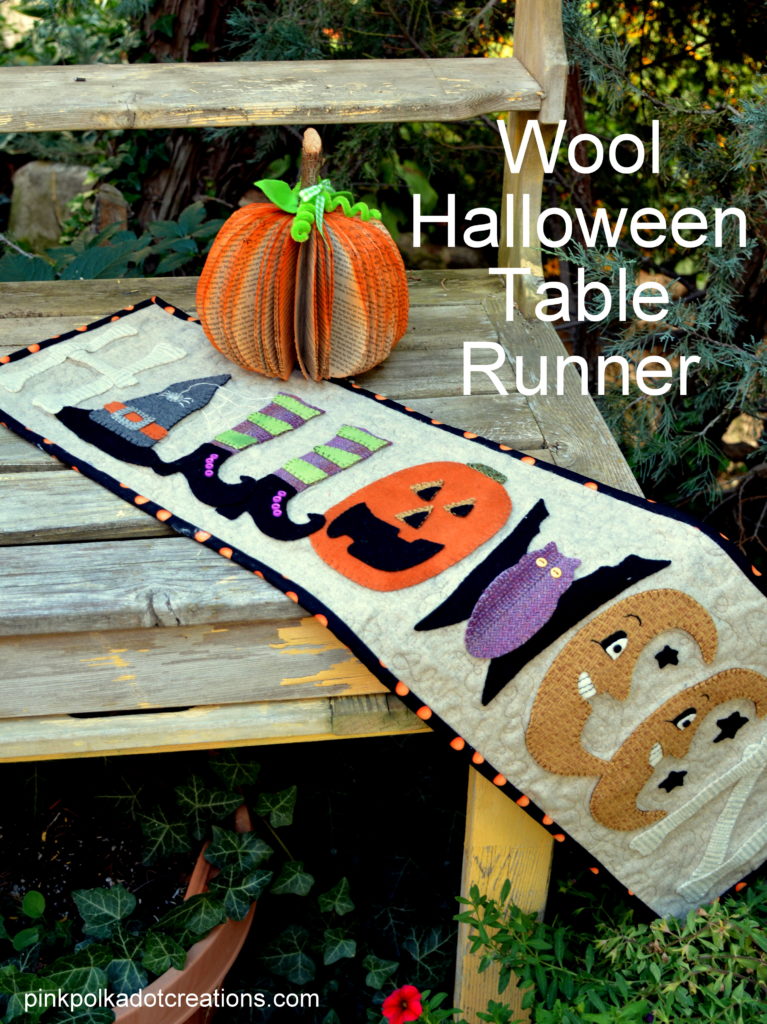 Continue reading
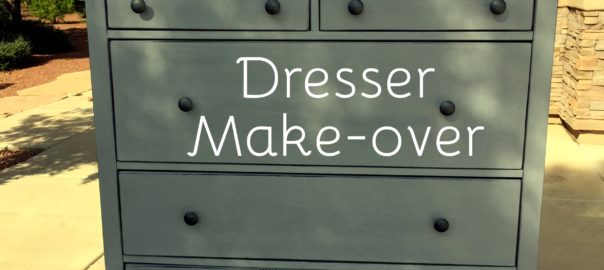
Today I have a fun DIY Dresser Makeover!
This was a fun, simple makeover…but boy did it make a big difference in the final look!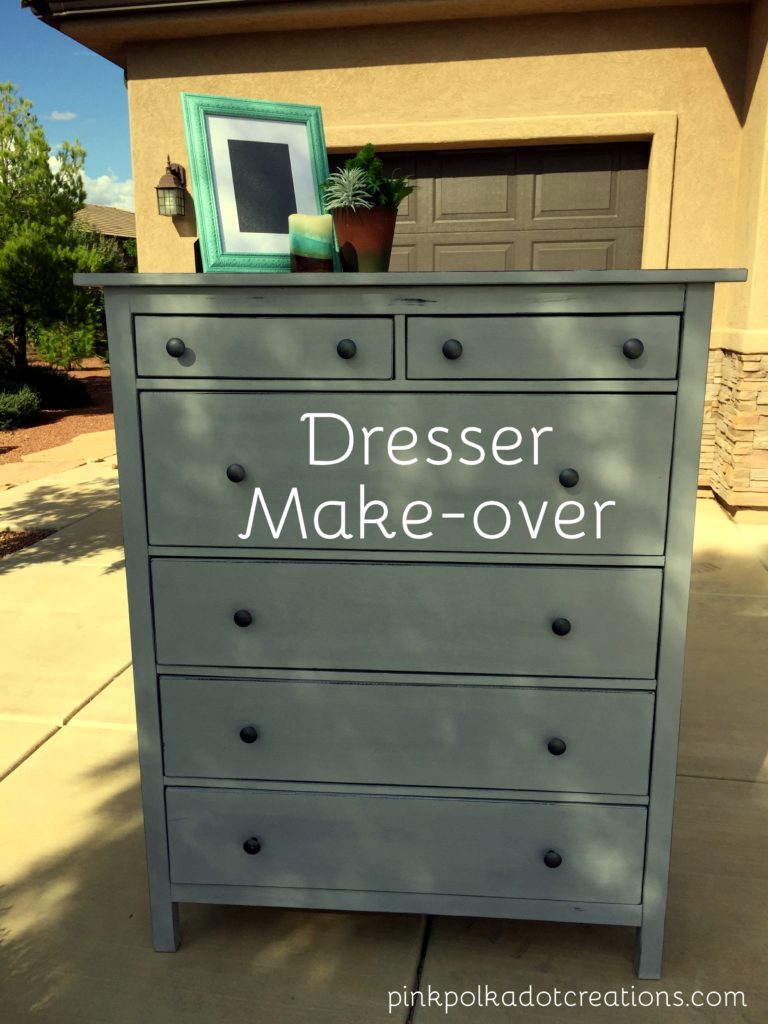 Continue reading
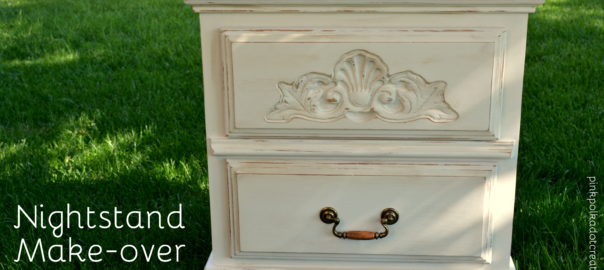
I am starting a bedroom makeover in our Master bedroom, so I started with the smallest pieces! This is the nightstand makeover!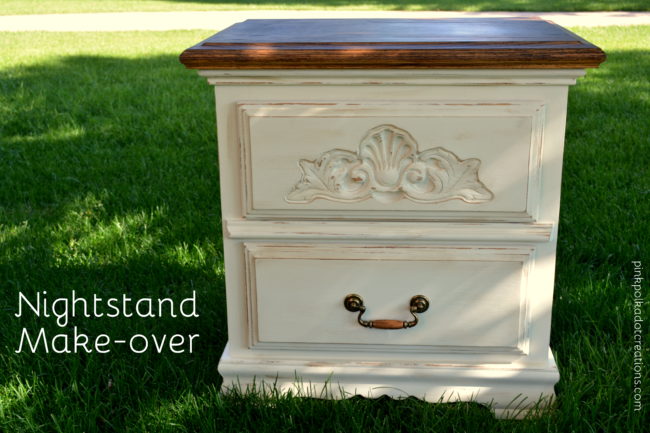 Continue reading
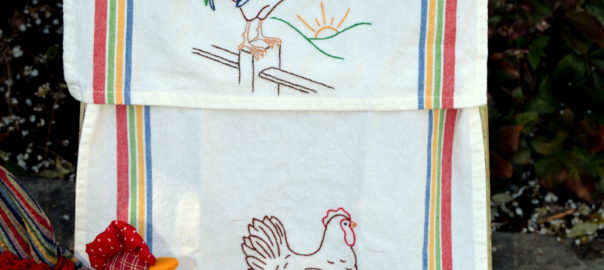
Lately, I have decided that I am more country girl than city girl and these Embroidered Chicken Dishtowels kind of prove my point!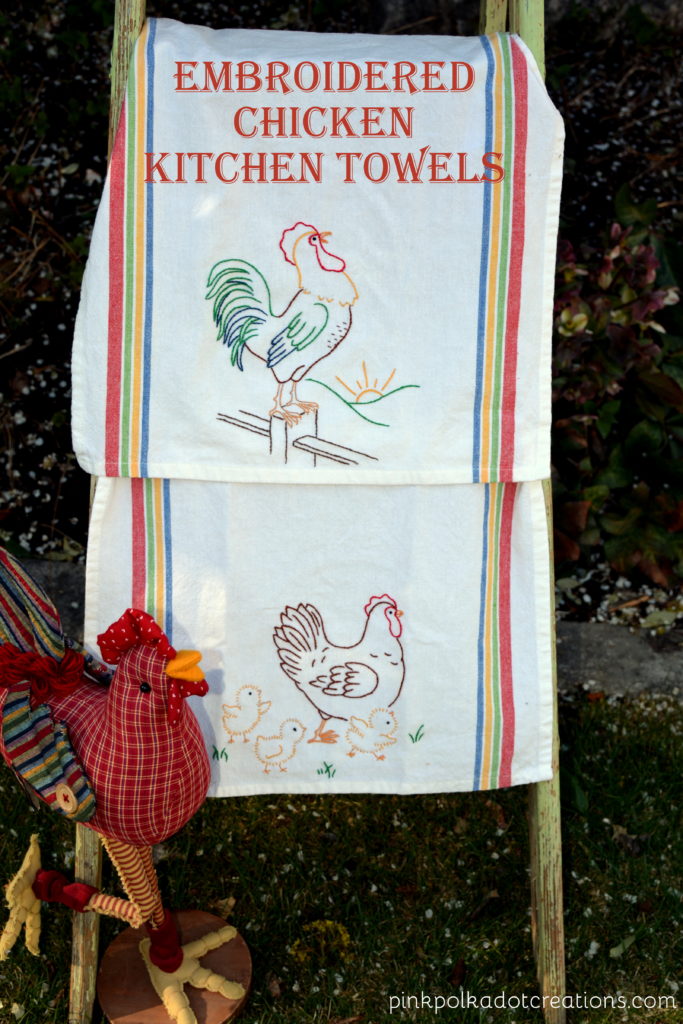 Continue reading
This summer my youngest son and I went to a boutique/yard sale during our town celebration. We spied a fun ice cooler, but neither one of us bought it…until my son went back and snatched up this cutie: Continue reading