Category Archives: Crafts

Repurposed Cupboard Door Tray

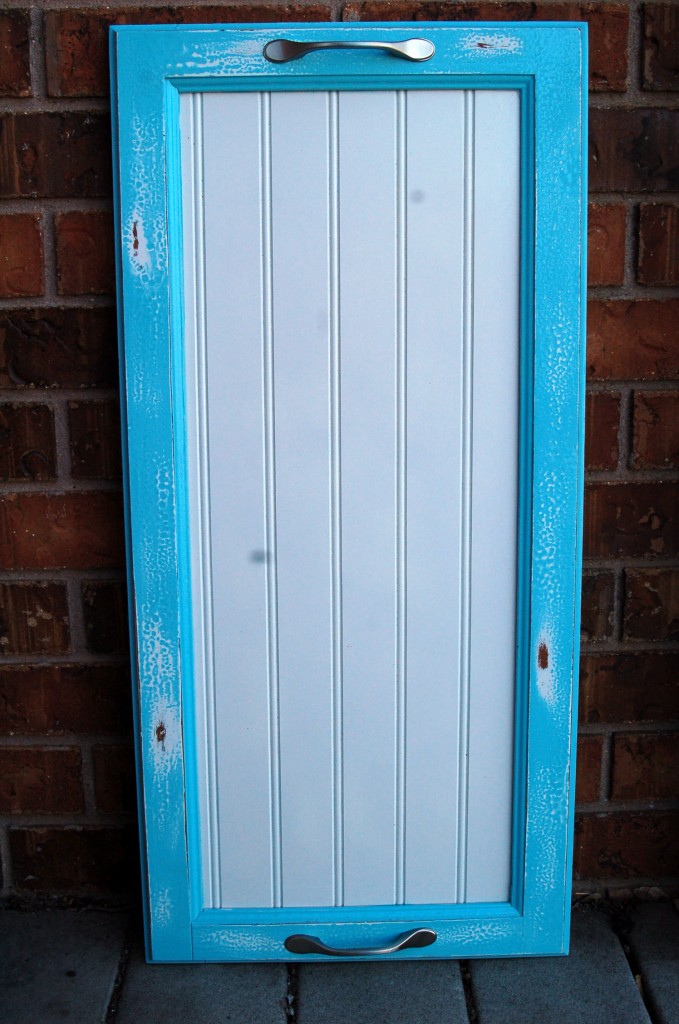
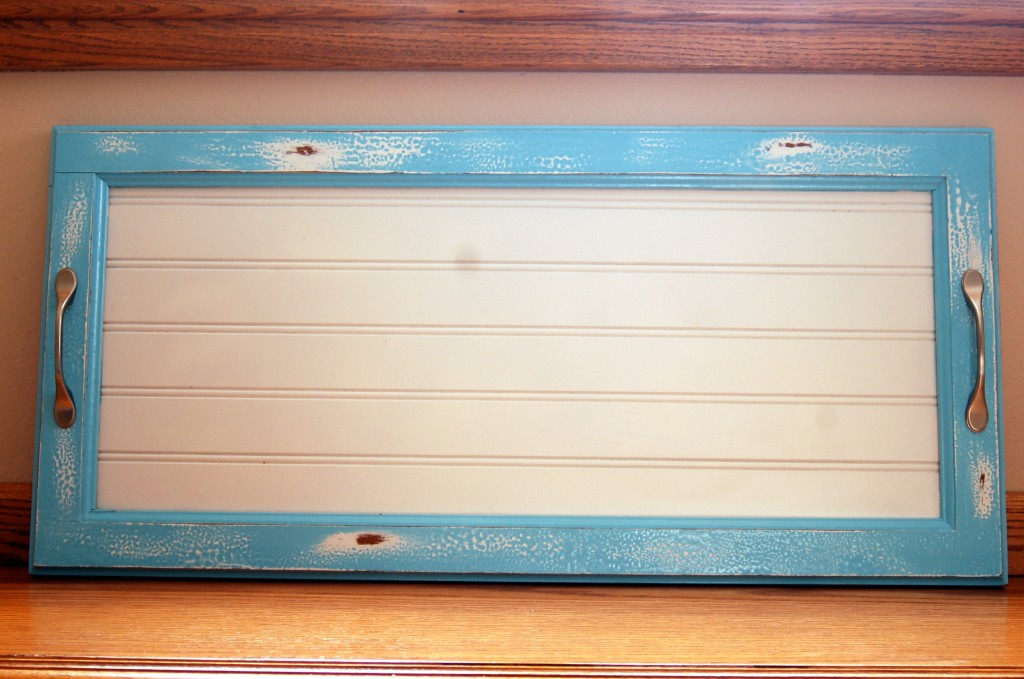
One of my best friends, Kathy,  gave me this for Christmas!  What a dear friend she is to go to all the time and trouble to make this!  I absolutely love, love, love it!  She told me that she and her husband worked on these together.  They took an old cupboard door, took out the inside part and replaced it with the bead board center.  Painted it these darling colors, distressed it and added the handles to each end!  What a cute idea!  I cannot believe how much time it must have taken to make.  I truly do appreciate all her efforts and talents.  She is my most talented, crafty friend!

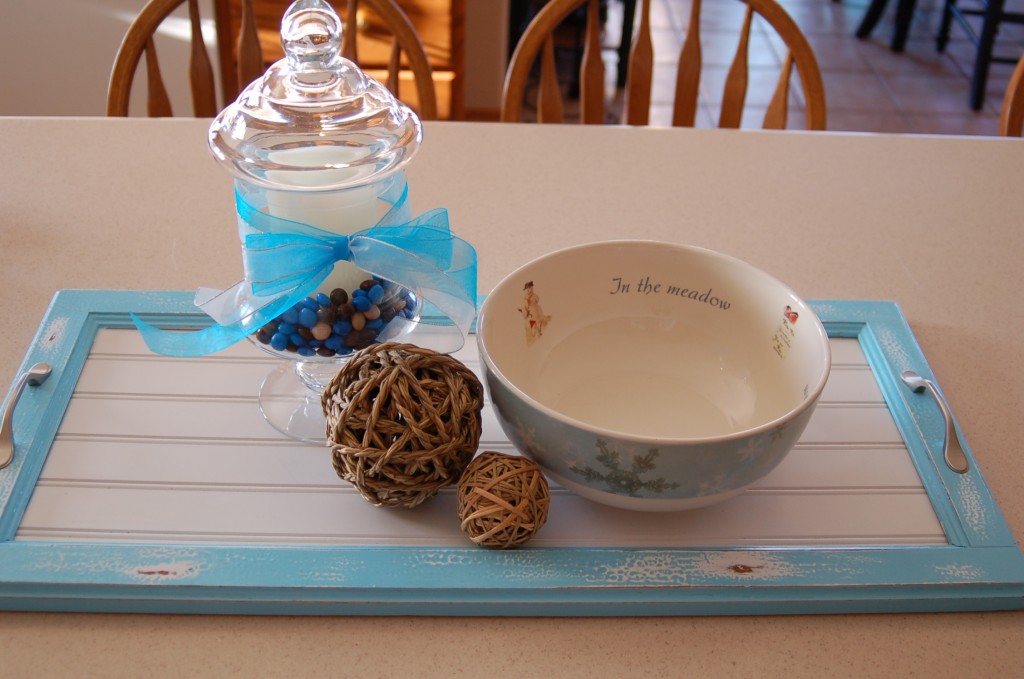
I put a candle in my glass apothecary jar and put the Almond Joy pieces  around the candle, because they are blue and white and brown.   I then tied a blue and white ribbon around the jar. Next I added the balls to my tray and my darling snowman bowl that Kathy gave me last year for Christmas  :)

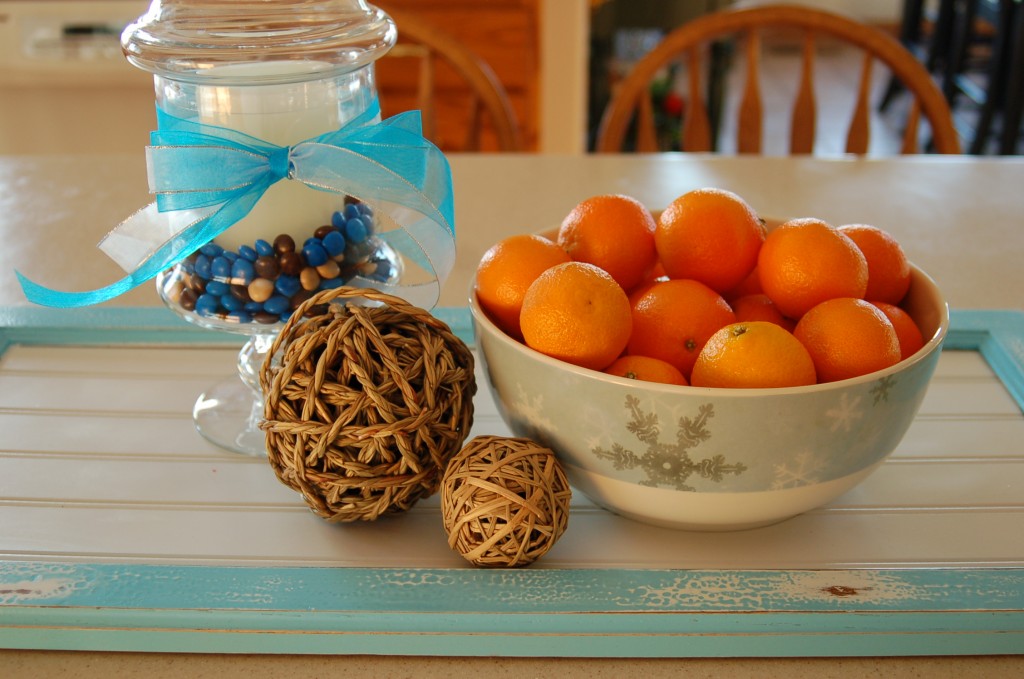
Then I added a bag of the Cutie oranges for another pop of color!  I love how it brightens up my kitchen!

I also love the fact that my 2 year old grandson loves these oranges so much that he ate 2 in the car before I could even get them home!  He kept saying he wanted “Moe  Num Nums”  (translated into English…More yum yums!)

I linked this to “I heart naptime.”


Setting Goals Backwards Journal

I have been in a bit of a funk lately and I just could not seem to shake it.  I just kind of felt like I was spinning my wheels and not going anywhere.  I don’t know if it is just this time of year, with Christmas over and the start of a brand new year and thinking of all the expectations that come with that.

I tend to set a lot of resolutions every year and then they seem to fall by the wayside after about a month or two.  I think that as women, we tend to beat ourselves up for all the things we think that we do not do.  I was reading a post the other day from here, and she talked about setting goals in reverse and how instead of listing all of the ways that we failed to accomplish last year’s goals, we should make a list of all of the things that we actually do right during the year.  Well I  thought about that quite a bit and decided that I really liked that idea, but I wanted to take it one step farther.  I made a journal so that I can record the things that I have accomplished or overcome every month and then I can realize all the things that I did do, and not beat myself up for all the things that I did not do.  I would not make a “to do list” of resolutions but rather an “I did list!”  I would then concentrate on the “half full glass rather than the half empty glass”.  I think it will be a great thing to be able to look back at my achievements each month.  Then I decided that if I dated my entries I could look back over several years at a time!

So do you want to make a journal to record all of your goals that you set in reverse!

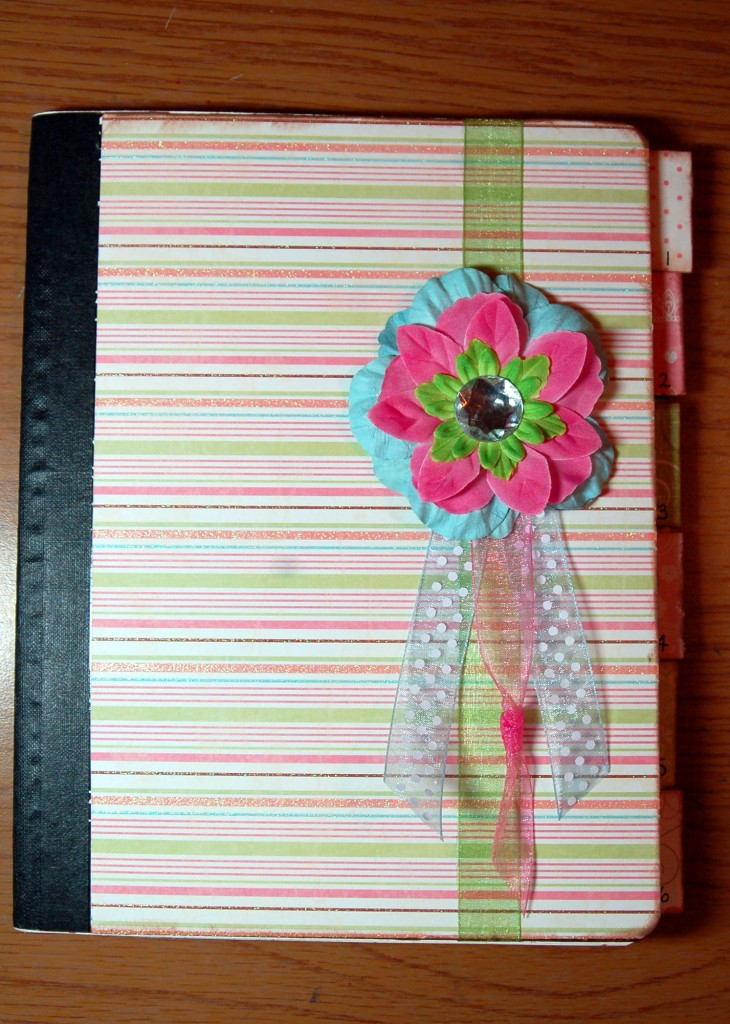
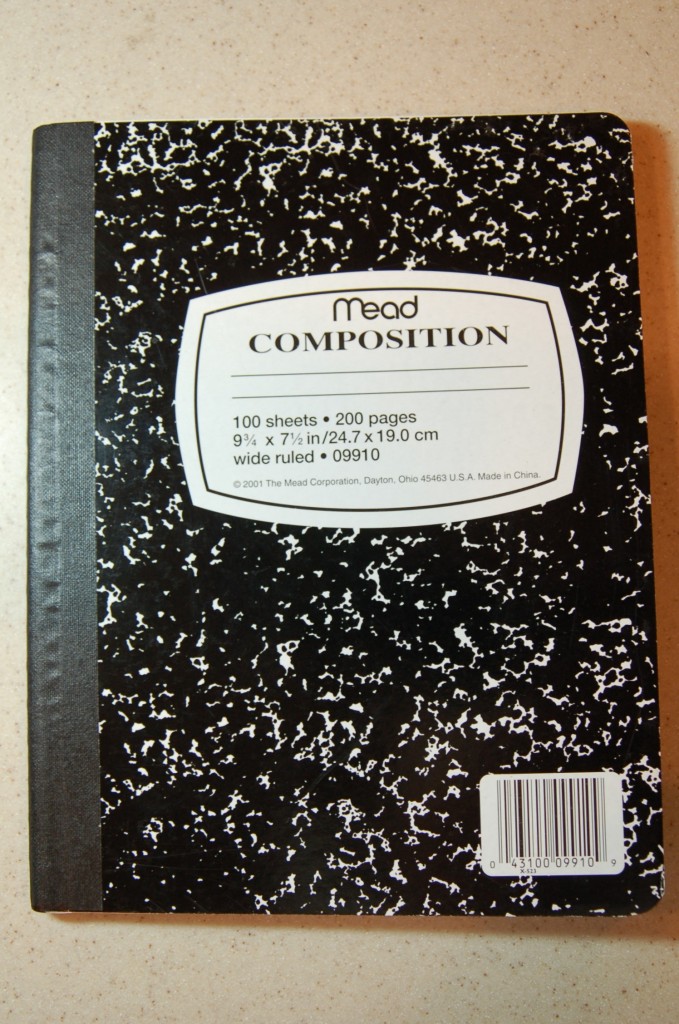
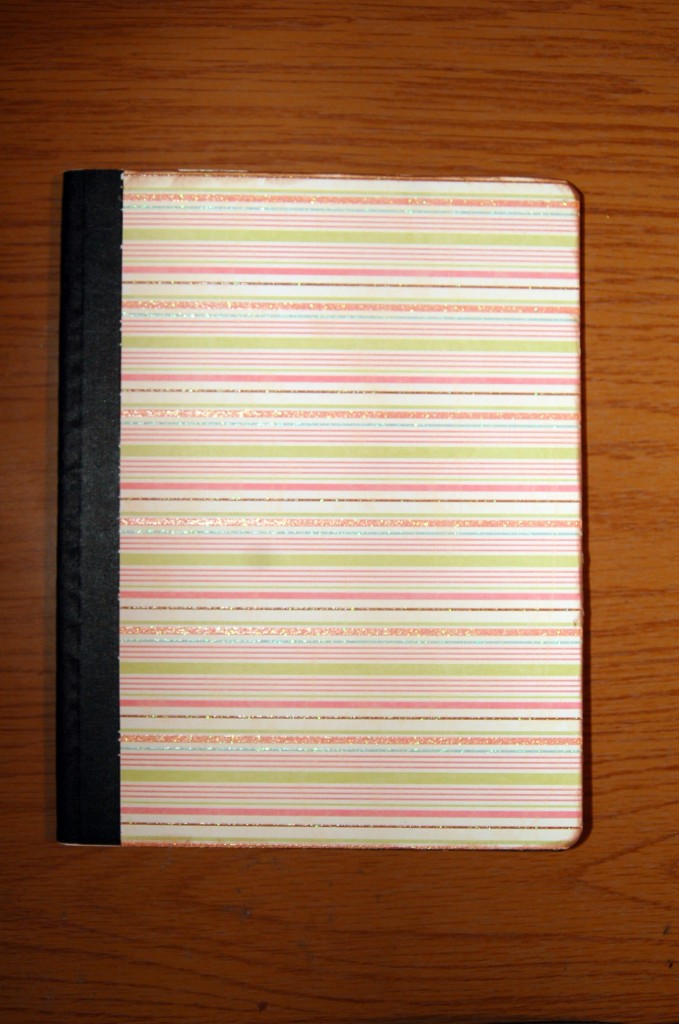
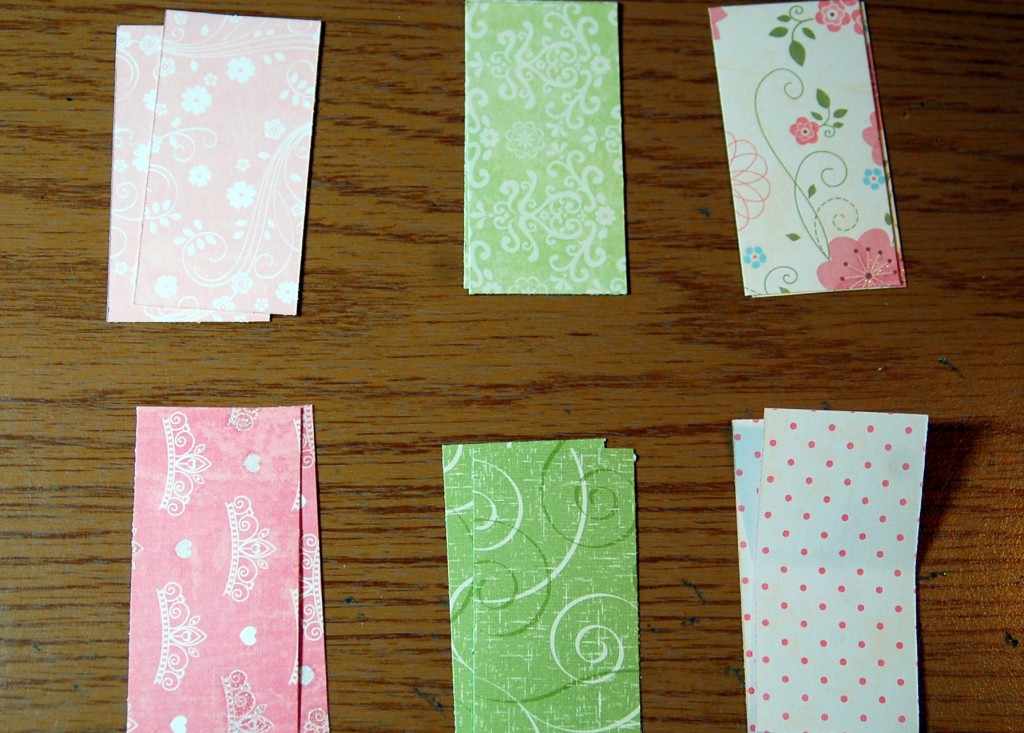
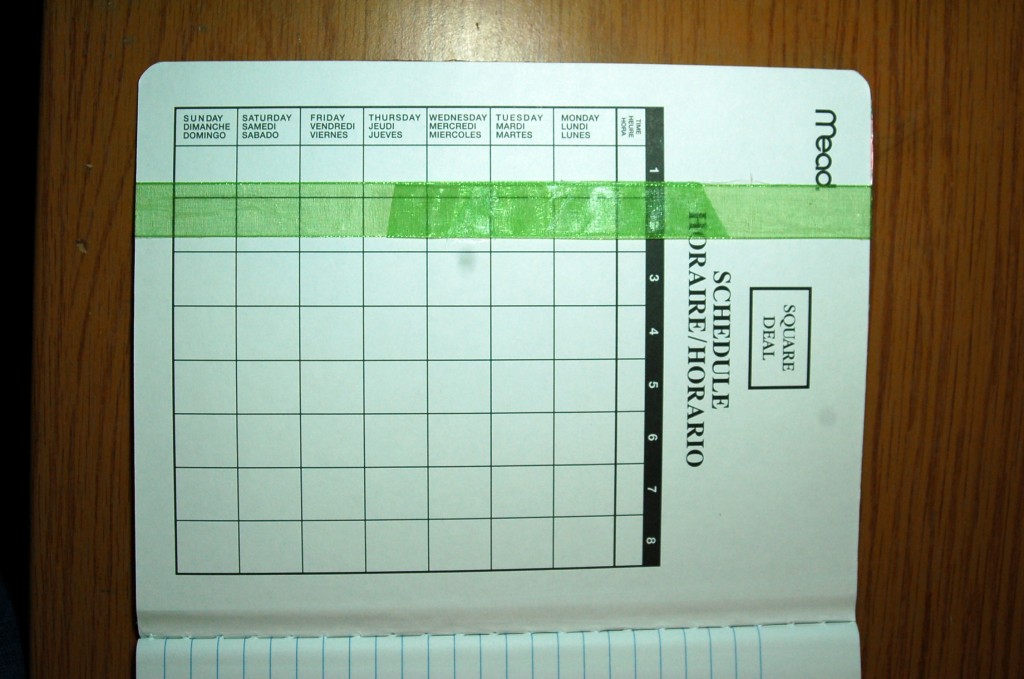
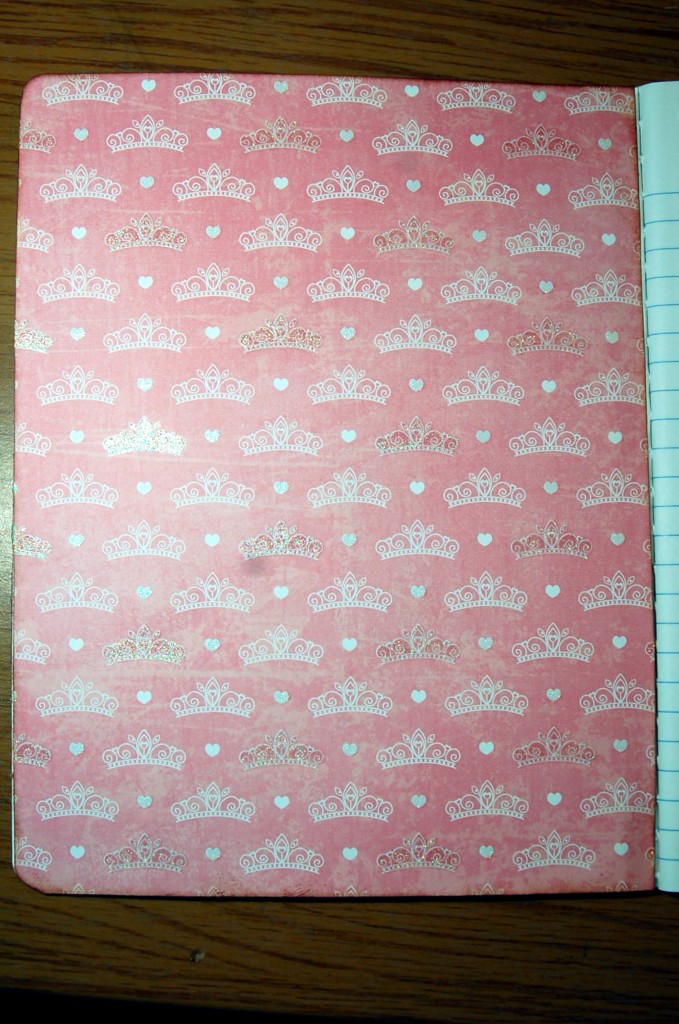
Start with any notebook.  I used a good old composition journal, but you can use any type of journal or notebook.Cover the front and the back.  I put the book on top of the paper and just traced around it.  I  just went to the black strip with my paper.  Ink the edges if you prefer and then adhere paper to the front.Next cut your tabs for the dividers 1 1/2″ x 3 “.  I used six coordinating  patterns and cut two of each, so that I had twelve tabs, one for each month.I wrapped ribbon around the front of my journal and glued it to the inside cover.  If you want to add ribbon you will need to do this step.Next, cover the inside of your journal.  Again I just put the cover on my paper and traced around it.. You want to leave a very little space on the inside, so that your book will close properly.  Cut out and ink the edges.  Adhere to the inside cover.  Repeat this step for the back cover.

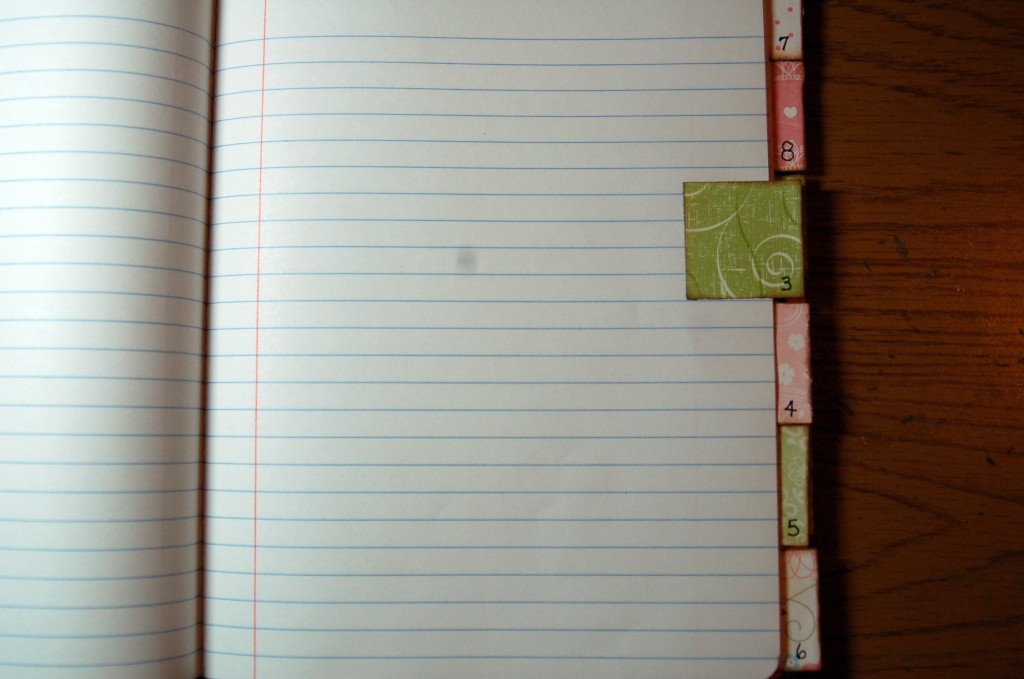
To add your tabs to the pages, fold tabs in half to make a 1 1/2″ x 1 1/2″ square.  Ink edges if desired.  Put one sheet of paper in between the tab and glue it so that about 1/4″ is sticking out beyond the page. The tab is showing  on the front and the back of that page. Space evenly so that you can space 6 tabs down and then 6 more behind that.  I had a 100 page journal, so I spaced the tabs every 8 pages.  That left a few more at the back, but  that does not matter.  (You could add  a title of  “NOTES”  to the last few pages if you wanted to.)  Then number the tabs from 1-12 for each of the months.
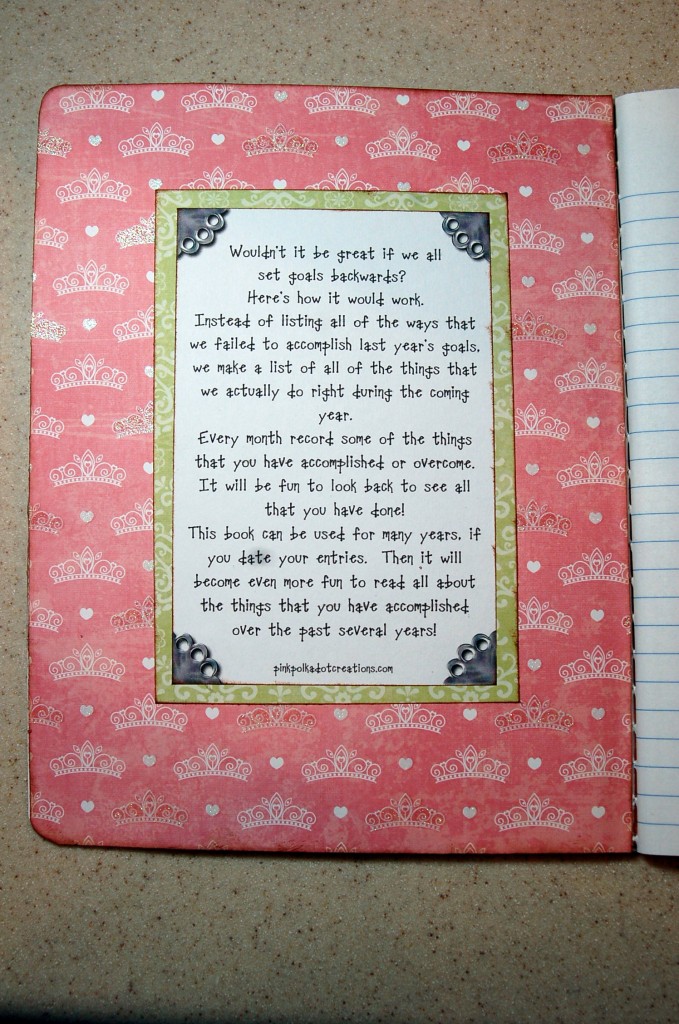
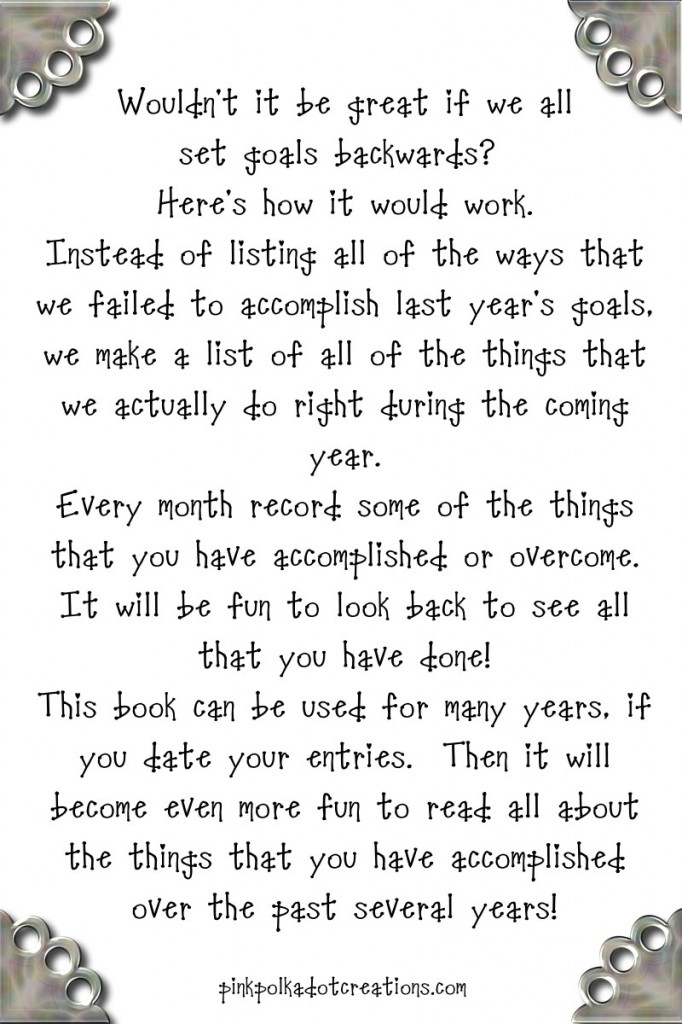
Decorate the front anyway that you would like. I wanted to make this a fun book that I would want to use over and over again, so I decorated it up by adding this flower and ribbons, which are pretty dimensional, but I am going to keep this book out on my desk, so that I will see it often and try to remember the purpose of this book.  If you are going to keep it on a shelf, you will want to keep the front pretty flat.  But just remember that the outside of the book is not what is important, but what you write in the inside!On the inside cover you will want to add this label.  It tells you how you should use this journal in setting your goals backward!Here is a printable for you to print for the inside cover of your journal.  I kept it pretty simple so that it would match with whatever color you use.  I matted this label with a green to match my book.  To print, just right click and go to copy, open your favorite program, like word, and right click again and to to paste.  The original size is 4″ x 6″.

Now I need to go and record that I got my closet completely dejunked and cleaned out and donated clothes to a worthy cause.  I spent time with my husband, and some of my grandchildren, which is time very well spent.  I also exercised 3 times this week!  So instead of beating myself up, I am going to try to look for all the good around me!

Inn Crowd

Merry Christmas Everyone!

My Christmas wish for you is that your day will be filled with love and hope and that you will be surrounded with happiness!I

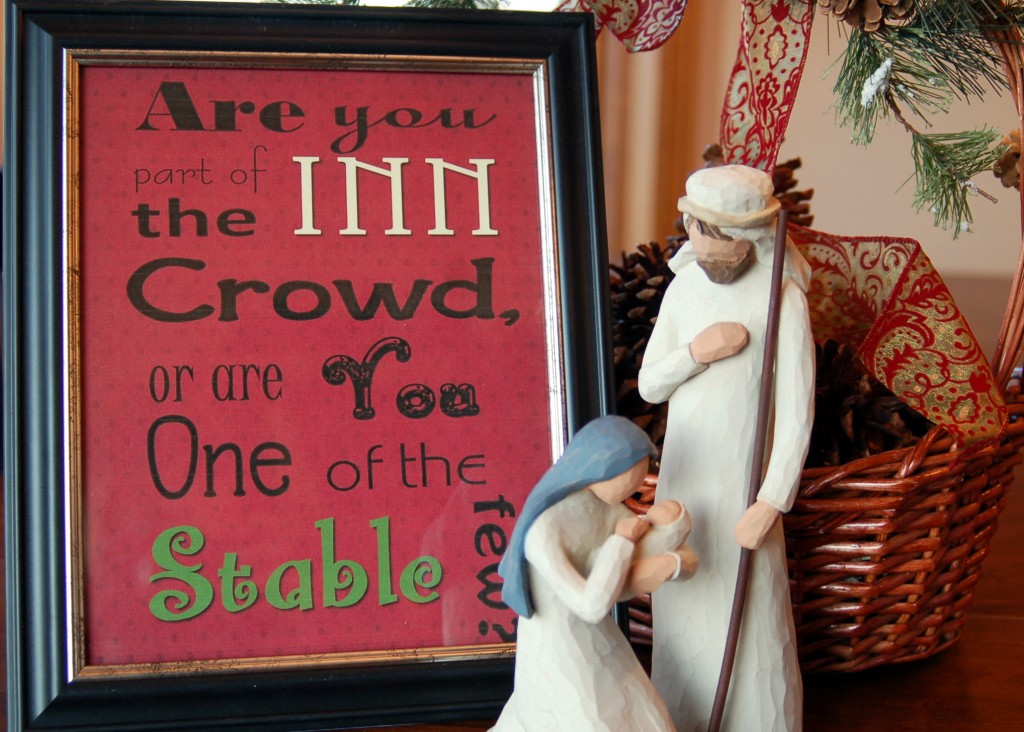
I love this saying, so I decided to make it into a subway art and frame it!  

If you would like to print one, just right click and go to copy, then open your favorite program like word, right click again and go to paste.  The original size is 5 x 7, but you can size it however you would like.  (I ended up printing mine 8 x 10)

Happy Holidays!

Ruffled Skirt

I think that I have had ruffles on  the brain lately, but  you can never get too many ruffles, right?  Ruffles are still such the rage in the fashion and crafting world and I love it!

This a great little skirt that you can dress up or down, and it is knit fabric, so it is very comfy.  It does not wrinkle so it is great for travel, and it camouflages all your flaws with all the ruffles!  It doesn’t get any better than that!
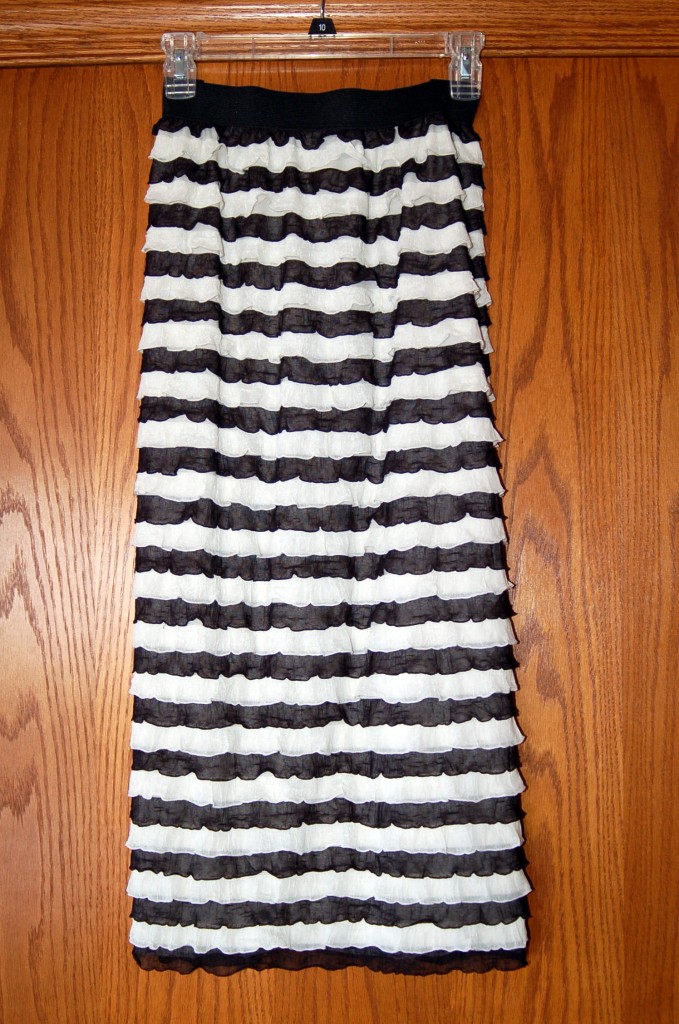
You start with this fabric that is already ruffled!  It is kind of pricey, but you only need your length.  I am kind of tall and I bought about 30″ for a skirt that is mid-calf.  It only cost me about $20 for everything, and where can you buy a cute skirt like that for $20?!

I bought my fabric at The Material Girls Quilts in South Jordan, UT.  They also have this ruffled fabric in Gracie Lou’s Quilt Shoppe in Salem, UT.  I know that a lot of the finer fabric and quilt shops are now carrying it, so you should be able to find a place near you.

The fabric is  wider than I wanted,  so I cut off about 6″ from the width because I did not want it to be that full.  With all of the ruffles, it is better to have it a little bit more fitted, so you do not add bulk where you don’t want it. (If you know what I mean!)
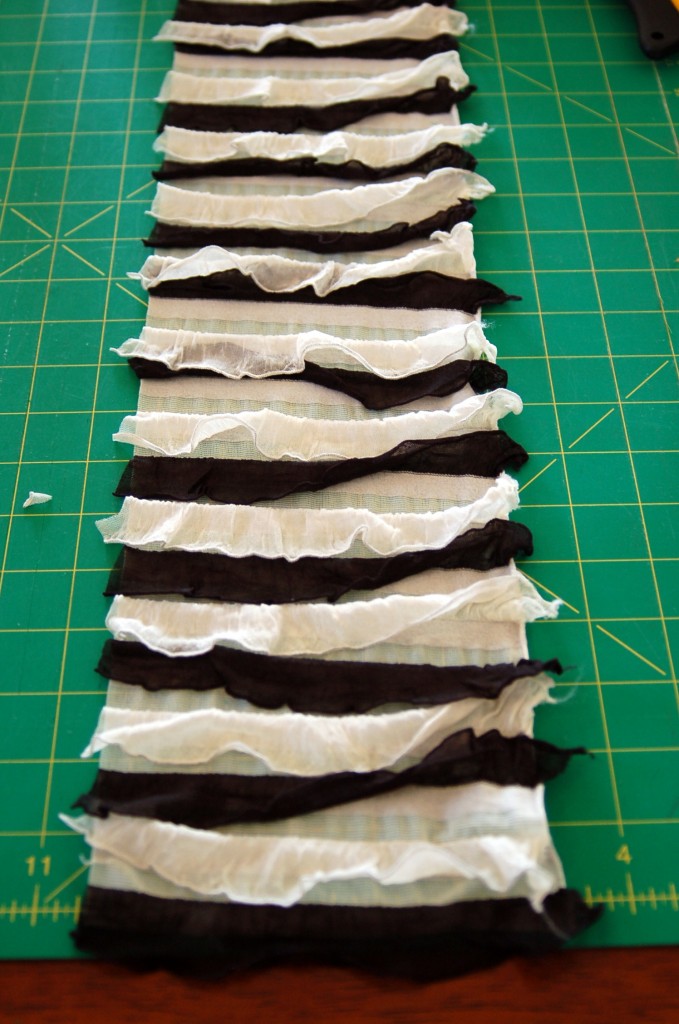
This skirt is sooo easy as in one seam and sew the elastic to the top!

So let’s make a fun ruffled skirt for the holidays, shall we?

The most time consuming part of making this skirt is pinning all the ruffles so that they match!  You have to just match each layer of ruffle and pin it in place like this…
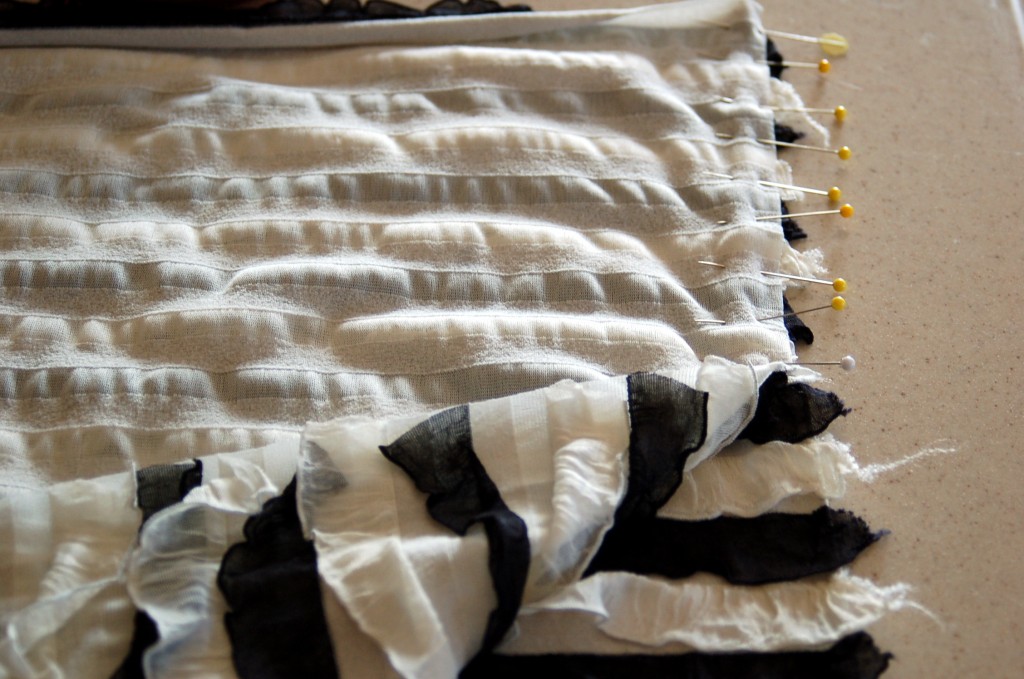
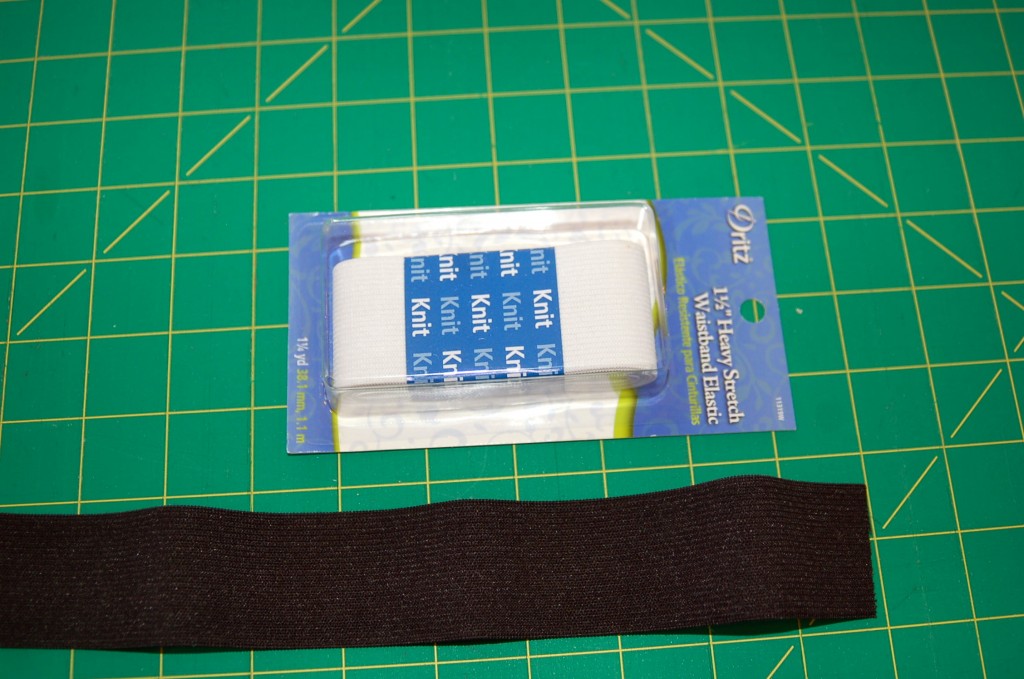
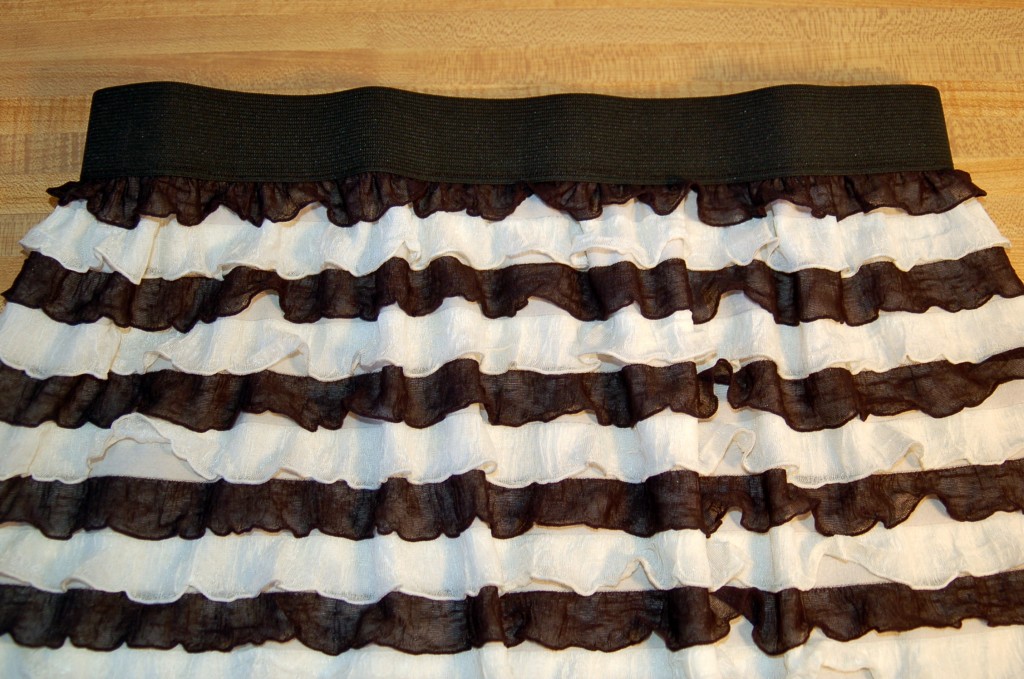
This is what it looks like when it is all pinned and ready to sew.Sew a 1/4″ seam all the way down, if your machine will sew over the pins, I leave them in, so that it will stay matched up nicely.I then serged the seam to trim off all the edges and to make a nice finish on the seam.  You could just serge the seam, but I really liked leaving my pins in, so I sewed the seam on my machine and then serged the edges.Look how nice it looks.  If you do not have a serger, you could also zig zag the seam and trim off the edges of the ruffles to make a finished seam.Here’s what the seam looks like, and from a little distance, it is hard to really even see where the seam is.  So is it important that you pin all of those ruffles down!I used 1 1/2″ wide elastic.  I just got this at Wally World, but you can buy it at most fabric stores, by the yard.  I couldn’t decide on black or white, so I bought both!  The black one finally won out though!Measure your waist, and subtract about 2″.  Just put it around you and when it feels right, that is where you want to cut it!  You want it to be a little bit snug, because like I said earlier, it is better to be fitted with this fabric!
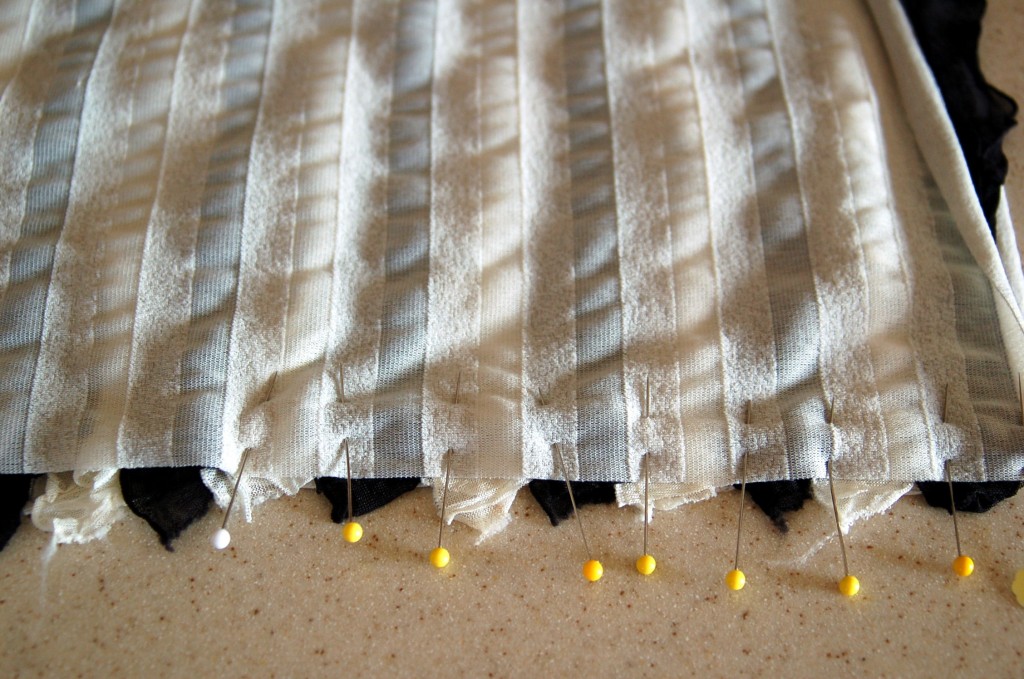
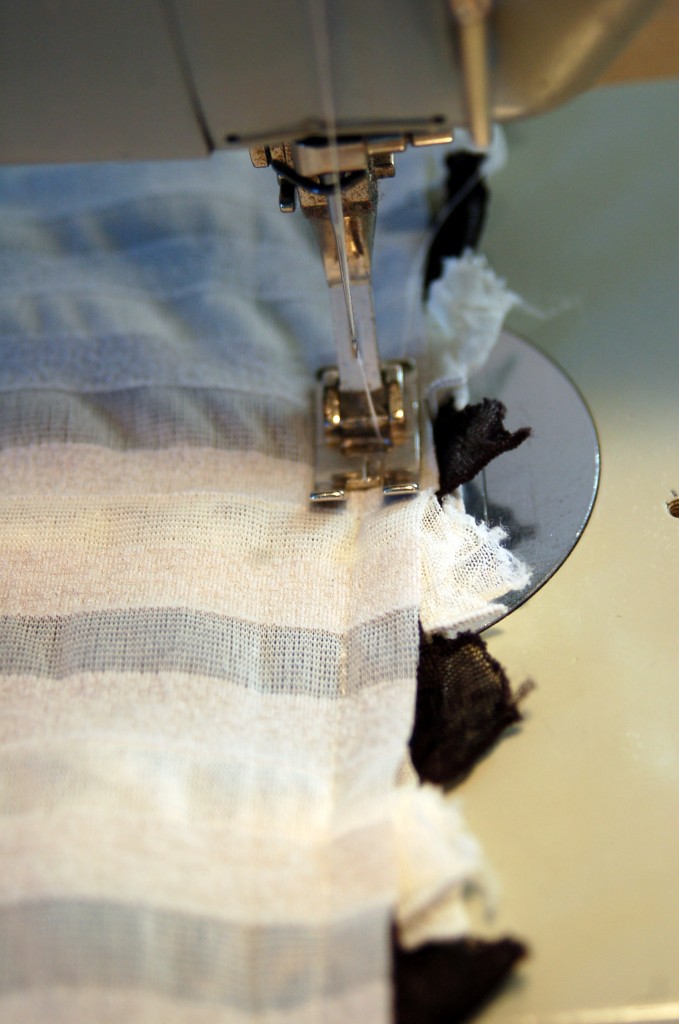
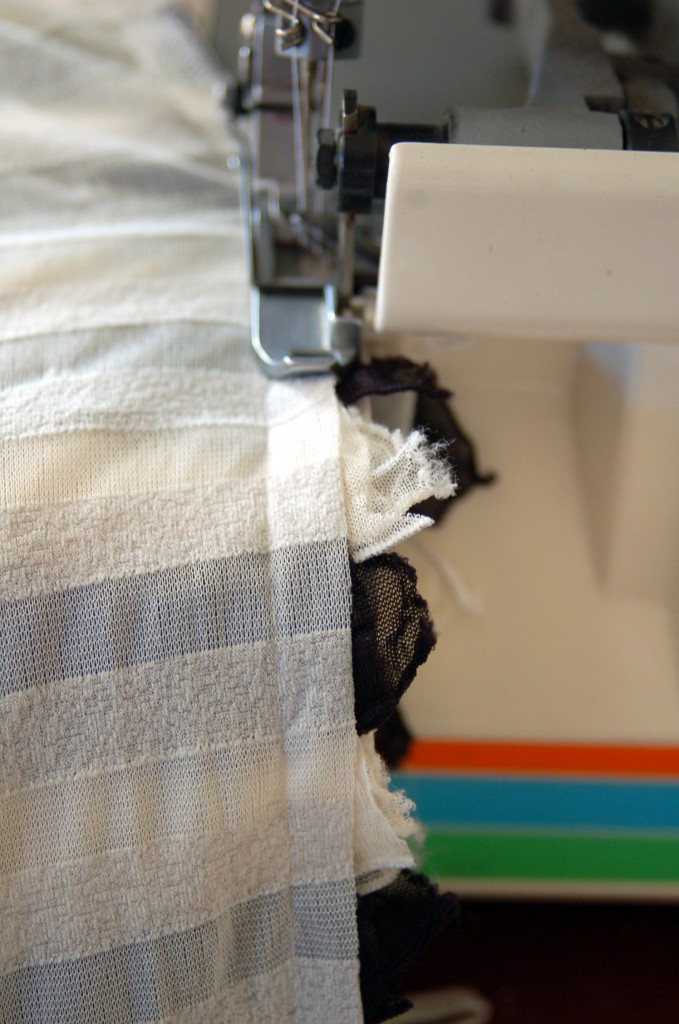
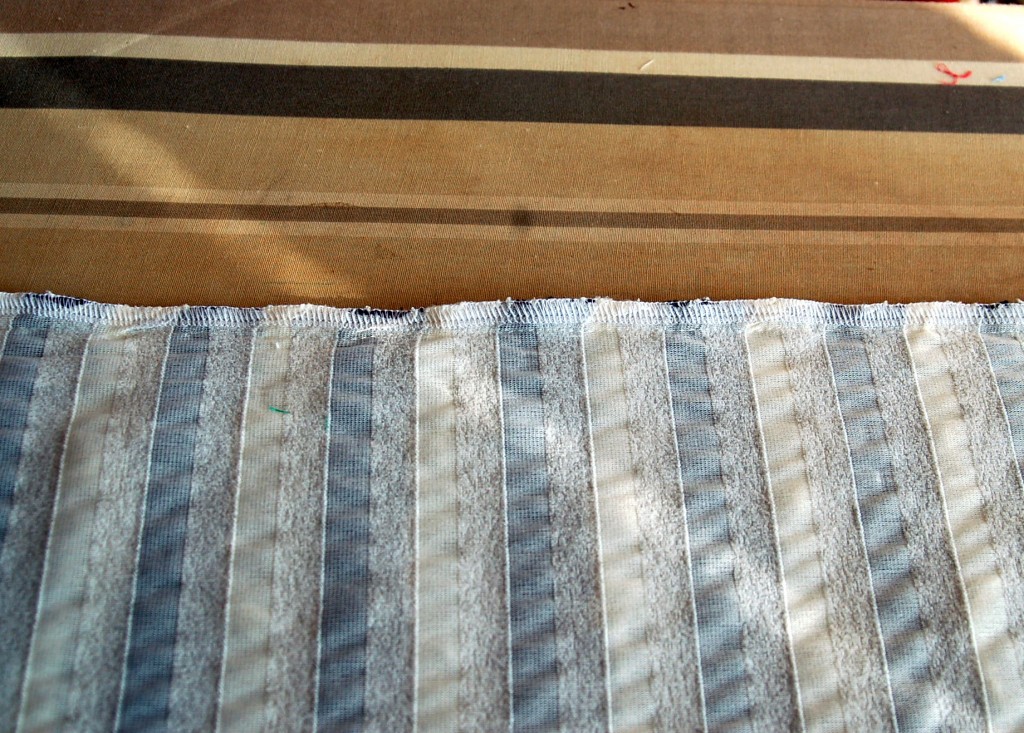
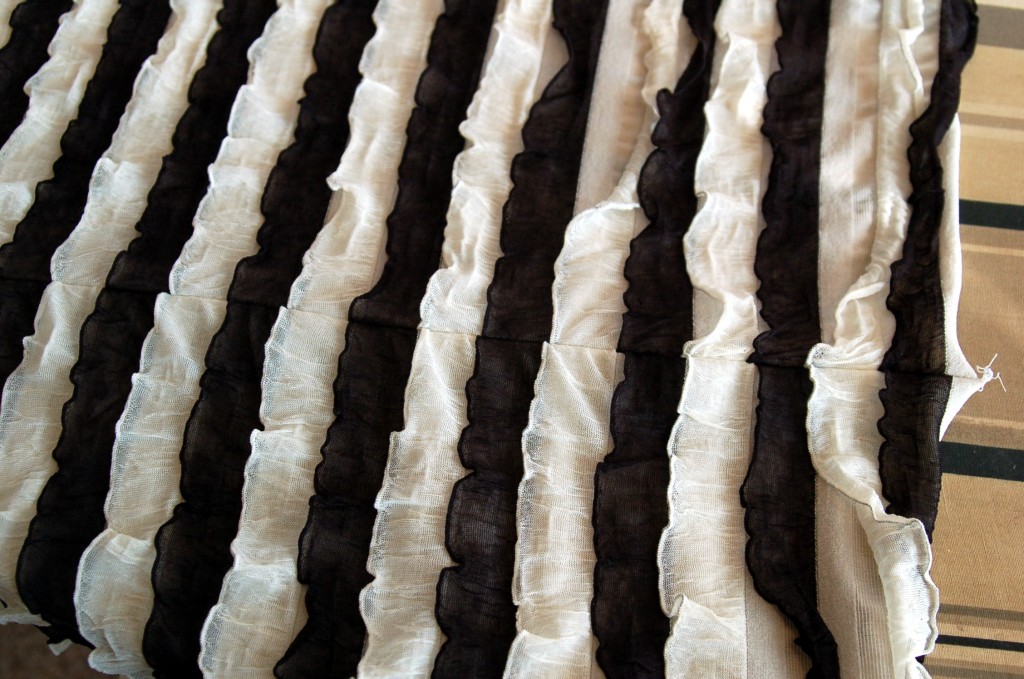
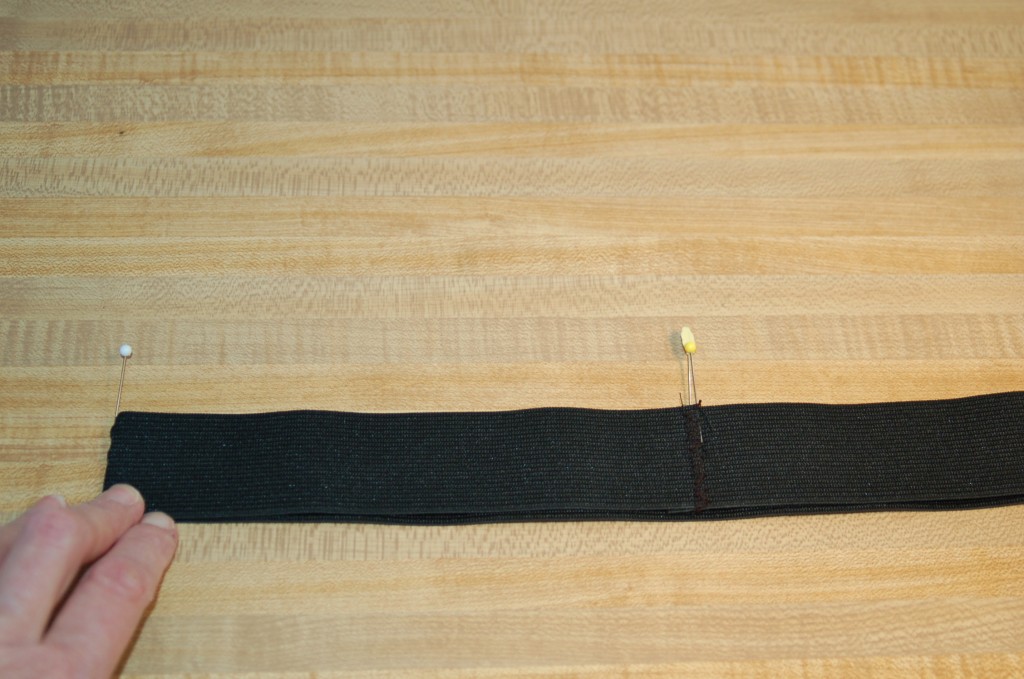
Sew the elastic into a  circle overlapping about 1/4″ and zigzag down the middle to secure it good.  I went down and back up once.

Then mark your circle into fourths, using pins.
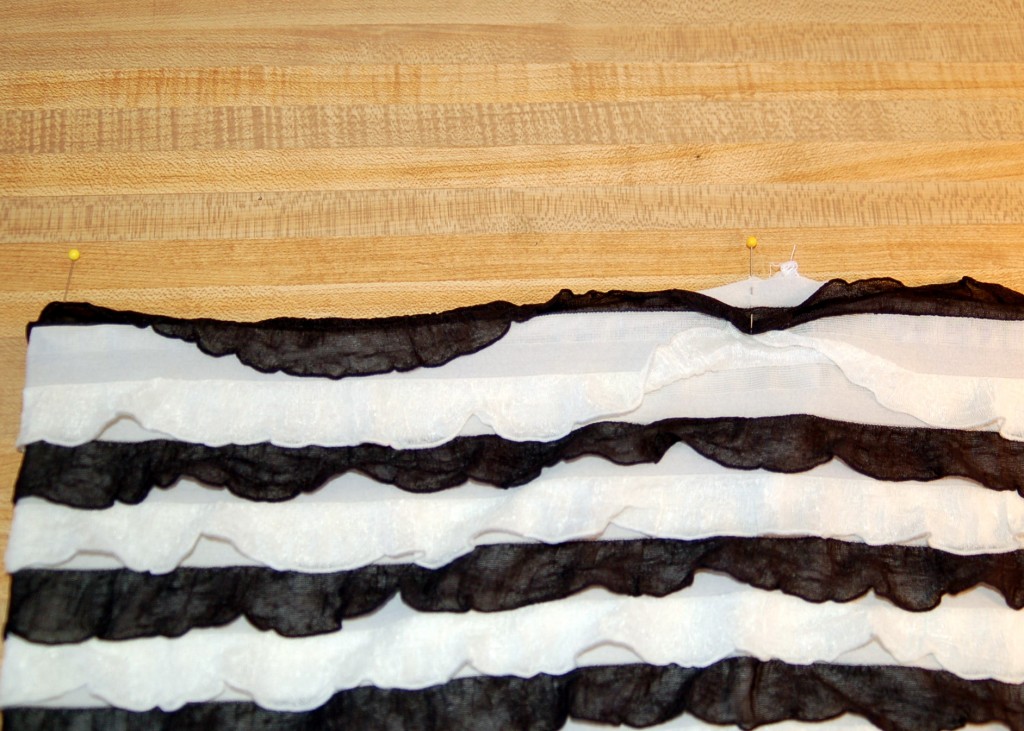
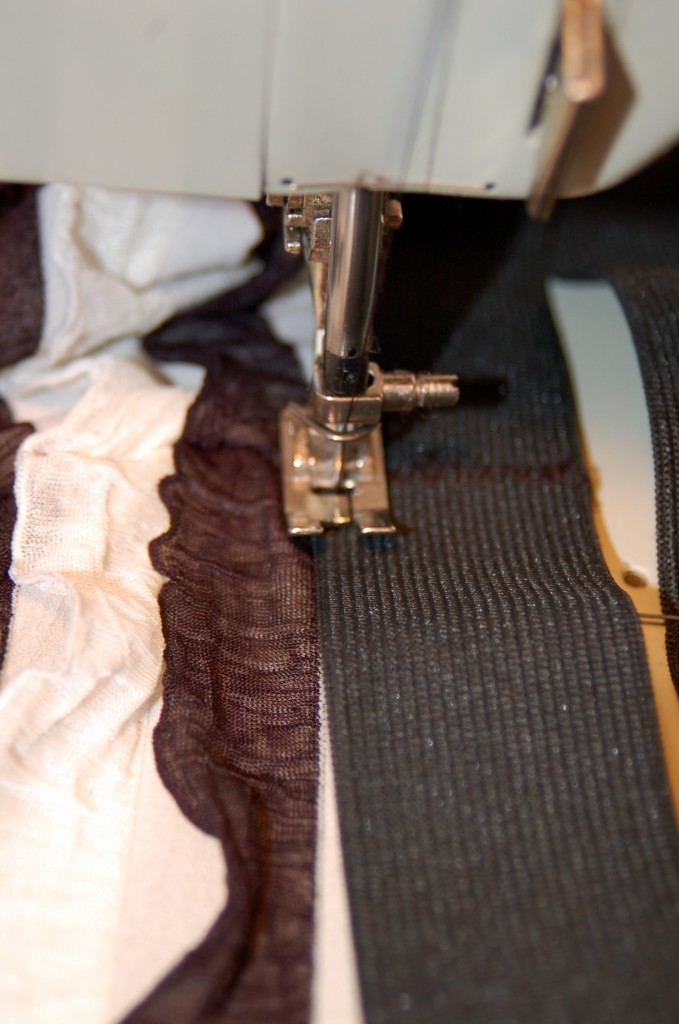
Do the same thing with your ruffle fabric.  Mark into fourths and mark with pins.There is a small amount of fabric between each of the ruffles and that is the part that you are going to sew on.  Matching pins and stretching the elastic to fit, sew the elastic to the right side of the skirt, using a narrow seam.This is what it will look like with the elastic all sewn on!  And guess what!  You are all done, because you do not need to hem this skirt, there is a ruffle on the bottom and it is knit fabric, so you are all done!!!
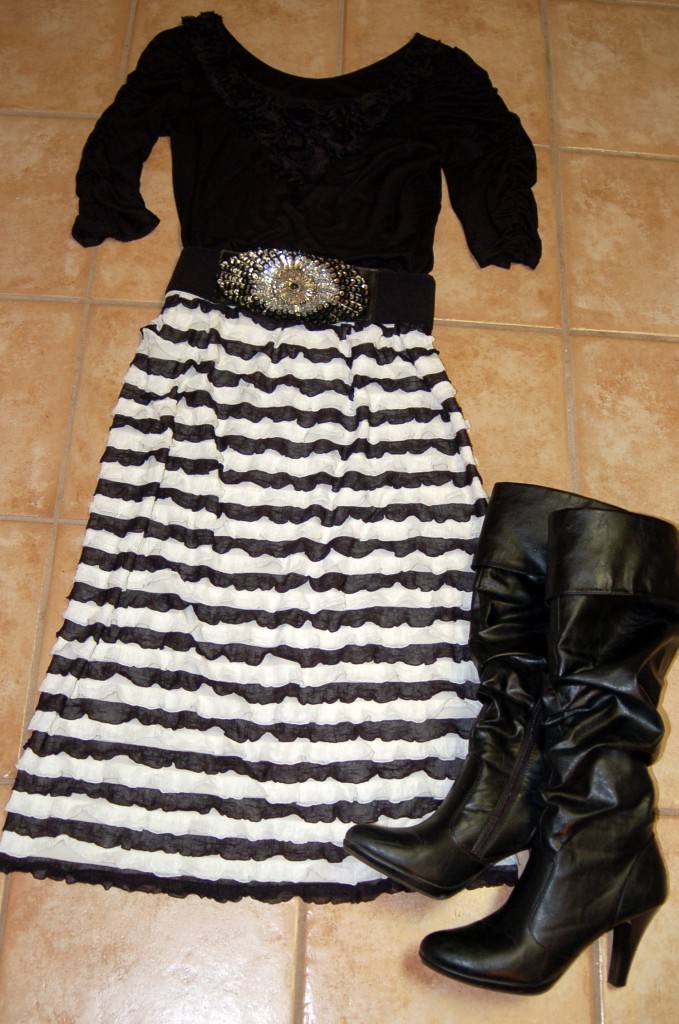
Pair this up with a cute knit top, a funky belt and some boots and you have a great Christmas outfit for your parties, a Christmas date, or for Church!
I hope that you can go and get some of this ruffled fabric and see how fun it is to sew!  I know that you will love it!

Happy Sewing!

Ruffled Christmas Pillow

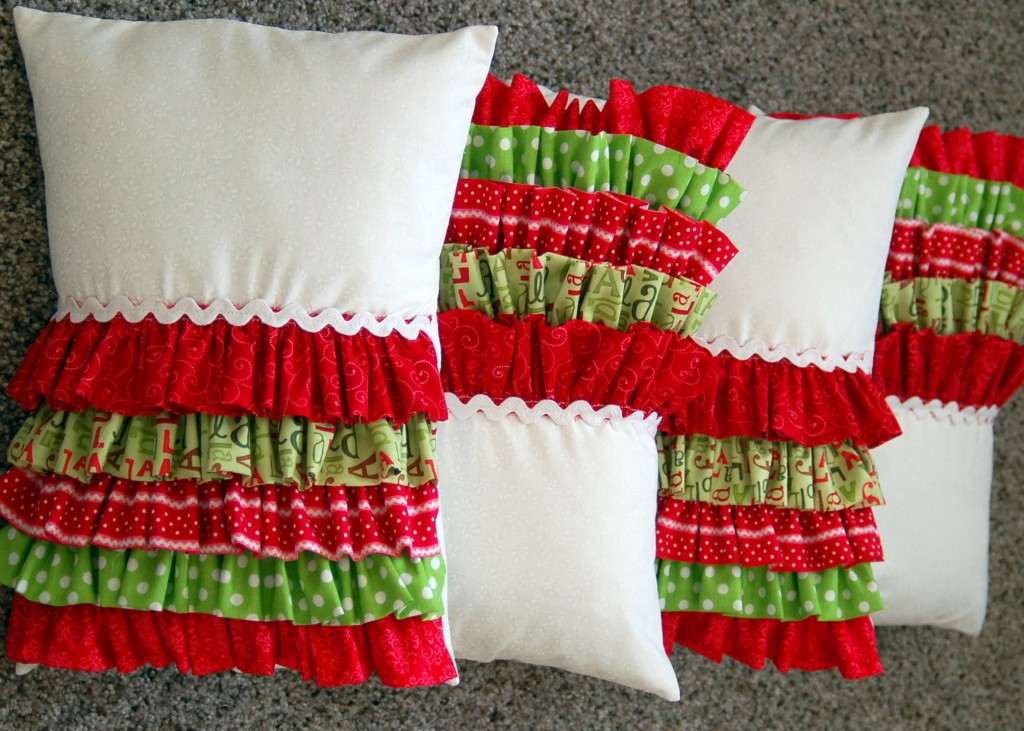
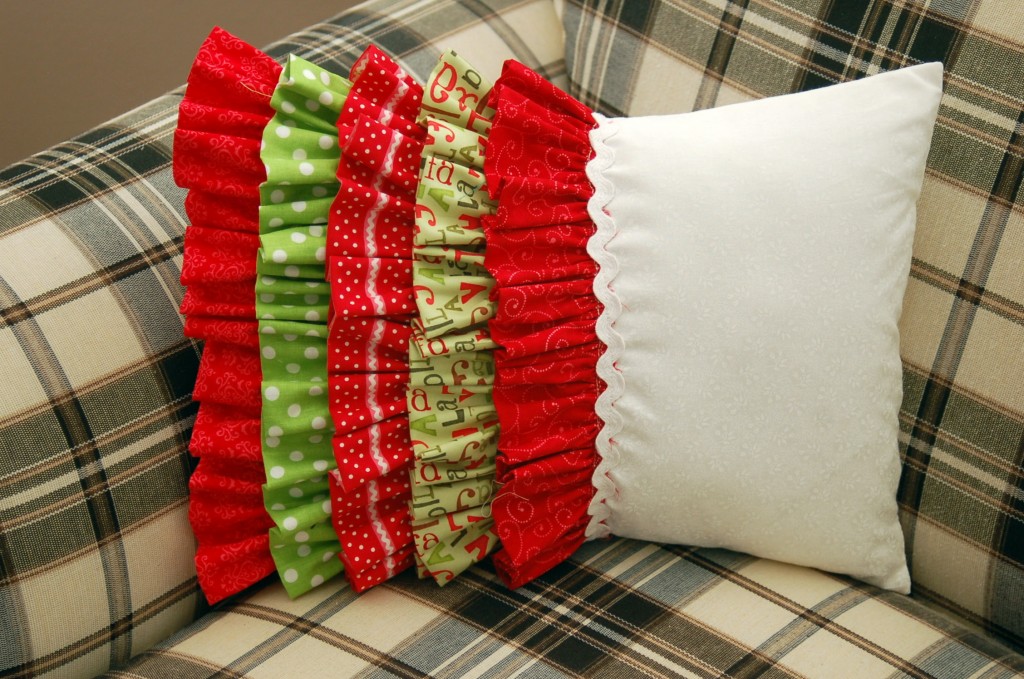
I made some of these pillows for gifts and I love the way that they turned out!  It took me a little more than a hour to sew each one, so it is definitely a project that you could do in an evening!

So, let’s make a pillow or two!

Supplies:

12″ x 16″ pillow form

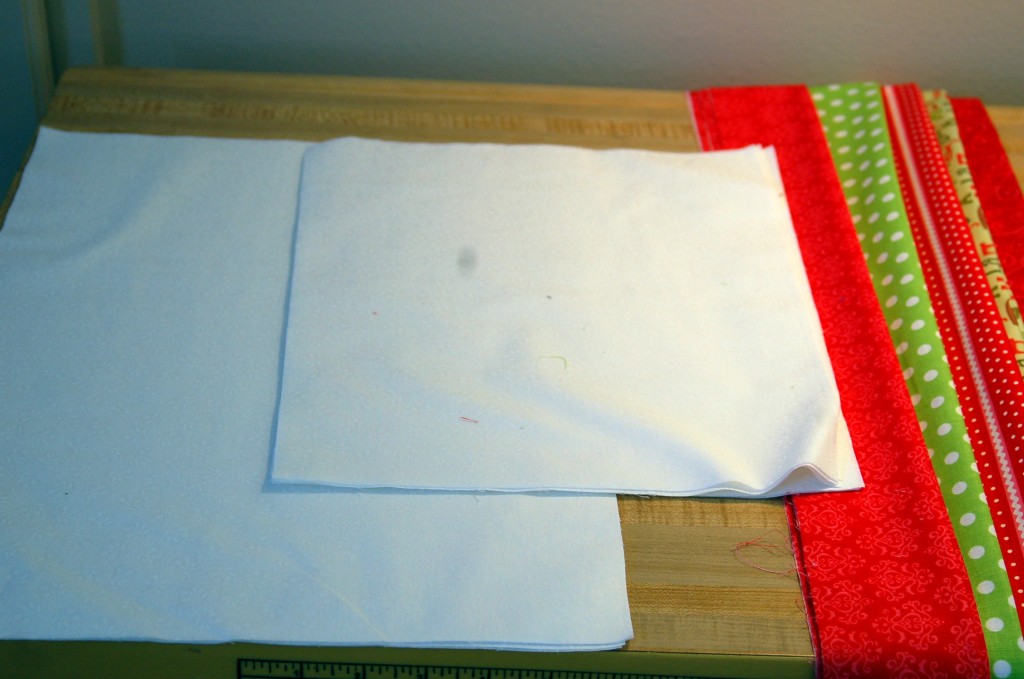
5″ x 32″ strips- you will need five different fabrics

1/2 yard fabric for pillow front and back (I used white on white fabric)
1/2 yard ric rac or ribbon

Cut one pillow front 12 1/2″ x 16 1/2″  rectangle, cut two 12 1/2″ x 10 1/2″ rectangles for the back.  Cut ruffles 5″ x 32″.  Fold ruffle strips in half lengthwise, wrong sides together and press.

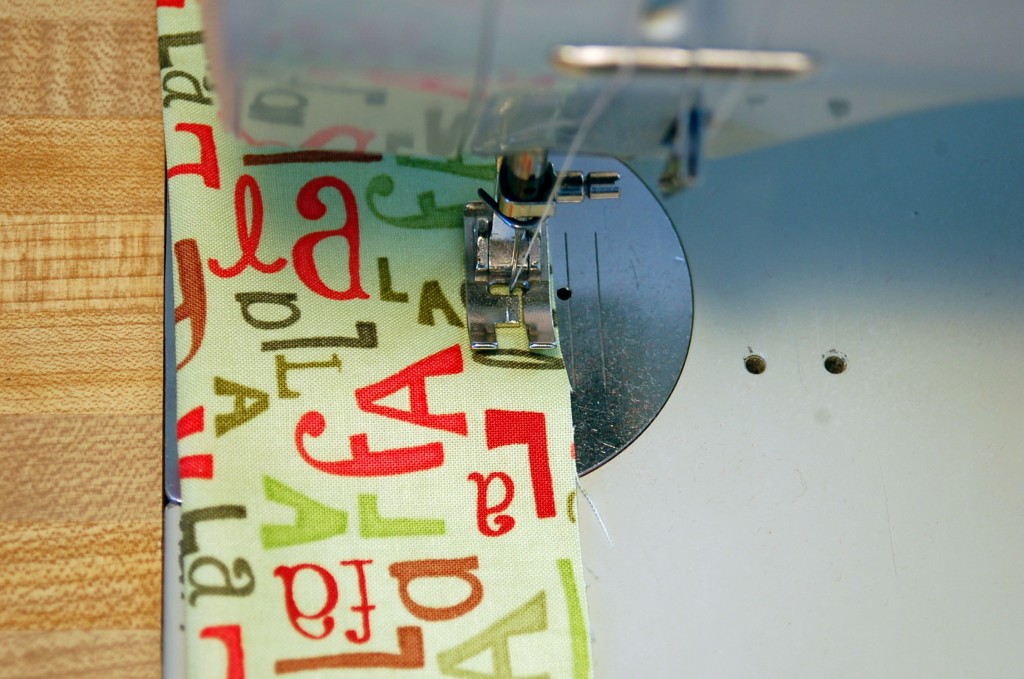
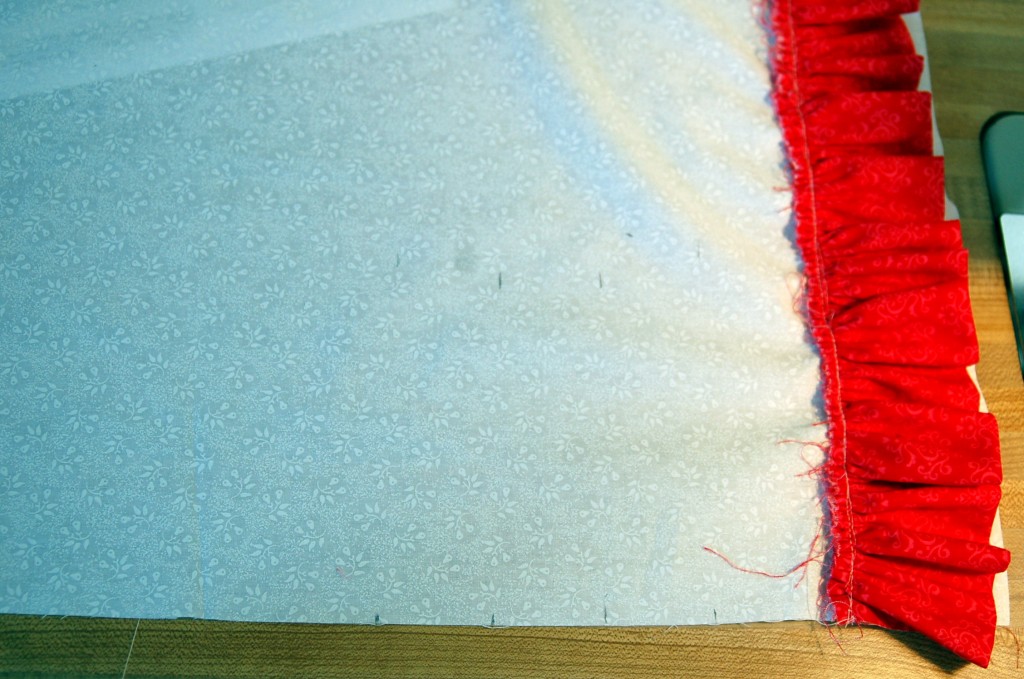
Sew a gathering stitch 1/4″ from edge along the long raw edge of the ruffles.  Pull gathers until ruffles measure about 12 1/2″ long.
Next, mark on your pillow front fabric:

1st row:  3″ from edge

2nd row: 4 1/2″ from edge

3rd row:  6″ from edge

4th row:  7 1/2 ” from edge

5th row: 9″ from edge

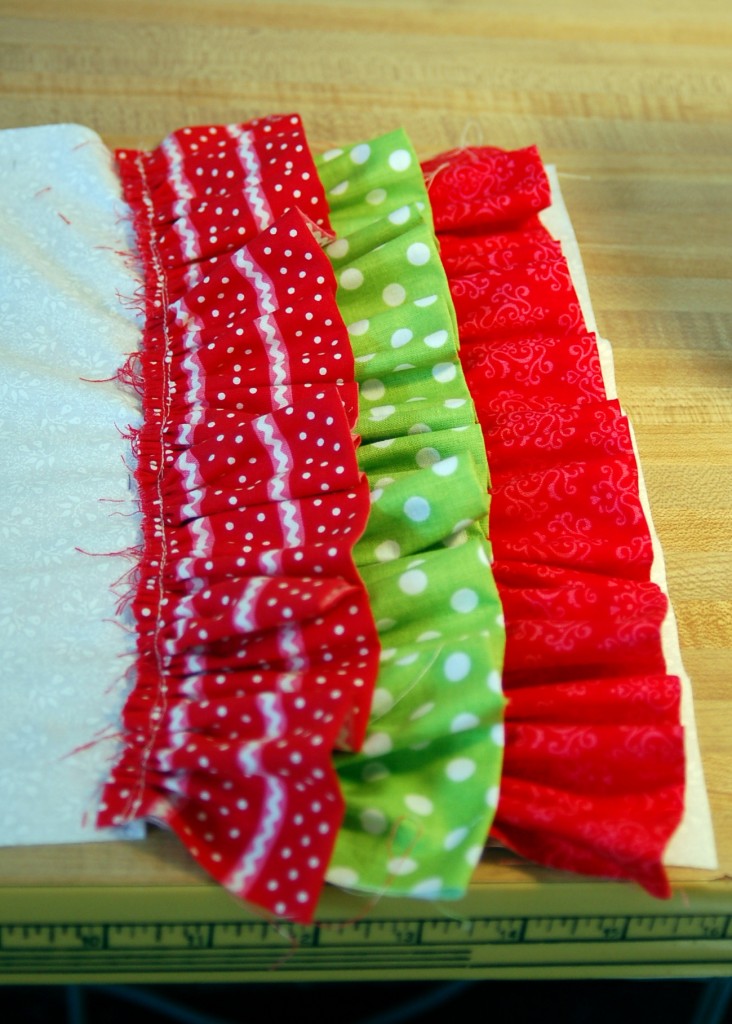
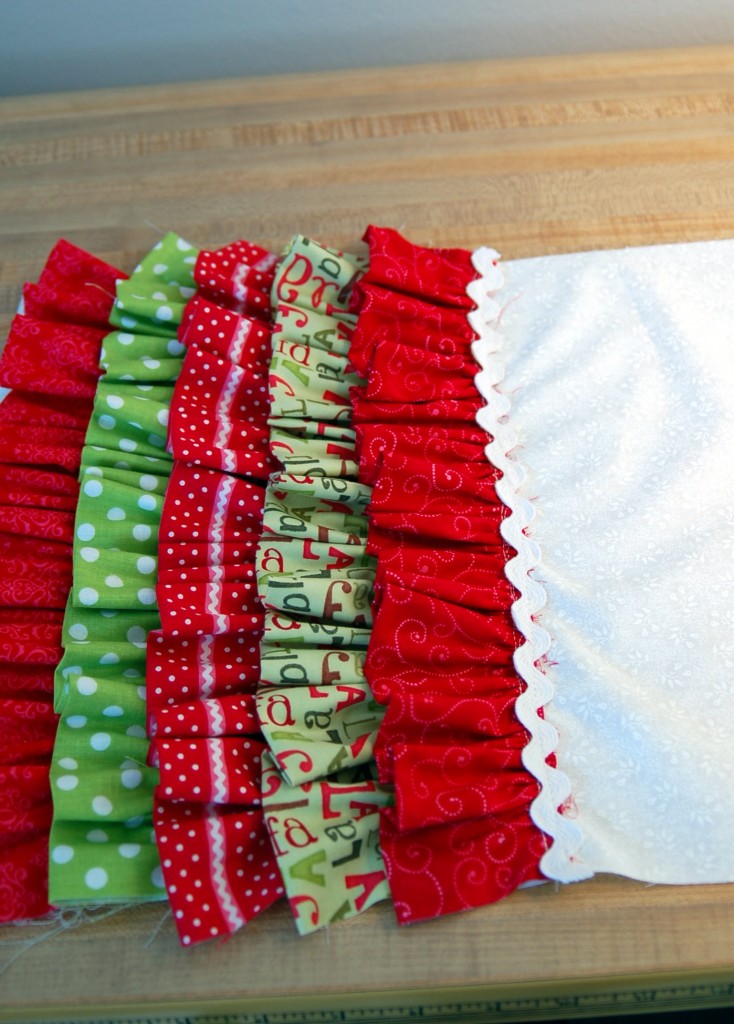
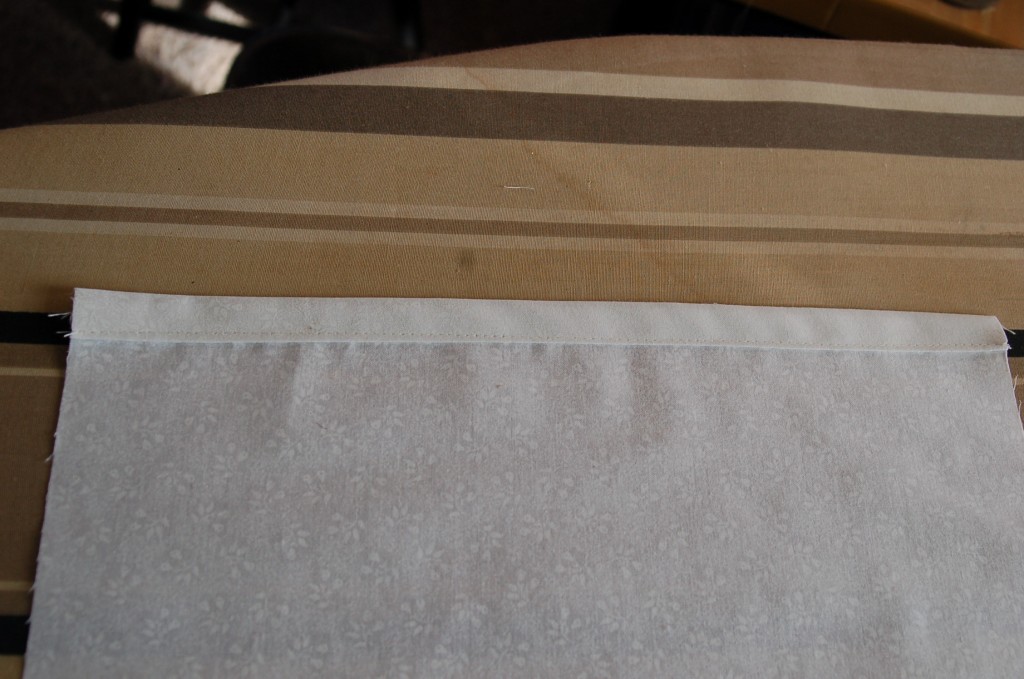
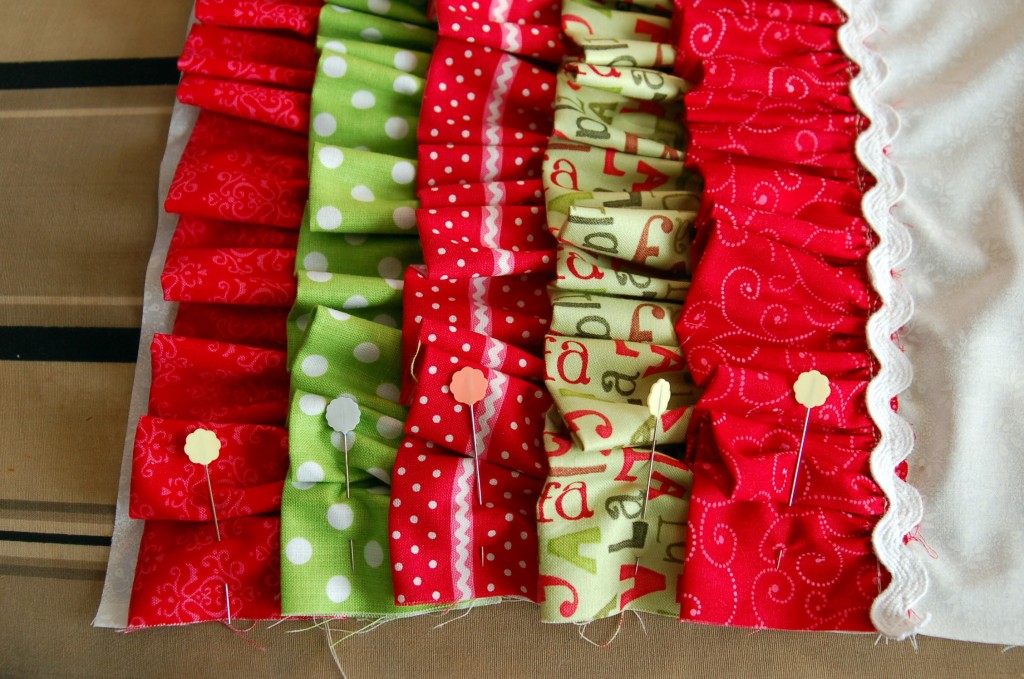
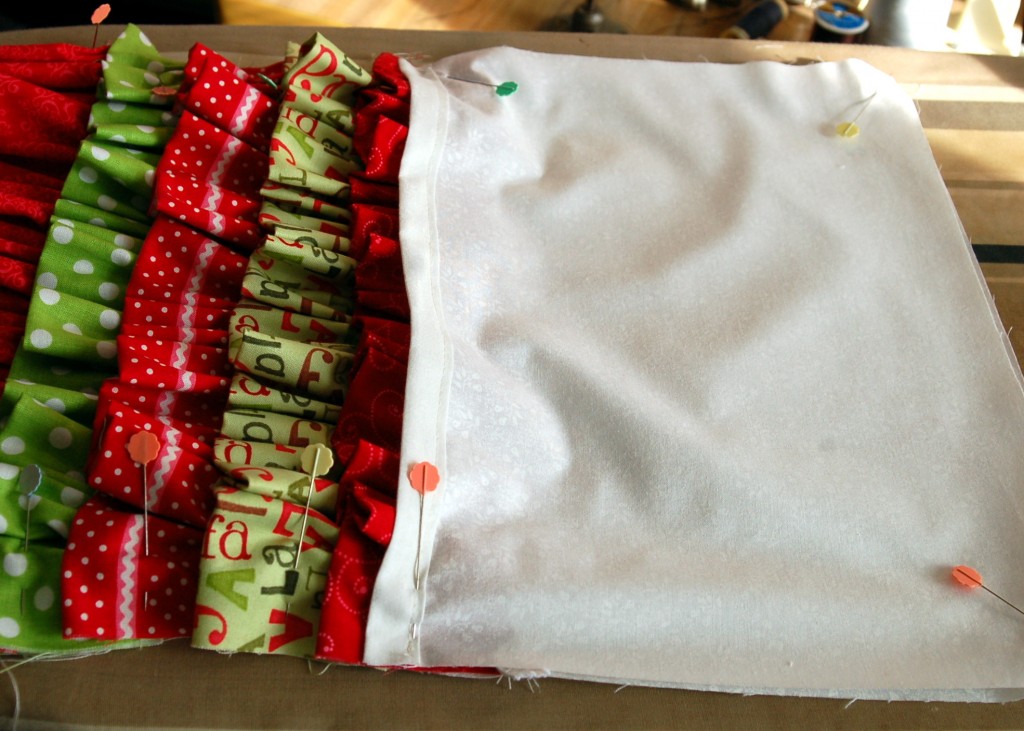
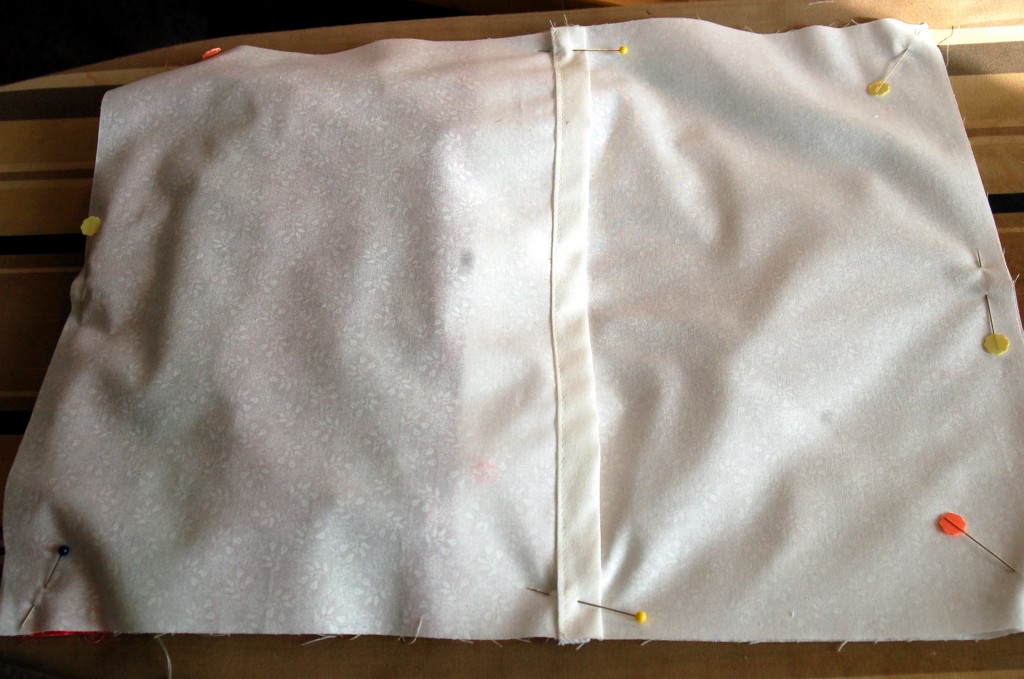
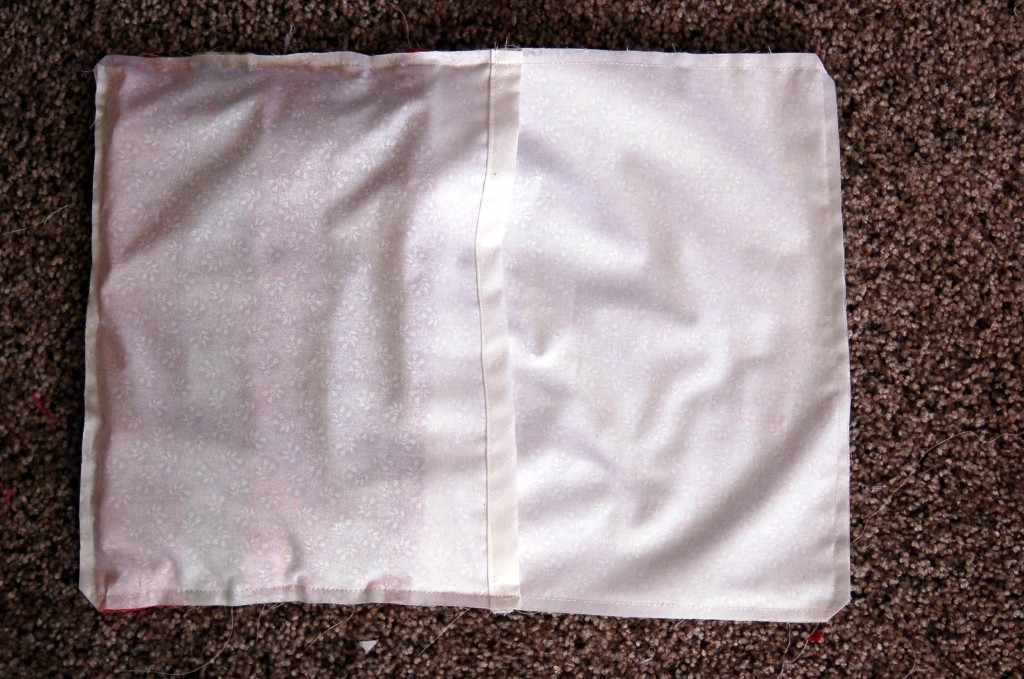
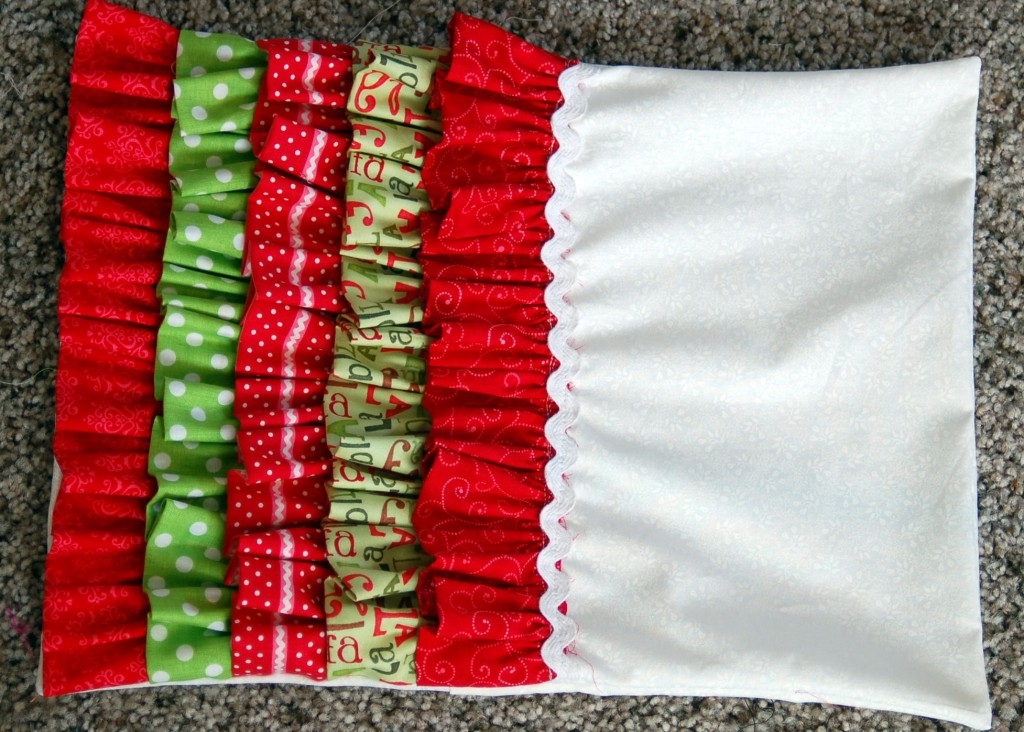
I marked on both edges and down the middle.  Beginning with the first ruffle, line up the raw edge with the marks that you made and stitch gathered ruffle to pillow .  Continue sewing on all five ruffles matching the raw edge with the marks you made.After all five ruffles are sewn on, you can cover the last seam with ric-rac or ribbon.  Or you could  just leave the raw edges. Next take the two back pieces and on the 12 1/2 ” side, fold down to the wrong side, 1/2″ and press and then fold down 1/2″ again and press.  Stitch close to the inside edge as shown.Pin all of your ruffles so that they are even with the edge of the pillow.Place one of the back pieces onto the pillow.  Right sides together and pin.Then pin the other side overlapping the first piece by about 2″Stitch all the way around the outside of the pillow and trim the corners.Turn through overlapped opening and gently poke corners.

Woot, Woot!

You have made a ruffled pillow!  All you have to do is insert the pillow form!Now all you need to do is find a nice warm blanket and a good book, or movie and you are set!

May you all find a moment to wrap up with a pillow, blanket and hot chocolate and remember the true meaning of Christmas & the real Reason for the Season!

Ruffled Tree Skirt

One down and two more parties to go this week!  Last night we had a really fun party that has become a tradition in our ward (congregation).  The ladies get together for a progressive dinner.  We have been doing it for about 6 years.  I live in a cul-de-sac and so for the last couple of years we have done it all in our cul-de-sac, because then we can just walk from home to home.  It is so fun.  Everyone started at my house for the appetizers, then we walked across the road for a wonderful meal and then back across the street, to my friend, Susan’s,  for the best part of all…desserts!  It was a really fun evening and we had about 50 people there!

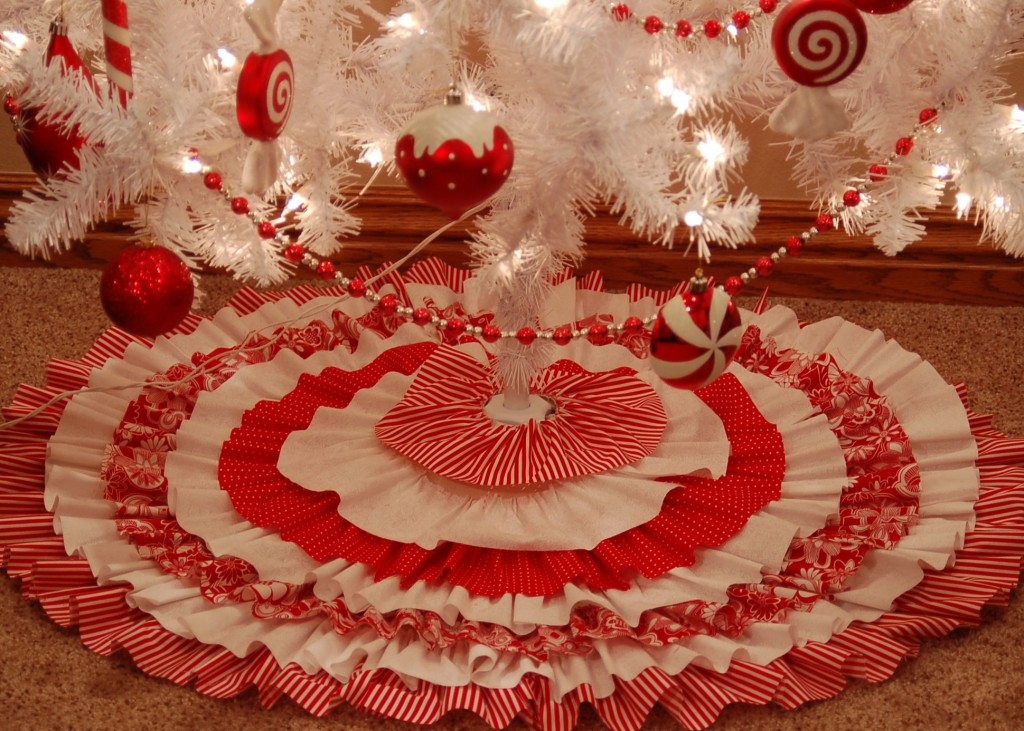
So needless to say, I was cleaning my house all day and getting the final touches on my decorating, before the party started.  One of the projects that I did was this cute ruffled tree skirt.  It was so fun and I completed it in a couple of hours!  It has NO SEWING, can you believe it!  It is all hot glued!  (I know me and the glue gun sometimes don’t get along, but I did not burn myself once this time!)

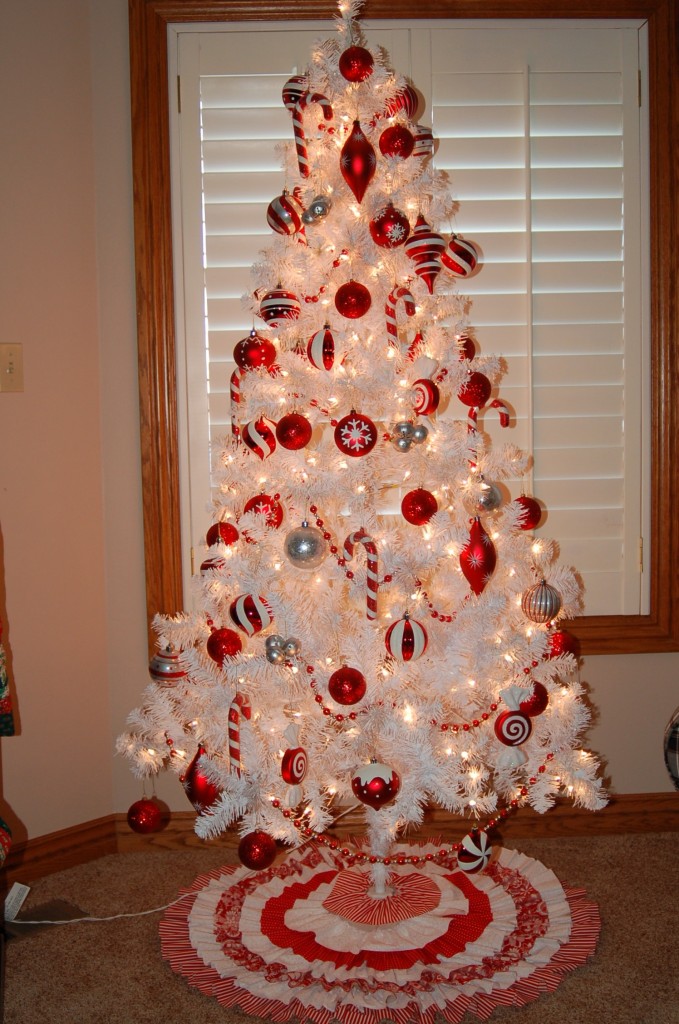
This little tree is in my bedroom and it goes perfectly with a bedspread that I made. 

I am so tickled with this tree skirt and I love all the ruffles!  (Imagine that!)  If you would like to try to make one of these go to Studio 5 for a great tutorial.  I used a small piece of dowel to stick my ruffles down with and that is why I did not get any hot glue burns, in the video, she uses some kind of a glove, that would work too, but I like the dowel, because then my hands were more free.

I will show you a couple of more projects that I did tomorrow, but for now it is off to do some shopping and to get ready for the next two parties! (But at least now my house is clean!)

Framed Ornaments

My daughter and I did another craft together!  I think that is a record for us to do two projects in about 1 weeks time!

My daughter found the idea on Pinterest.  If you have never looked at Pinterest, you need to go there.  Just click here and you can follow me!

This is a cute, fun, easy craft that you can complete in couple of hours!

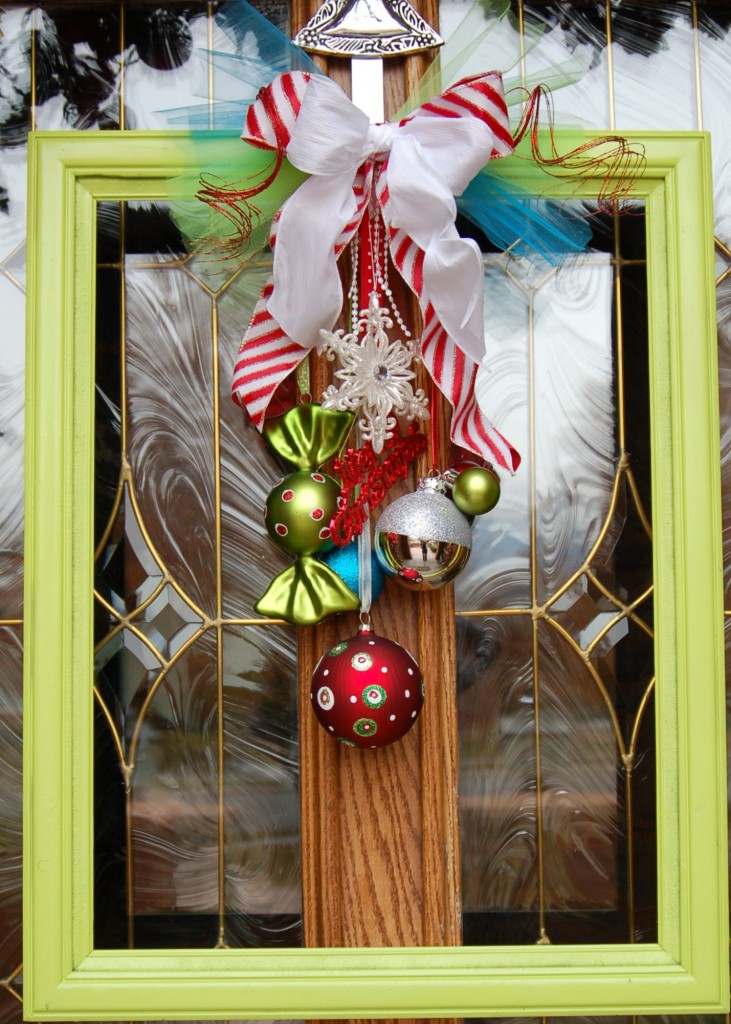
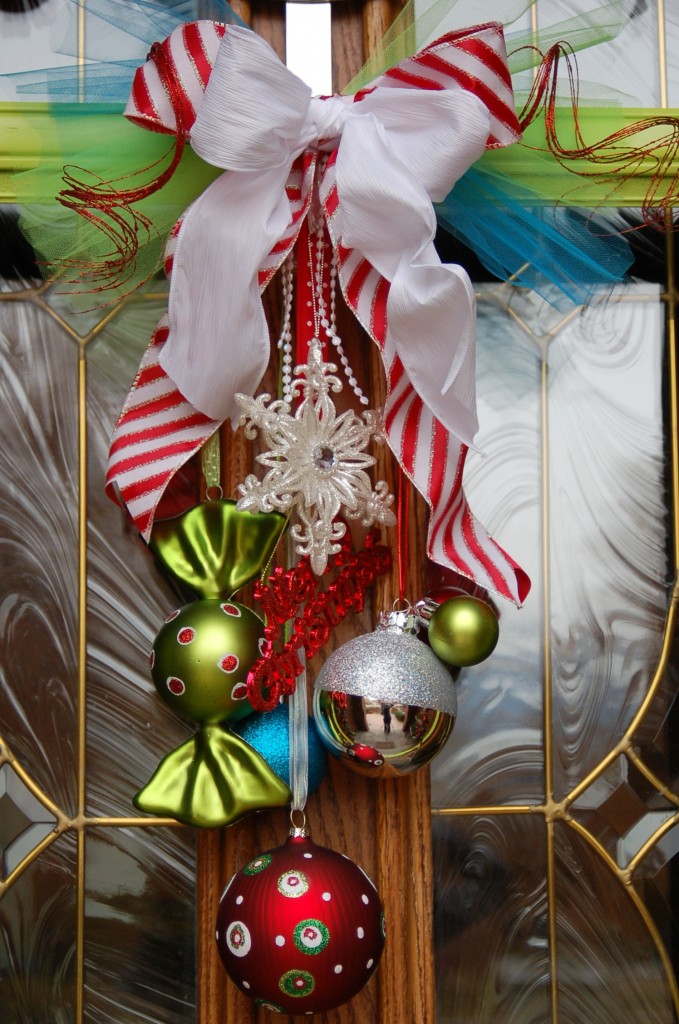
It is framed Christmas ornaments!

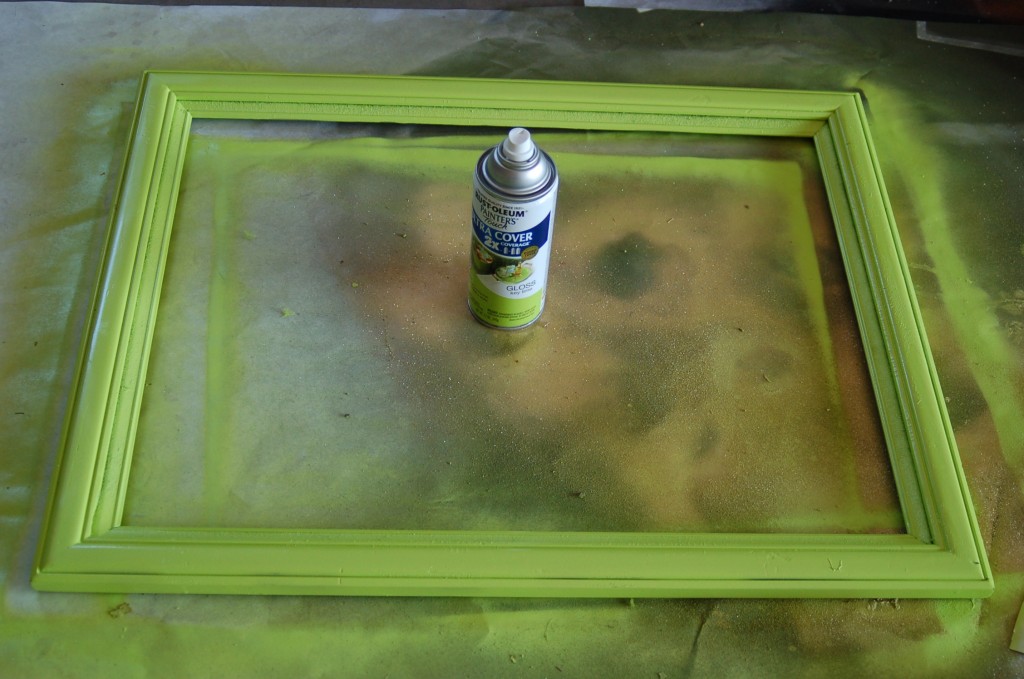
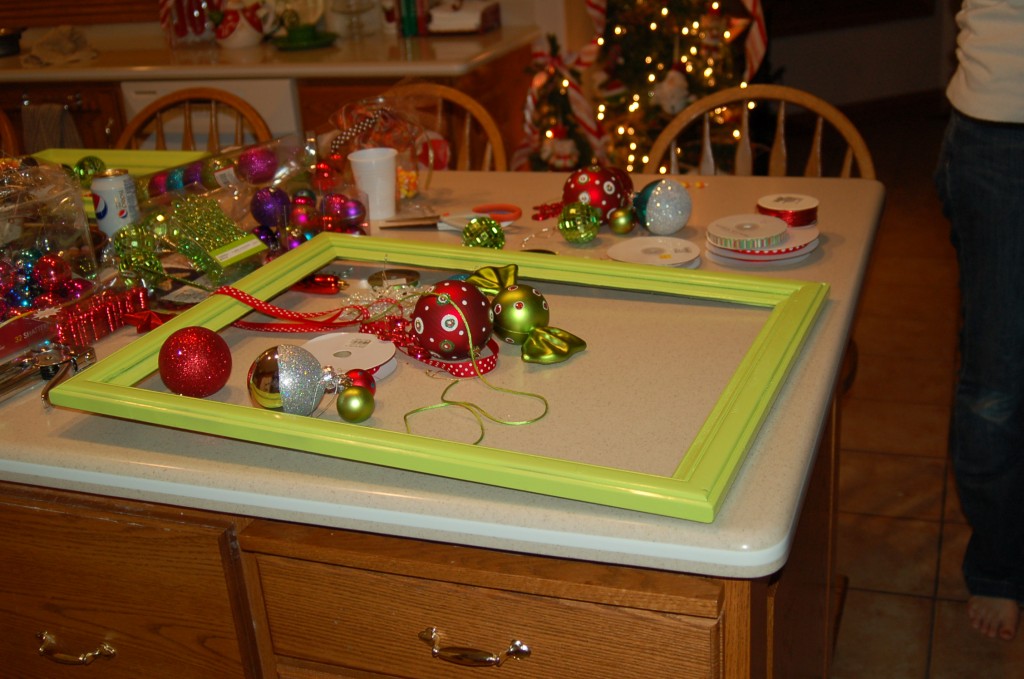
First of all, you need to start with a frame.  This is one that I picked up at the DI and I took the picture and glass out and spray painted it lime green. (This frame was a little bit bigger than I would have liked, but it was the only one they had that would work!  The thicker the frame, the better!)

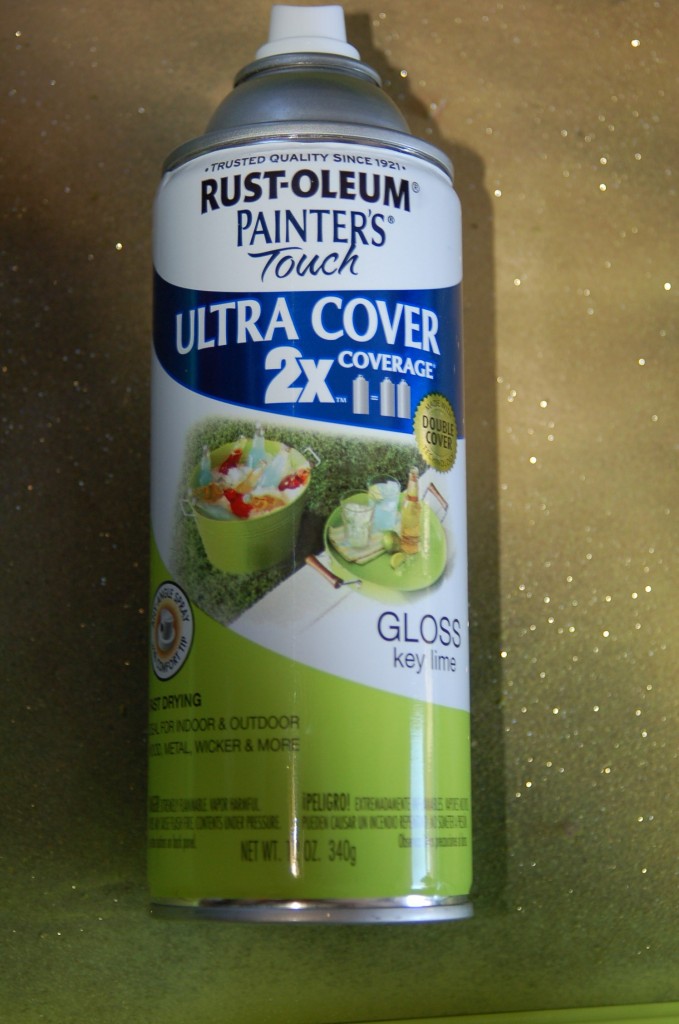
I used this Rust-oleum ultra cover, 2x paint.  I love this stuff!  It really covers well and I only have to do a couple of coats!  This color is Key Lime Green!

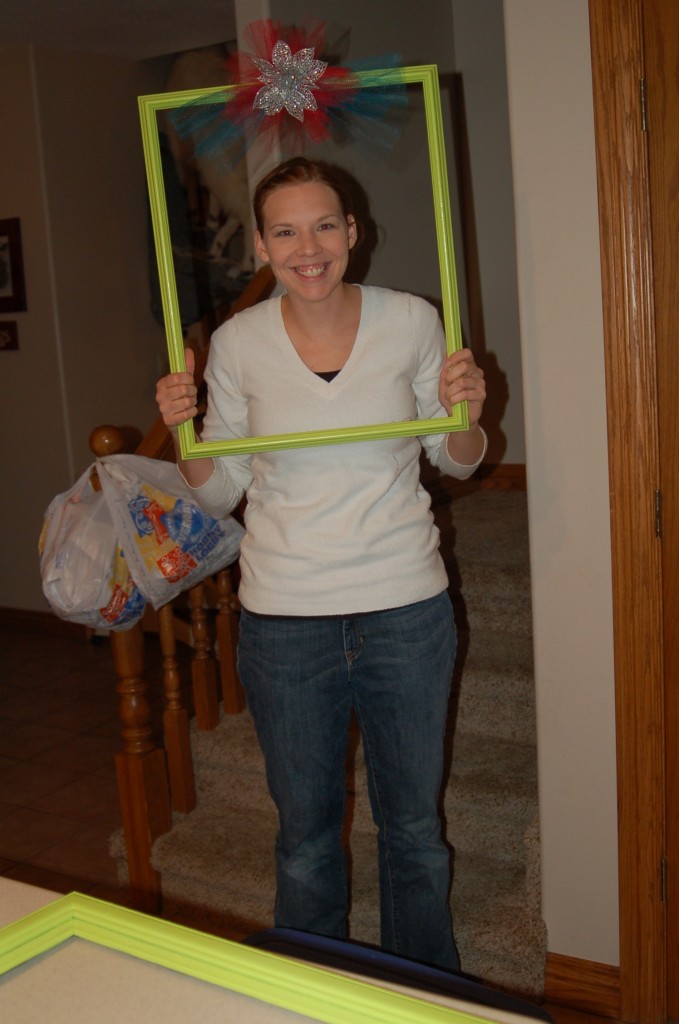
After painting the frame gather all your supplies together.  We hung each of the ornaments on a ribbon at varying lengths.  We then just used a staple gun and stapled the ribbons to the back of the frame.This is the bow that my daughter was experimenting with, but then changed the silver flower to a big candy cane striped ribbon.  I told her that I needed a picture of the frame and this is what I got!  Just a goof off!  (do you love the plastic bags hanging on the stair railing?  This is the catch-all area of my house!)

We added a big bow, tulle, curly cues, and beads to the front of the frame.I think that it looks quite festive and I am starting to get the Christmas Spirit!  I have most of my decorating done, and it is a good thing, because this week a lot of the parties will start at our house!What are some of your favorite Christmas decorations?  Have you had them for a long time and are they priceless, or are you getting/making a lot of new, updated things?  I have a couple more projects that I am working on and hopefully I will be able to get them done this week, before the parties!  I will share when they get finished.

Coffee Filter Wreath

I have a fun project, if you need one for this weekend!  It is fairly inexpensive, depending on what flowers and ribbon you use and you don’t have to think very hard to make it, so put on a good movie or in our household a good ballgame!  We watched the Utah football game…go Utes!  My daughter and I got together this weekend to make these.  It was so  much fun and we have not really done very many craft nights since she started working, so we were way overdue for another one!

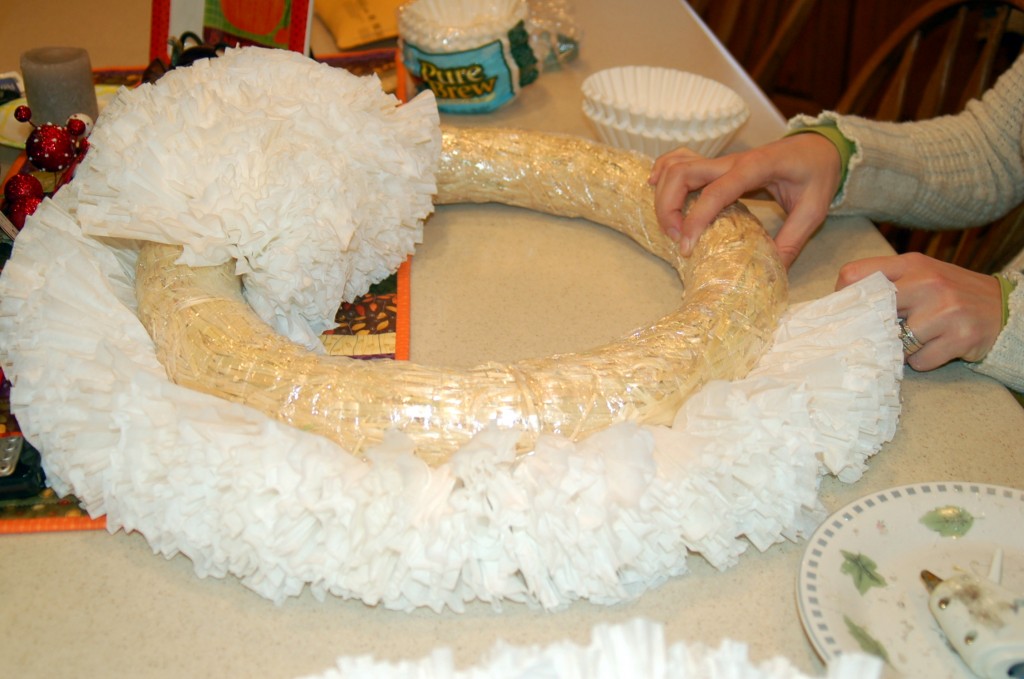
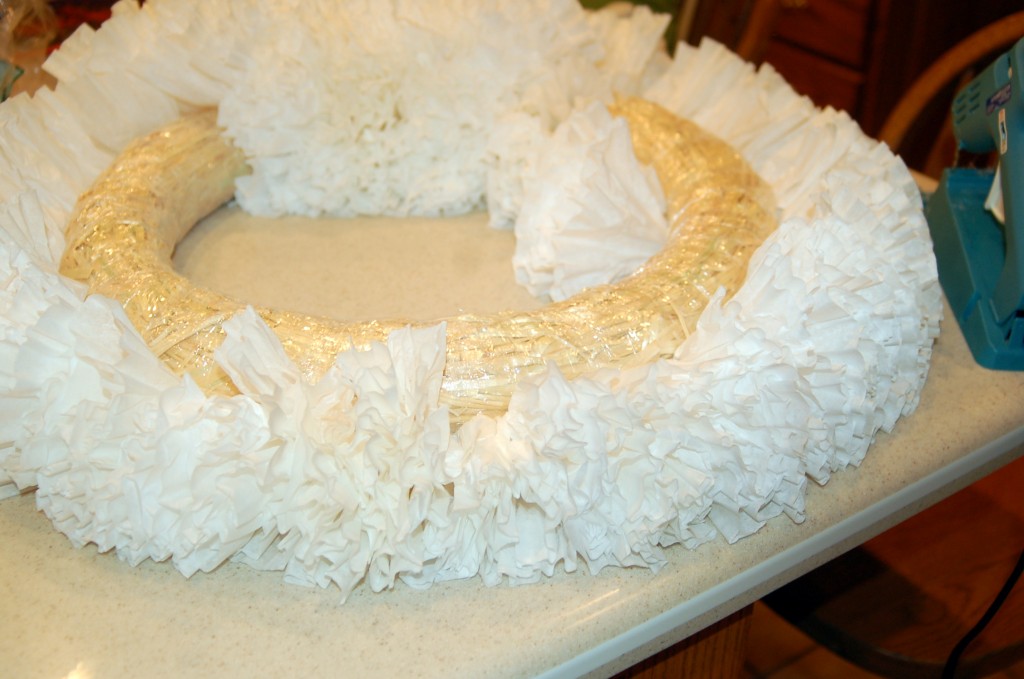
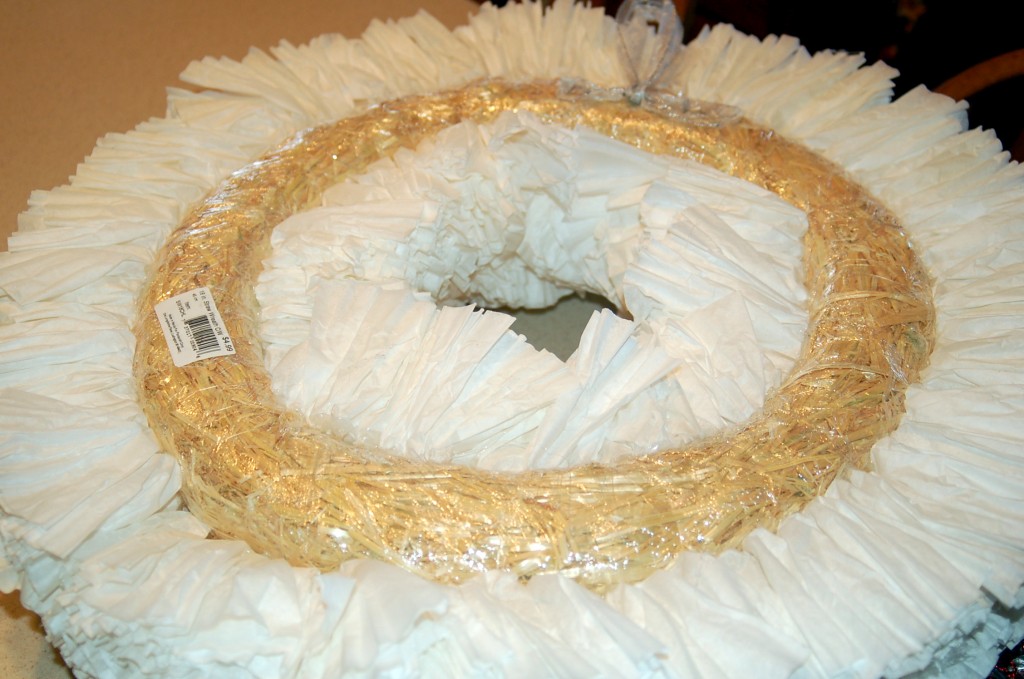
You start with an 18″ straw wreath, and LOTS of coffee filters.  I used about 400 coffee filters.  Mine is probably a little too full, you could space your filters out a little bit more and only use about 350 coffee filters.  My daughter got really carried away and used over 600 filters on hers, but once she started putting them so close together, she had to finish it that way. It still looked great, but you really don’t need that many.  The cost of the straw wreath was $5 at Hobby Lobby and all florals were half off  that day, so we scored with the wreath only costing $2.50!  The coffee filters were $1.25 per package of 200 ( I used two packages),so another $2.50 and my wreath only cost $5.00 plus whatever flowers and embellishments that you use!

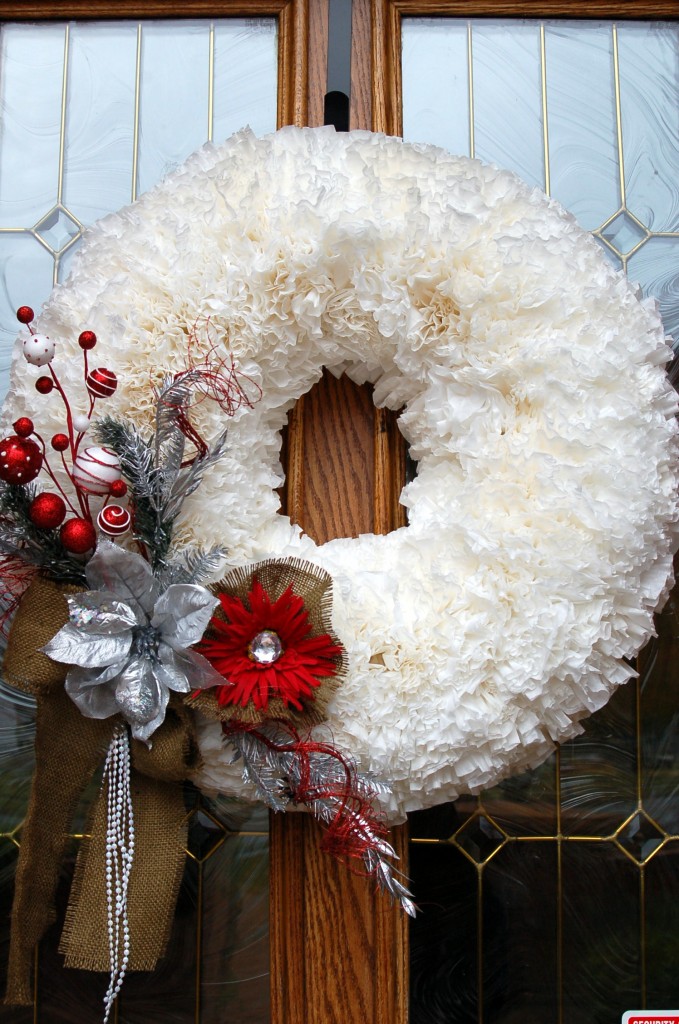
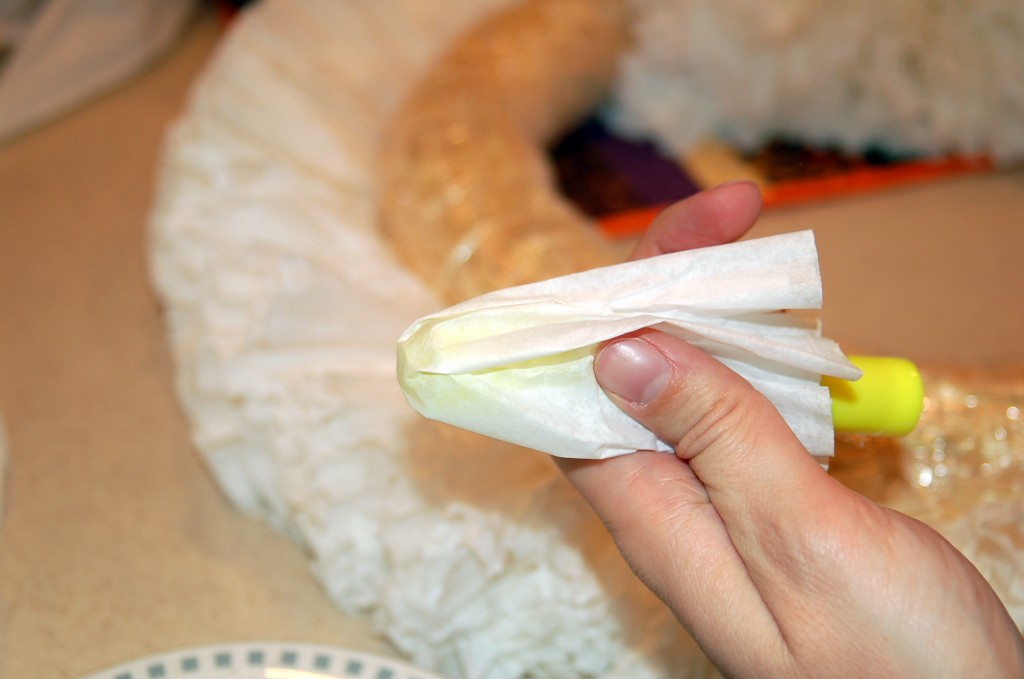
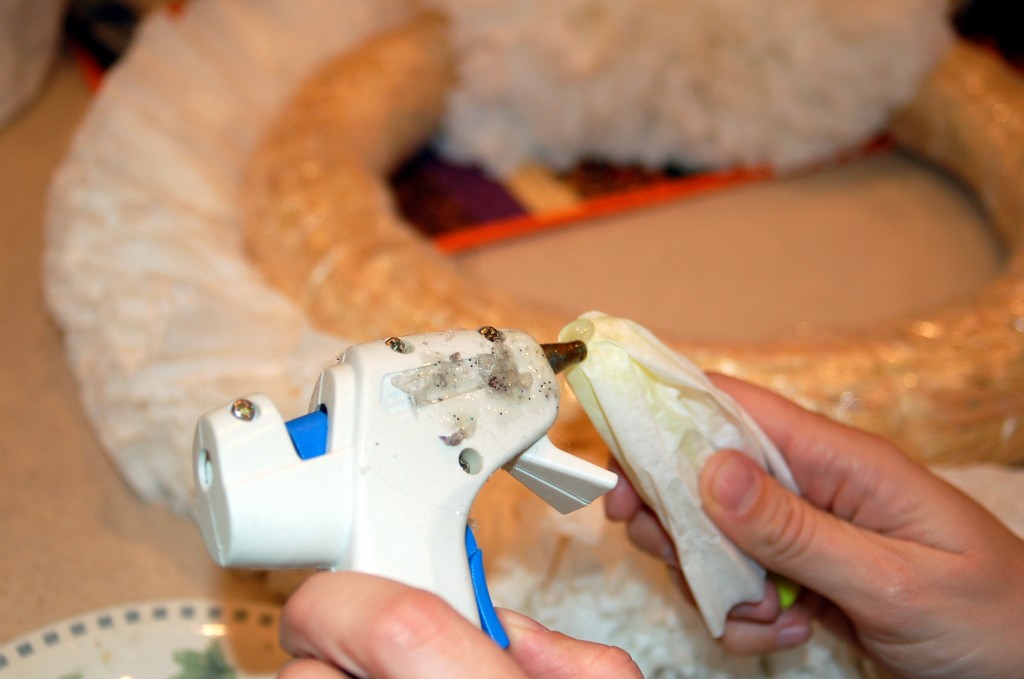
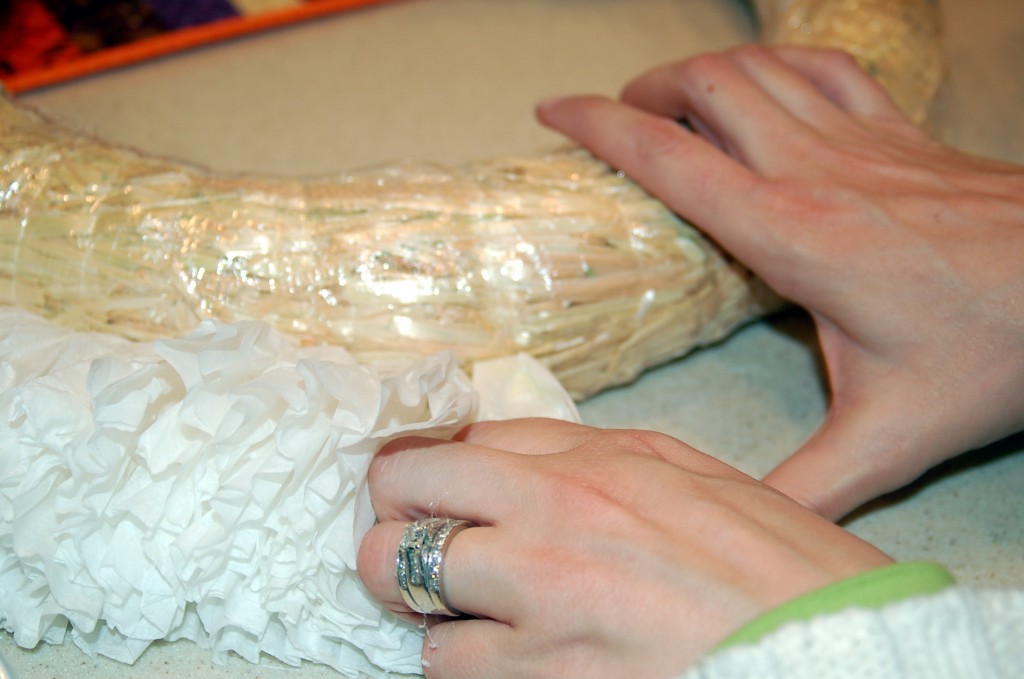
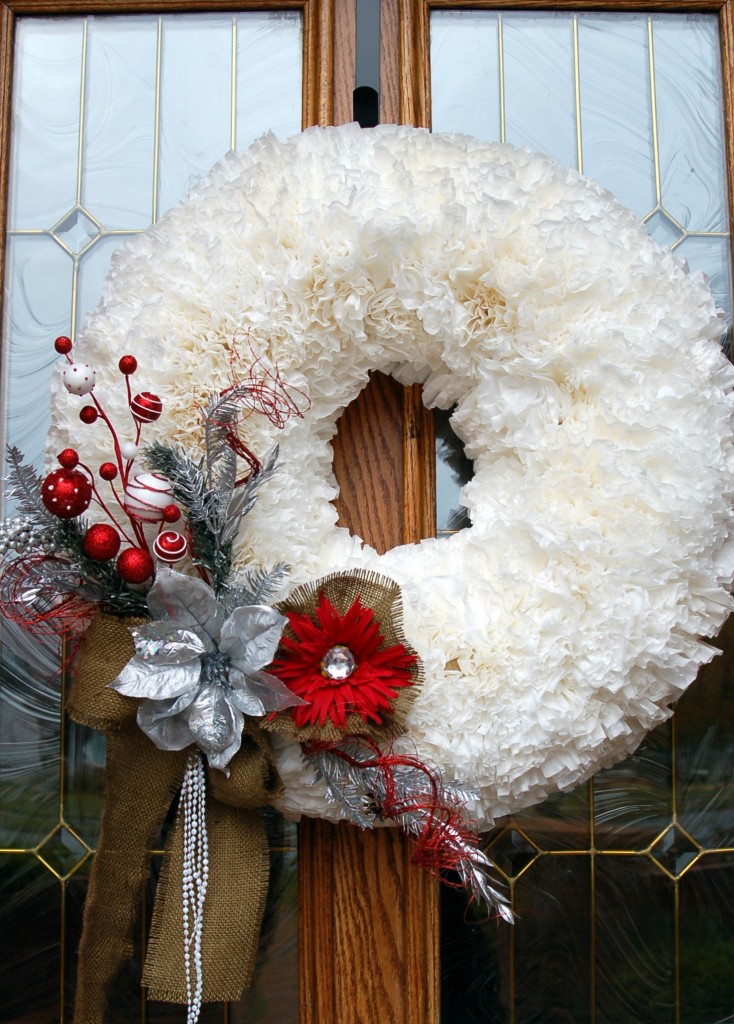
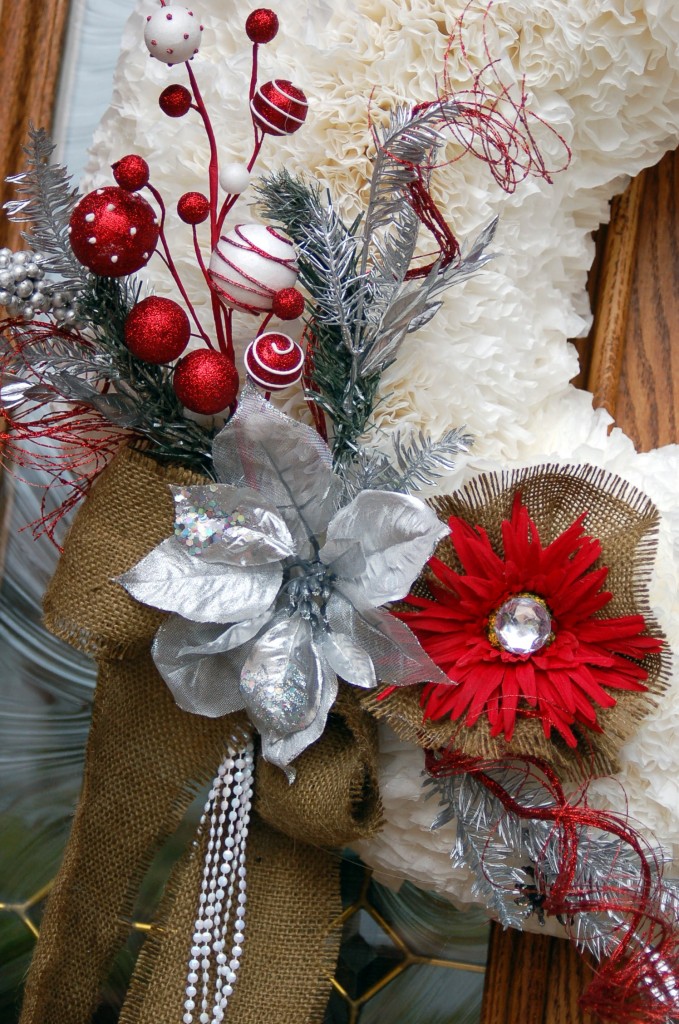
Start around the outside first, and go all the way around.  We just started putting them on and soon learned that it was better to go all the way around the outside first.Take a coffee filter and center it around a marker like this.  This keeps you from burning your fingers with the hot glue.  (I however, was struggling even with the marker and managed to burn myself 3 times!  It takes talent…I know!)Then add a dab of hot glue to the end.  (You gotta love the glue gun..it is well loved!)Then hold it onto the wreath for a few seconds to make sure it is secure.  We left the plastic wrap on the straw wreath and it worked just fine and we did not have the mess of the straw all over!Go all the way around the outside.  Make sure that you do not go too far down on the side, so that the wreath will lay flat against  your door or wall.  After you do the outside, then go around the inside center and then just start filling in all of the middle.  Like a already said, we probably put our filters a little closer together than we should of.  If you space them out a little more I think that it would be a little more rufflely!  (Is that a word?)This is what it looks like from the back!  I hot glued and stapled a ribbon to the top to hang it with.  I have seen this wreath with just the coffee filters and no embellishments and it is beautiful that way too!I added some silver sprigs, a silver poinsettia, a red flower backed with a burlap ruffle, some red sparkly curls, a sprig with red and white balls, and a burlap bow and white beads.

Here is a close up of the embellishments.

 I am thinking that these would be cute for Valentines day and spray paint the wreath red after you get the filters on!  Or how about green for St. Paddy’s Day?  They really are fun to put together because you can just sit and make them without to much thought and some days no thinking is a good thing!

I linked this to  I heart nap time, and My Crazy Beautiful Life

Thanksgiving Table Centerpiece

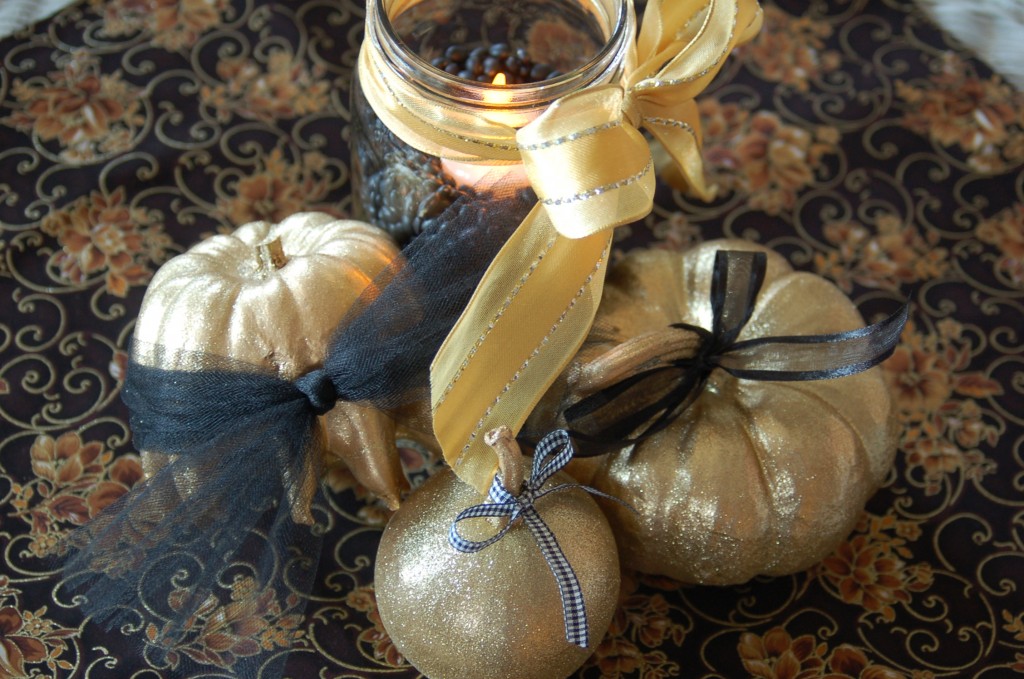
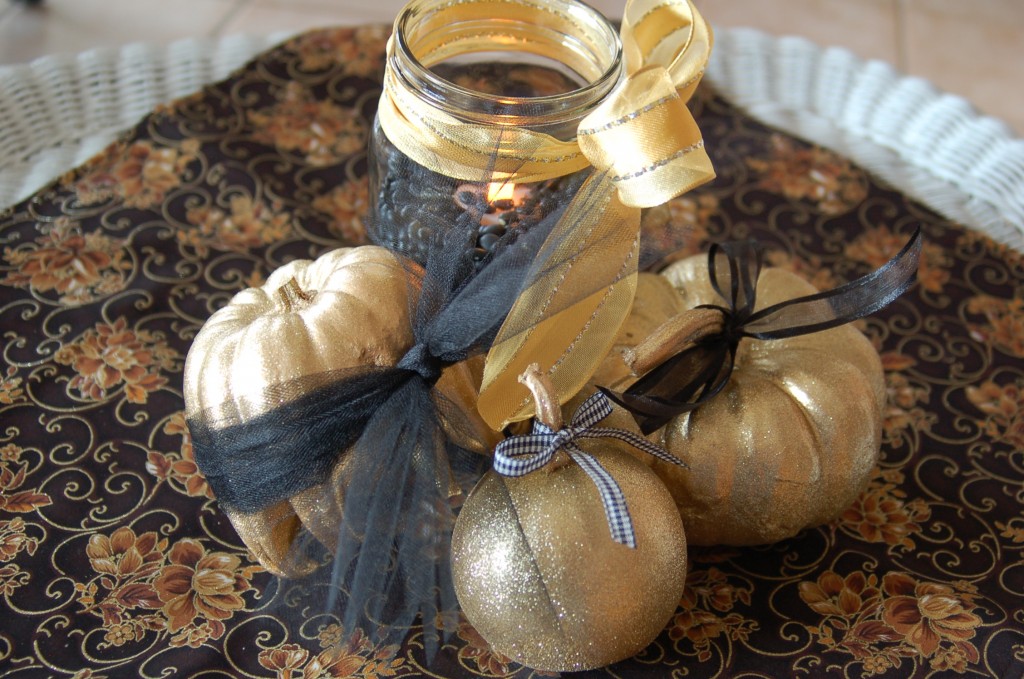
I had to make some centerpieces for a small dinner last weekend and this is what I came up with.  I thought that they looked festive without too much work!

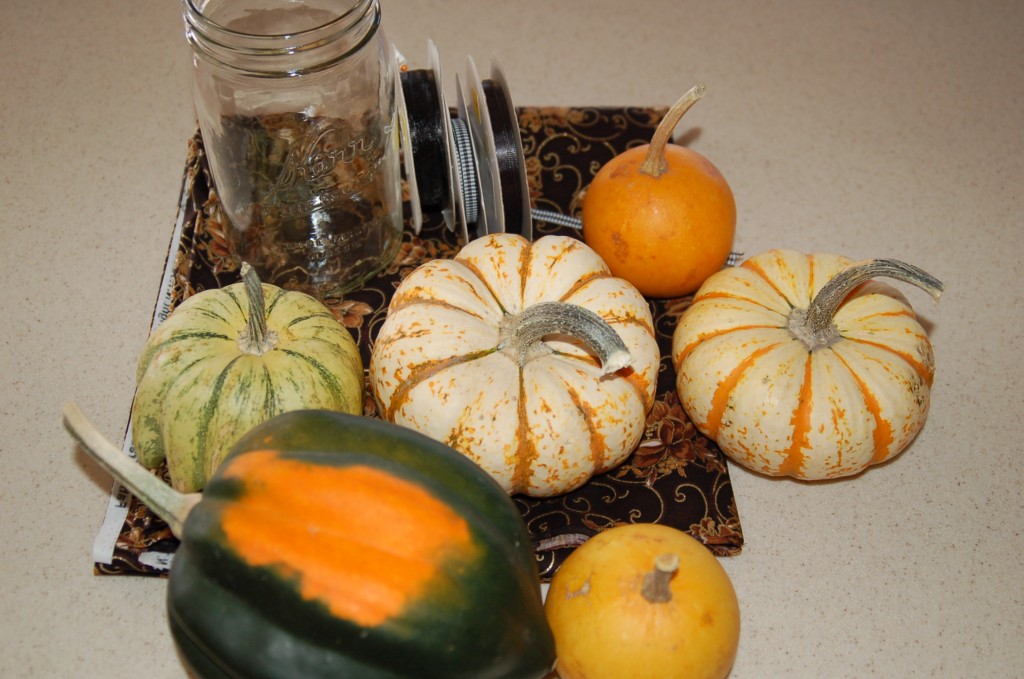
I found this black fabric with gold glitter in the design, so I thought that I could just use the gourds and pumpkins leftover from Halloween. I used the gold Krylon Glitter Blast spray paint to paint them and then just simply tied ribbons and tulle on them.  For the jars, I filled them up with black beans and put a battery votive candle down in the beans.  Then I tied the jars with a pretty metallic gold ribbon…

And  I think that they turned out pretty cute with out a lot of time or money!  You could also put popcorn kernels, candy, rice, or just about anything in the jars to make your candles.  I think I will have to use this idea again for Christmas, with red and green candies in the jar!

 Do you have any fun, easy ways to decorate your tables?  I would love to hear from you!

Fall Bunting

I promised everyone that I would have an idea to go with the fall banner that I posted here.

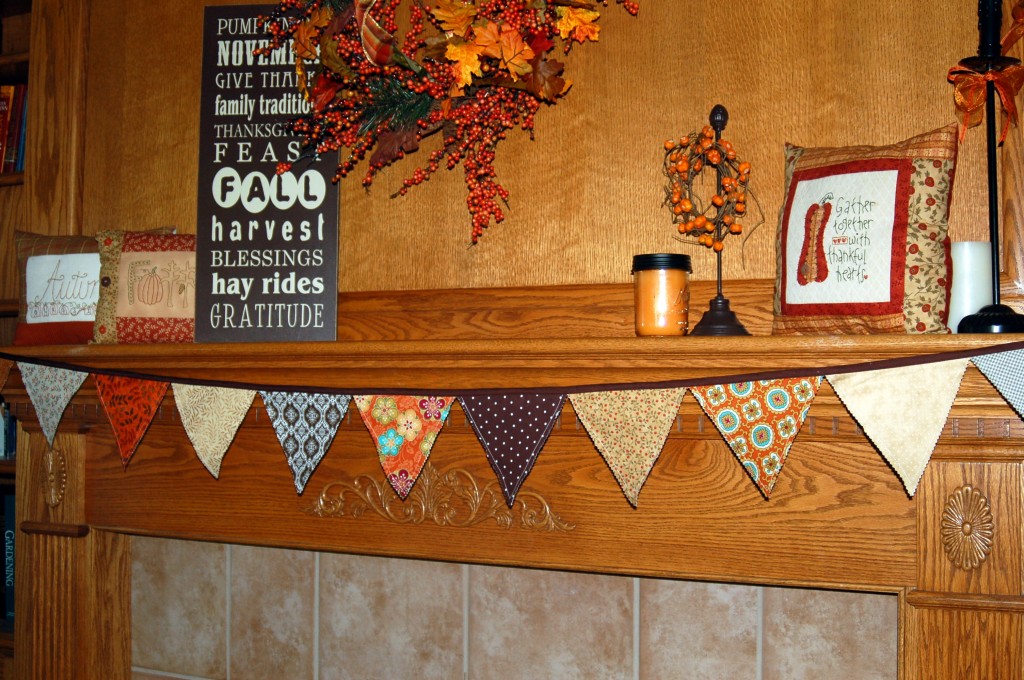
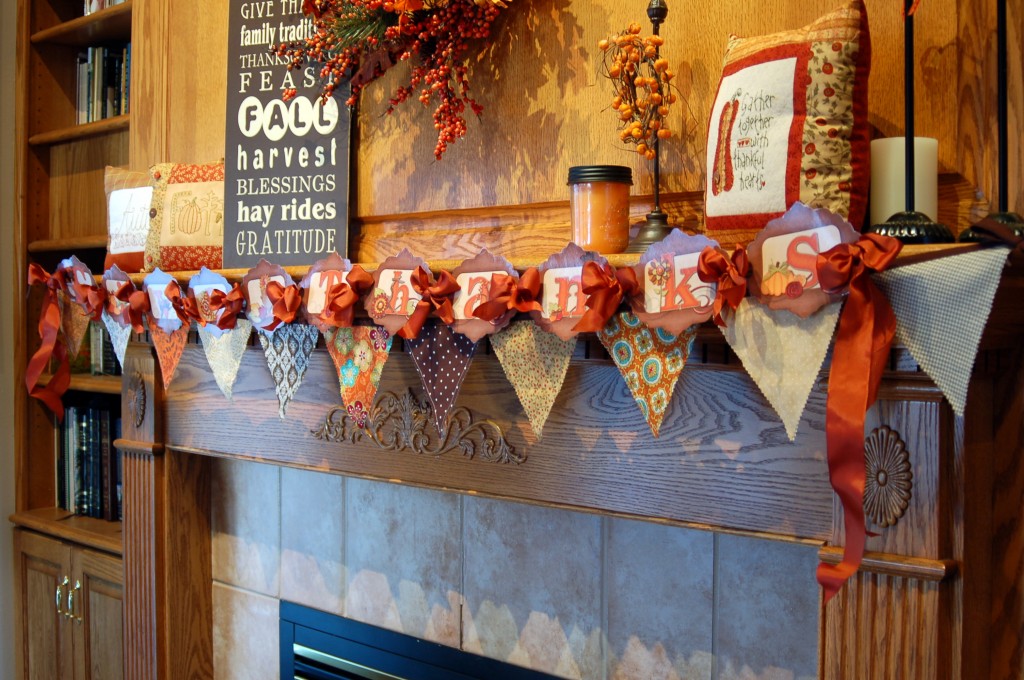
This is a fun, super easy fabric fall bunting.  They are quite the thing right now and I can see why so many people love them.  They are fast, easy, inexpensive and they add so much to your decor or to any party!  You can make a bunting out of fabric, paper, wood, metal, or just about any medium that you can think of!  Here is my bunting on my fireplace, but you coulld hang it above your Thanksgiving table, drape it over a picture or a chalkboard, or in a window.  So many possibilities!

So let’s get started making a fabric bunting!  I made this bunting double sided so that if I hang it over my island in the kitchen, it looks great from both sides.

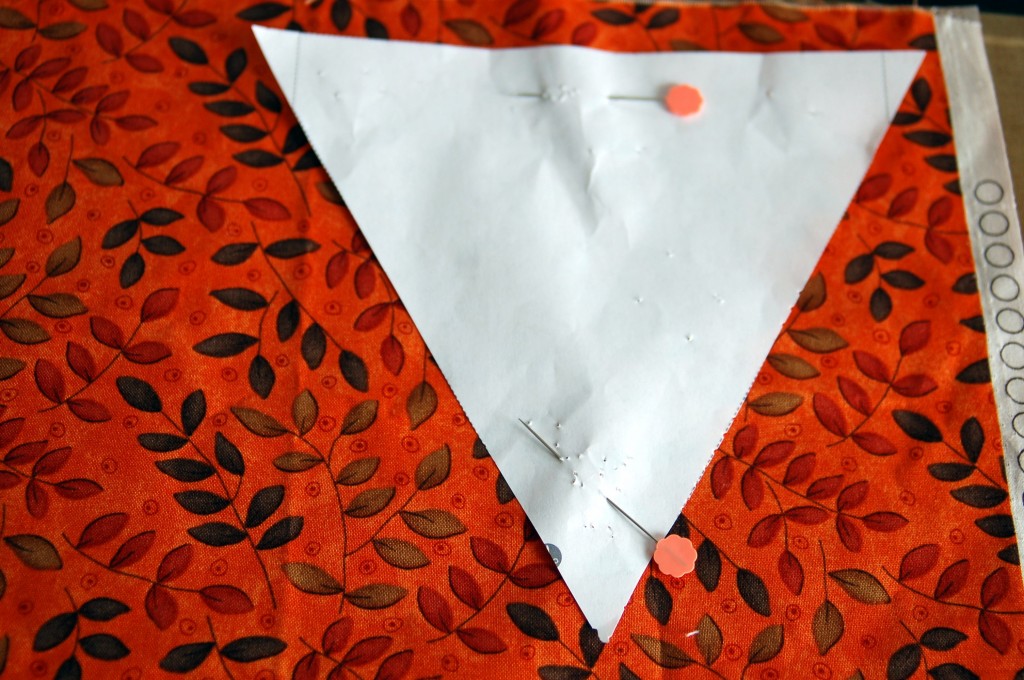
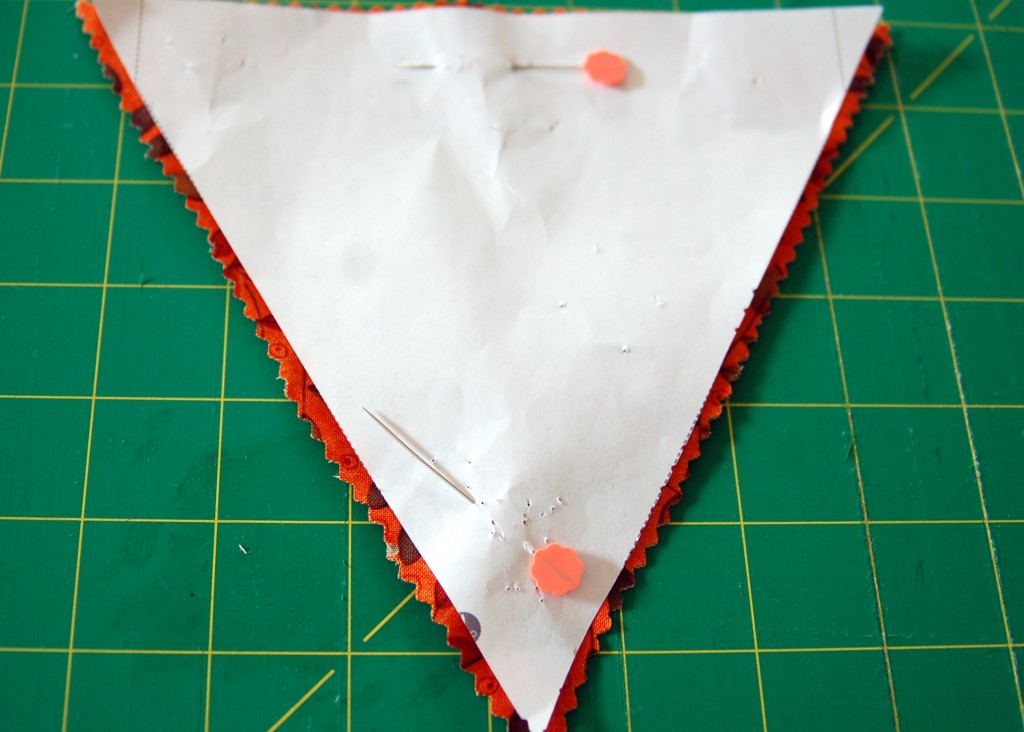
First make a pattern.  I used a 7 inch triangle.  Pin to your fabric with wrong sides together. Right sides out obviously:)This is  a great way to use up all of your fabric scraps, and you can make your triangles as big or as little as you want them to be.  I did and odd number of triangles (11) because to me that just looked better.

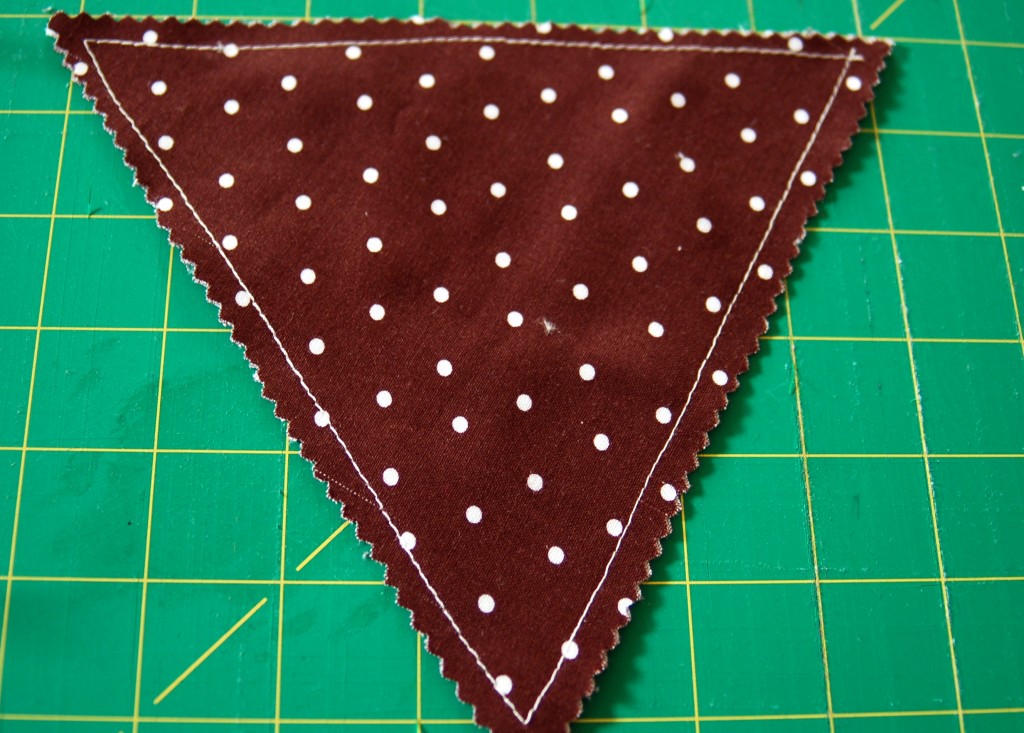
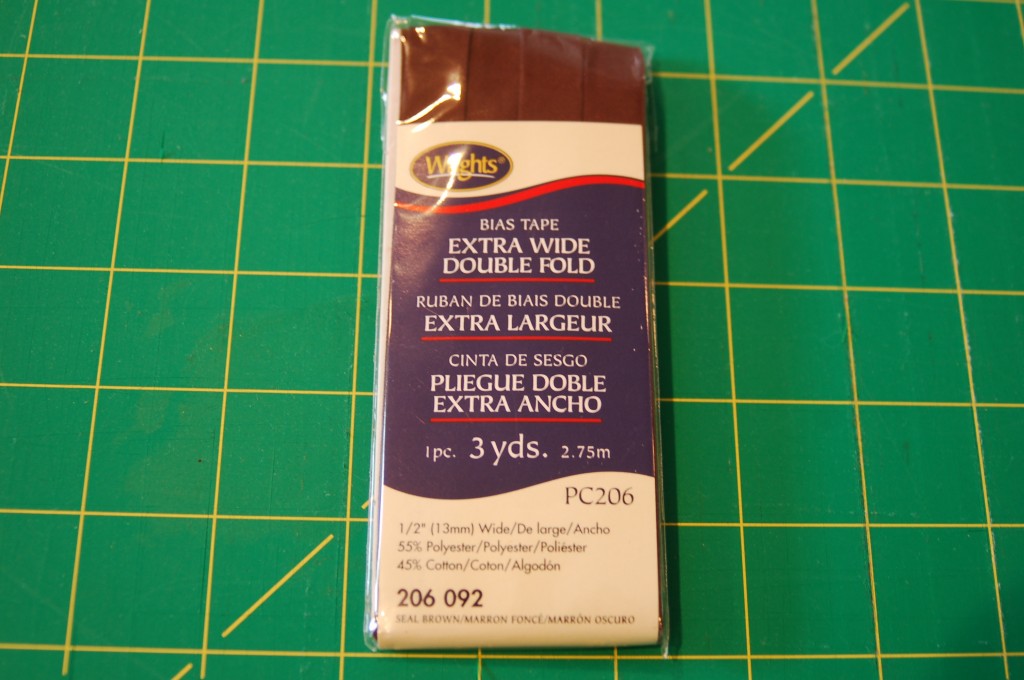
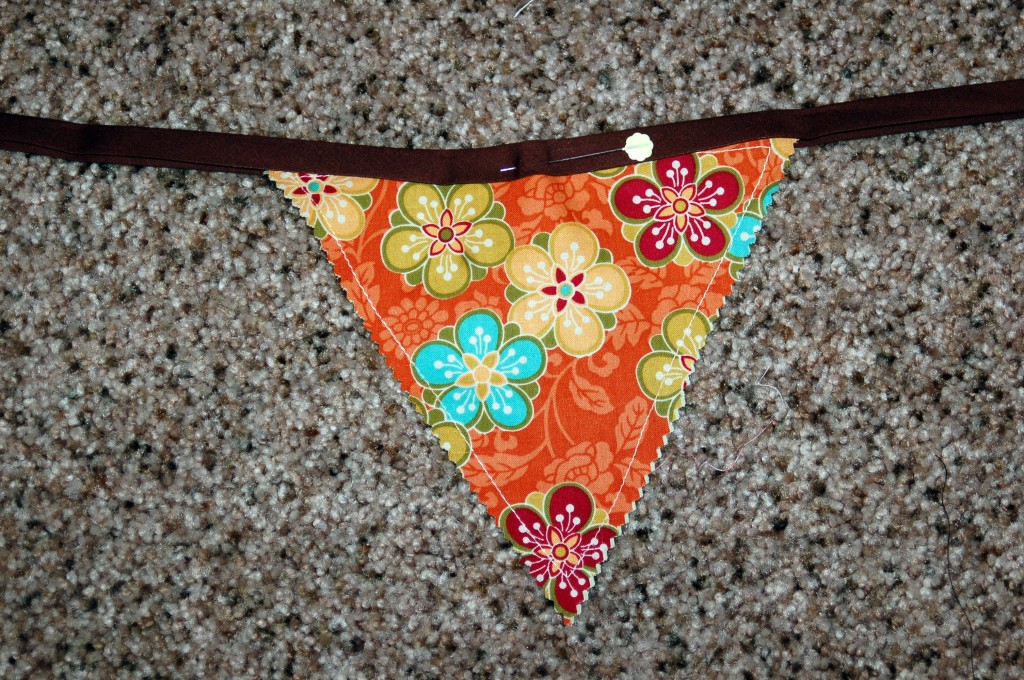
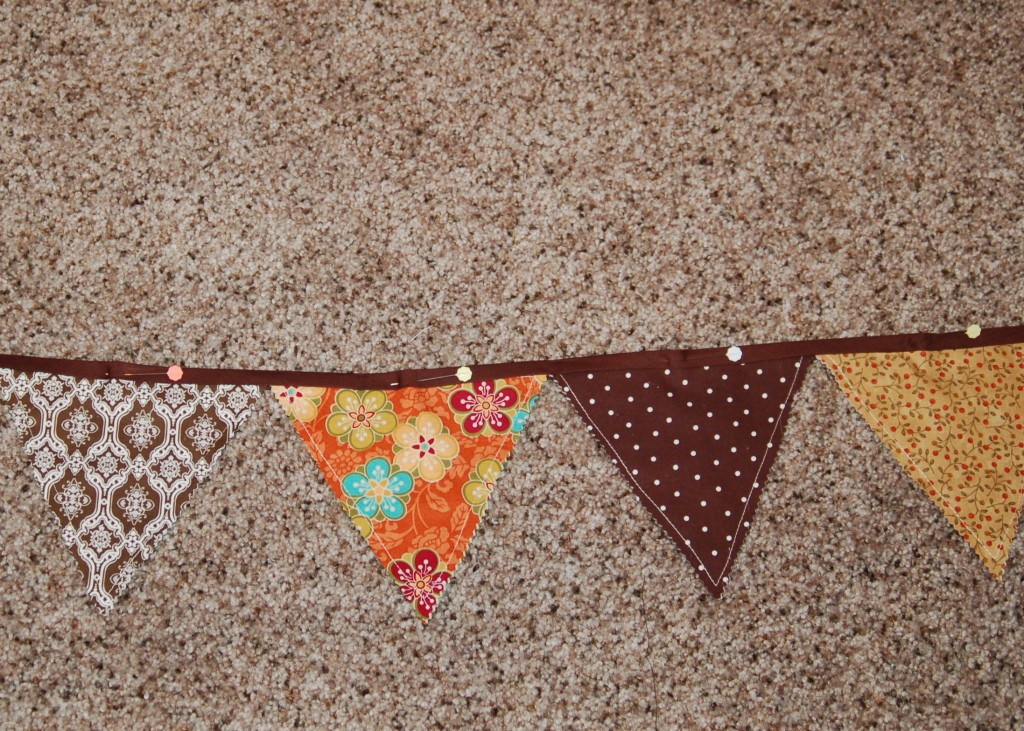
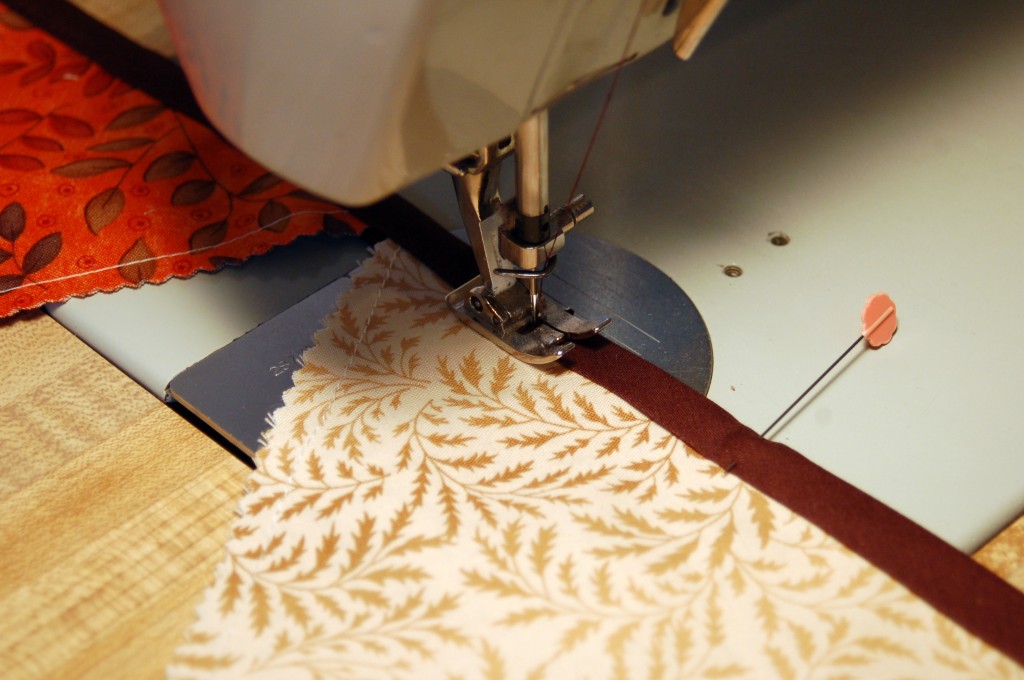
 Cut around your pattern with pinking shears if you have them, if not regular scissors or your trimmer blade will do. Next, sew 1/4 inch seam all the way around through both layers of fabric.You will need one package of bias tape, this is the extra wide width and I liked it because it was easier to work with.Find the middle of the bias tape and the middle of one of your triangles.  Pin the triangle inside the tape.  Make sure you have the shorter width of the fold on the front where you will be sewing so that you make sure to catch it in the back when you sew the seam.Pin all of the triangles in the bias tape according to how you want them placed.Sew your seam close to the edge of the bias tape edge making sure you catch the triangle and the back of the bias tape. This really is simple if you have pinned it all ahead of time.  Make sure the triangle edges are touching each other, you can overlap them a bit if you want to, but I just made sure that they were butted right up to each other.See how simple and easy that was, and look how much they can add to you fall decor!Here is a picture of my bunting with my fall banner that I posted earlier.  I think that they look so cute together!  I just think that the possibilites are endless with these buntings!You could totally do this bunting with no sewing.  Make the triangles only one layer and glue, staple or tape to a fun ribbon, ric rac or cording!  Oh the possibilities!

What are some of the fun ways that you decorate for fall?  I would love to here from you!